The article was written for nail service professionals with the help of Lovely brand technologist Olga Volkova. This article contains no fluff, only useful information: description of the material, analysis of the composition, life hacks, palette review, design examples.
So, let's begin. If you are a master with experience, then you still remember those times when there were not even gel polishes that we are already familiar with. To make a simple three-dimensional design, you had to dodge and use your imagination. Craftsmen who have recently come to this business, on the contrary, are confused by the variety of materials. Lovely gel paste is a new product in the nail industry. And she already has her own fans.
How is it different from gel paint and 4d gel?
Gel paste differs from gel paint in consistency. With gel paste it is viscous, dense, elastic, while gel paint has a more liquid consistency. You can put a large lump of gel paste on your brush and it will not spread and holds volume perfectly. Very easy to apply.
The material does not have a clear contoured volume, unlike 4D gel (plasticine). If you want to get the details of the picture with a perfectly smoothed clear edge, then use 4D gel. If you want soft contour lines or soft, pleasant-to-touch details, then use gel paste.
The best manufacturers
Kodi Professional (Kodi)
The products of this brand are distinguished by good quality and a wide product line. Among the products produced are gel paints, which are bottled in small black jars (4 ml). The modeling gel, on the basis of which paints are made, is easy to apply without spreading to the sides. After drying, no sticky layer remains on the surface of the nail. The products are in demand among craftsmen, as they allow them to create flat, three-dimensional designs, and casting techniques.
The cost of the jar is 202 rubles.
E.Mi (Amy)
The hypoallergenic composition is available in branded 5 ml tubes. German quality was appreciated not only by craftsmen, but also by ordinary people. The assortment palette includes warm and cold tones. For convenience, ready-made sets are produced, but if necessary, you can purchase a specific item. New this season is paint for creating gold and mirror-silver finishes.
The cost of a tube is 550 rubles.
Miranda (Miranda)
The paint is available in small 7 ml jars. The affordable price does not reduce the quality of the product. The entire color range has rich tones. There are items that include fillers to create shimmer and shine. Economical consumption makes it possible to use the coating for a long time to create new nail designs and master different techniques.
The cost of the jar is 220 rubles.
RuNail (Runail)
Gel paint is produced in small jars of 5 and 8 ml. The consistency allows for convenient application of the liquid composition, which makes it possible for even beginners to use the product. The coating is ideal for creating artistic painting, French manicure, and flat design. The palette includes 15 shades that can be mixed.
The cost of a jar is 240-250 rubles.
Properties of gel paste
Gel paste is easy to use even for beginners in nail service. It can be removed or adjusted if something does not work out or is not satisfactory. The color density of gel pastes is very high. The designs are expressive and bright.
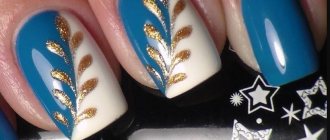
Gel pastes are well suited for the “Chinese painting” technique, for fine lines, openwork, inlays, engravings, and three-dimensional designs.
There are pastes with and without a sticky layer. Gel paste from Lovely has no sticky layer and is perfect for working with rubs, broths, etc.
Lcn nail sealing system - special system
Wax sealing of nails lcn is a special system that is convenient to use at home. There is no need to prepare wax cream and look for suitable tools; just buy a set from this German brand, which already has everything you need.
Box with lcn kit
Homemade nail sealing kit from lcn
In the box you will find:
- Wax cream
- Shine oil
- Soft polishing file
- Wax brush
Video: Nail Sealing Kit Review
Cost of gel paste
The price of the jar is 390 rubles. You can buy online in our online store or from official representatives in your city. The material consumption is very economical, and one jar will last you a very long time. So start shopping with the most popular colors: black, white, gold and silver. You can also share flowers with other craftsmen - for storage you need an opaque jar with a tight-fitting lid. The material must be protected from exposure to UV rays.
Life hack: in order not to constantly cover the gel paste with a lid while working, you can simply turn the jar upside down. Due to its dense consistency, the material will not leak.
Sealing natural nails with mineral paste
- Mineral nail paste is a product from the Patrisa Nail brand. In addition to minerals, it contains wax and almond oil. The paste forms a protective film that prevents nails from absorbing moisture and nourishes them with beneficial substances.
- The product is not recommended to be applied after a classic or other manicure that includes hand baths. Therefore, we choose a hardware manicure, or do a classic manicure a day before the procedure.
- The paste is applied to degreased nails with a soft polishing file and rubbed into the surface. After this, you can apply any decorative coating to your nails.
Mineral paste and other nail care products from Patrisa Nail
Which brushes to use for working with gel paste
You can use any brushes, depending on the technique that you will use, but it is advisable that they be synthetic.
Rules for working with brushes with gel paste: do not clog at the base, wipe gently and do not leave the brush dirty. The gel consistency polymerizes very quickly when exposed to UV rays. Even if the brush with the remaining material just lies in the air, then slowly but surely it will also polymerize.
Features of the procedure
Wax treatment courses must be carried out several times a year. The course itself consists of 5 procedures performed with an interval of 10-14 days. Doing it more frequently will not harm the plate, and prolonging the break is not recommended.
Sealing has a cumulative effect. The result noticeable after the first session will not last long, but the condition will noticeably improve after completing the course. By sealing several times a year, your nails will become stronger, stop peeling, and grow faster. Home care can be performed more often, up to several times a week. A warm mixture applied to the fingertips and massaged while spreading it promotes relaxation.
Differences between salon and home sealing
The salon nail sealing procedure is quite popular. Based on the condition of the plates, the master will draw up a recommended course. In severe cases with severe injuries to the plate, the master can increase the course or shorten the interval between sessions.
In addition, only a specialist will be able to carefully prepare the plate if the client has extended or gel polished nails. It is important not to injure the weakened plate by improperly removing material.
Beauty salons work with high-quality materials; by going there, you can be sure of using the right products. In addition, the master can recommend another, more suitable method of strengthening.
The sealing procedure is quite simple, so there is no need to use the services of professionals. You may need to attend several sessions in the salon in order to understand how the master works and what areas he pays attention to in a particular case.
Performing sessions at home is a more profitable option. Wax for manicure is a budget home care product, and a jar of the product will cost less than one procedure. The main thing is to properly prepare the plate and maintain it regularly. Then the effect will not differ from the work of the master.
Tools and tools for performing the procedure
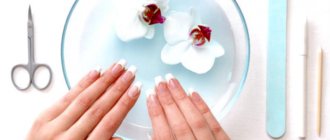
The procedure for sealing the nail plate is quite simple; it can be done at home. To carry it out, you can prepare oils and creams yourself, or use ready-made professional mixtures. In addition to the product itself, you will need to purchase the following tools:
- fine grit file,
- cuticle stick,
- buff for polishing, hardness from 1500 grit.
A large selection of waxes and hand creams created with the addition of this ingredient is presented by companies specializing in the production of professional manicure products and manufacturers of organic cosmetics. Many of them have released not just one type of wax, but a whole line. The products are sold in small packages, however, they are quite economical.
The most popular brands:
- LOR DNC presents waxes of different actions, but their composition is similar - paraffin, beeswax, essential oils,
- Spivak produces products with different scents based on shea butter, apricot kernel oil and various waxes,
- PHYTOcosmetics are made on the basis of natural materials, but they contain artificial flavors,
- MedikoMed is based on Vaseline,
- Belweder is a lanolin-based product containing mineral oil. More expensive than competitors, but has a large number of popular reviews,
- In addition to wax and oils, ChocoLatte contains vitamins A and E,
- Crea&mix is based on olive oil, the series is represented by a variety of products,
- GREEN MAMA cream-wax, to which vitamins have been added that have a beneficial effect on the plate,
- Organic Cocktail is a product based on natural ingredients with added vitamins.
All products contain similar ingredients - wax, oils, and sometimes liquid vitamins. They have a similar effect, but you should still choose those in which beeswax is the main ingredient. It is worth noting the low cost of this category of goods, so home care is a profitable option.
Other nail sealers
Natural wax is by far the most popular sealing product, but there are other ways to strengthen your nails. Beauty salons offer a biogel strengthening procedure.
Biogel is a natural product created on the basis of tree resin. Its main difference from wax is the absence of an allergic reaction and the ability to strengthen people with wax intolerance. In addition, biogel can be used to increase the length if the nails are too short. This extension will not damage the nail. An undeniable advantage is the variety of colors. Thus, the manicure will not differ from the usual coating and the woman will not have to suffer from the lack of color design during the treatment.
Another option is mineral sealing. It is produced using ready-made mineral paste. This product is rich in natural oils, contains wax, lanolin and glycerin. The strengthening process is similar to that of wax. The paste is applied to the nail and rubbed into its structure.
The effect is in no way inferior to salon or home strengthening, and it can be carried out at any convenient time. The result is similar to a wax seal. The plates become stronger, shiny, elastic, stop exfoliating and accelerate their growth.
Some salons offer strengthening with gel polish or regular gel. Such coatings are not medicinal and have only decorative functions. However, it is still worth noting that nails coated with gel or gel polish are less likely to break, which means that a woman has the opportunity to grow the desired length.
Mode of application:
Prepare the client's nails as you normally would for applying gel polish:
1. Treat the nail with a soft file (a buff from Lovely will do a great job with this);
2. Degrease the nail plate using Cleanser from Lovely;
3. If necessary, apply Lovely Primer and let it air dry for 30 seconds;
4. Spread a thin layer of Lovely Base over the surface of the nail plate. Then dry your nails in a lamp. The recommended polymerization time in a UV lamp is 2 minutes, in an LED lamp – 60 seconds;
5. Apply colored gel polish and dry your nails in a lamp. The recommended polymerization time in a UV lamp is 2 minutes, in an LED lamp – 60 seconds;
6. Fix the gel polish with top coat and dry your nails in a lamp. The recommended polymerization time in a UV lamp is 2 minutes, in an LED lamp – 60 seconds. Remove the dispersion layer using Cleanser from Lovely.
7. Execute the intended design. Polymerization time is 1-2 minutes in UV and LED lamps.
8. Does not require covering with a top coat, if this is not provided for by the master’s plan.
If you are painting on several nails, having completed the decoration of one nail, lower it to intermediate polymerization for 10 seconds. After the design is ready, keep it for 60 seconds in an LED lamp or 2 minutes in a UV lamp.
Design options
With the help of aeropuffing you can create many express designs of varying complexity, you just need to give free rein to your imagination.
Below are three examples of the most popular and simple design options that you can use to decorate your nails. So, photos and sequence of actions - how to do aeropuffing:
Standard Gradient
- Apply a layer of gel polish of the main color and a matte finish to the nail - it will cause the sponge to clog less. If you don't have a matte topcoat, you can use a glossy one and lightly sand it with a buff.
- Start driving in the paste from the darkest area, gradually moving towards the border of the gradient. At this point you need to use the side of the sponge to create a smooth transition.
- To avoid ruining your manicure with the paint tip, turn the sponge towards the beginning of the gradient. The first layer may have an uneven color transition - that’s okay, the perfect ombre will come from the second layer. Dry the nail in the lamp, then repeat the application of the gradient. Then dry again and apply a glossy top coat.
French
- Apply a light base coat, just like a regular French manicure.
- Prepare the required color on the palette and apply it onto the nail with gentle movements, forming an arc. Once you get used to doing a French sponge, you can make a very beautiful bend with a soft transition.
- If you wish, you can experiment by making the transition to a smile even smoother, like a gradient. This manicure will look very delicate, especially when using light shades.
rainbow gradient
This option is performed without drying individual layers.
- Apply gel paste to the palette in the colors of the rainbow.
- First, take the lightest shade and using a tapping motion, draw a vertical line down the center of the nail plate.
- Using the same method, apply other colors sequentially - like a rainbow.
It is not necessary to blend thoroughly - when applying subsequent layers, the borders of the colors will blend, forming a beautiful and smooth rainbow gradient.
Material composition
The gel paste contains:
- acrylates (acrylic copolymers) - this gives the product strength. Thanks to acrylate, the design is very durable and can withstand various mechanical impacts.
- HEMA (hydroxyethyl methacrylate) is a component that is responsible for the adhesion and safety of the material.
- Stearamide is a product obtained from the chemical reaction of stearic acid amide and ethylene diamine. It is a dispersant for coloring pigments. When this component is added to the product, it crushes the pigment crystals and makes them very small. The smaller the size, the more densely these crystals are laid out. Therefore, gel pastes are incredibly highly pigmented. They have a very dense color. Thanks to this component, the gel paste is distributed very evenly. No clots or stains. Gives uniformity and shine, prevents the formation of bubbles.
ATTENTION! There is no need to cover the gel paste with top! Thanks to stearamide, the pattern has a beautiful shine, is pleasant to the touch, smooth and looks great.
Sealing nails with gel polish
Gel polish can be not only beautiful, but also useful. Now on the market there are products from famous world brands designed specifically for strengthening nails. First of all, we are talking about biogels and the IBX care system.
Some types of gel polish not only decorate, but also restore nails
Biogels contain formaldehyde or other aggressive components. It is not possible to extend nails with biogel, as this can be done with permanent gel polish; the maximum extension length is only 2-4 mm.
This gel can be either transparent or colored. By the way, the dyes used by manufacturers are also natural.
Sealing nails with biogel
The IBX system is designed specifically to protect and restore nails. The set contains two bottles: IBX Repair restorer, for damaged areas, and IBX coating, the products contain avocado and jojoba oils, which are beneficial for nails. The IBX coating does not replace the base for a shellac manicure.
Video: IBX system application technique
Palette
The color palette is very wide. The Lovely line includes 16 colors. Shades can be mixed with each other or used in their pure form.
Lovely 001 – snowy white shade
Lovely 002 – jet black
Lovely 003 – Purple color
Lovely 004 — Cornflower blue Lovely 005 — Shine of steel Lovely 006 — Forest green
Lovely 007 – Mint Green
Lovely 008 – Cobalt Blue
Lovely 009 – Carmine red shade
Lovely 010 – Granite gray shade
Lovely 011 – Pea yellow
Lovely 012 – Cocoa color Lovely 013 – Hot pink shade
Lovely 014 – Pastel orange shade
Lovely 015 – Gold
Lovely 016 – White gold
Sealing procedure
So, wash your hands with soap. Nail plates must be completely dry. Rub the prepared wax-based cream into each nail and periungual areas one by one. Do this with light massaging movements. Finish rubbing at the tip of the nail. To do this, take an additional portion of the cream and rub it in thoroughly. Thus, you create an obstacle to delamination. After this, polish your nails with a suede buff. Then simultaneously dip all your fingertips into cold water for a minute or two. This will allow the wax microparticles to harden better and adhere more firmly to the surface of the nail.
Since this manipulation is health-improving, you should not apply varnish or enamel to the nail plates after it. This way you simply neutralize the sealing effect. Give your hands a rest. It should be taken into account that with neglected nails and the presence of inflammatory processes around the cuticle, sealing with wax can be painful.
To achieve a lasting healing effect, it is necessary to carry out this procedure at least three times with an interval of 10-14 days. Each time, nails must be prepared for the procedure in the manner indicated above. Thus, in a month you can significantly improve the condition of your nail plates without compromising your budget. The result will pleasantly surprise any woman.
And in order for it to last longer, you need to take care of your hands every day. Housework, if it involves the use of aggressive cleaning agents, should be done with gloves; use the cream regularly; do not let your hands freeze.
DIY washing gel made from laundry soap and soda
The traditional recipe for homemade washing gel involves using laundry soap (50 g), soda ash (100 g) and a liter of water. To give the product a pleasant aroma, it is recommended to add scented oil. Step-by-step instruction:
- turn soap into shavings using a knife or grater;
- dissolve soap in hot water;
- put the mixture on the fire, avoiding boiling;
- Pre-dissolve baking soda in water and pour into the soap base;
- turn off the gas, wait 10 minutes and add fragrance (essential oil).
Note! It is necessary to mix both the soap base and the soda solution well. Things may become covered with a white coating and will have to be washed several times.
