New original manicure techniques change each other at such a speed that it is difficult for even the most attentive fashionistas to keep track of them! Beauty salons invite you to try all the new techniques, and girls try to reproduce them at home, using the means at hand! A new feminine trick for creating gorgeous designs on your nails is using tape! It would seem that the object that is used for gluing paper has absolutely nothing to do with the original nail design. A manicure using tape is not that difficult! Even beginners who have just started learning the art of manicure can do it at home!
Features and Benefits
It is important to note that ordinary stationery tape will not work for us. It leaves a sticky residue and can even tear off a piece of enamel.
If you don’t have anything suitable at hand, stick it several times to the back of your hand. This will remove excess stickiness.
In general, when decorating the nail plate in this way, masters use special adhesive tape.
The main advantage of this approach is the availability of materials and ease of implementation. Using this device, you can decorate the plate with several colors, creating a clear border between them. When working, the shades will not spread or mix if you separate them with thin sticky strips. It is very difficult to achieve this effect manually.
Trends 2022 offer the following nail art options, which can be created using adhesive tape:
- French;
- mosaic;
- geometric patterns;
- stars;
- chess field;
- multi-colored stripes located in different directions.
You can come up with other variations, it all depends on the imagination of the master.
There are two types of tape: colored and transparent. The first is used as an auxiliary material; after applying and drying the varnishes, it is completely removed from the plate. The second acts as an independent decor.
Features of manicure with adhesive tape
Scotch tape on nails
Few people know how to paint “lacquer miniatures” on their nails. The technique of creating patterns using self-adhesive tape comes to the aid of fashionistas. Scotch tape is sold in specialized stores for nail design.
Manicure tape consists of thin strips of various colors to create a geometric pattern on the plates. Nail design using tape has a number of features compared to traditional manicure:
- performed independently;
- applied to any base - acrylic, gel or traditional varnish;
- thin shiny tape can be an independent decoration for a manicure;
- acts as a stencil for applying complex designs;
- used to create an endless variety of designs by non-professionals.
Scotch tape can act as a manicure decoration
The tape nail design technique is ideal for those who don't like long nails or can't afford them. Narrow tape, metal strips and zigzags look good on short nails.
What you will need
At the preparatory stage, collect the required tools:
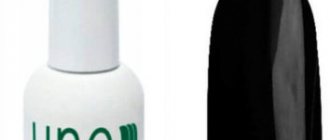
- Low tack tape. Narrow or wide, colored or transparent – there is a purpose for each type.
- Base for varnish, fixing coating.
- Background enamels that match each other.
- Manicure scissors.
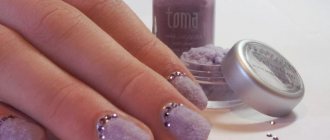
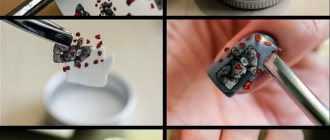
- Decor as desired - sparkles, stones, kamifubiki.
Scotch tape is the main tool in such nail art. When choosing it, pay attention to the following points:
- Adhesiveness – it should not be too high so as not to smear the varnishes and damage the base.
- Size – wide ribbons will have to be cut for convenience, but for certain ornaments this is exactly what is needed.
- One-sided - double-sided sticks to the fingers, creating discomfort when working.
- Traces are bad; if stripes remain after peeling off, you won’t be able to do a neat job with such tape.
Connect the tape firmly to the surface of the nail, otherwise the polish may spread.
Execution technique
Performing a manicure is no different from traditional approaches. First you will need to remove the old coating, file and polish your nails, soften and remove the cuticle.
Features begin at the plate design stage:
- Apply base coat.
- For the chosen design, place tape on the index and ring fingers just above the center line of the nail. Carefully attach the ribbon along the edges so that the enamel does not spread during application. Do not cut the tape too close to your finger, leave a piece that will be easy to pull.
- Apply colored polish flush to the cuticle, without extending beyond the edges of the sticker. It's okay if the color gets on the tape. It precisely serves to ensure that the area underneath remains untouched.
- With a quick and precise movement, peel off the ribbon before the varnish has time to dry.
- Paint the remaining empty space with a different color.
- After the enamels have completely dried, carefully apply tape at the junction of the two paints.
- Cover the result with two coats of sealer varnish.
The detailed process is shown in the video. This work looks stylish and elegant. Brilliant ribbons add a “zest” to the creation; without them, nail art would be too boring.
Tapes can be attached in any order and direction. We have presented the simplest option, having mastered which you will be able to create complex geometric patterns, turning any fantasies into reality.
A few photo instructions:
Number 1 Number 2 Number 3
Application technology
Classic tape can only be used for regular manicure. When working with gel polishes, you should forget about it: in the ultraviolet lamp, which is needed to dry the gel, the tape will cut into the nail so that it cannot be pulled off. If you want to create geometric patterns on your nails when painting with shellac, you need to buy a special roll of threads. These are thin adhesive strips that you can use to make lines.
So, let's return to classic nail art. After applying the base, you need to apply the base color and let it dry. After this, the necessary sections are cut out of the tape and glued to the nail.
Advice:
To avoid making 10 identical pieces, carefully use each piece on 2-3 nails until the stickiness becomes zero.
The next layer of varnish is placed on top of the nail with tape, which will form a pattern. This layer also needs to dry. Next, it’s time to remove the tape. Regular tape will have to be “torn off”, but be careful; the window insulation agent can be pre-wetted with water.
Sticky residues should be removed with a cotton pad moistened with water or a room cleaning product (glass liquid, dishwashing gel, etc.). Never use products containing acetone! The last step of the manicure is applying the topcoat.
Manicure ideas
Masters of the nail industry know many ways to design nails. It is better for beginners to follow proven approaches, and professionals who have been decorating their nails with interesting patterns for a long time can come up with a catchy option themselves.
Now we will look at popular ideas that will not require much effort and time to implement.
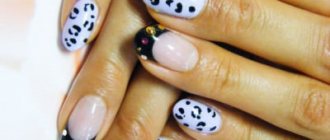
Festive French
The classic approach involves a clear drawing of the smile line, which gives the nails naturalness and elegance. To make your work easier, manufacturers of nail art products have come up with special stickers that can be found on every corner.
But what to do if they are not at hand, and you need a French jacket as soon as possible?
Scotch tape will come to the rescue.
In the traditional version, smiles with rounded edges are drawn, but this cannot be done with electrical tape and other similar devices. This nail art is best done on short nails. Thin and straight edging looks harmonious in a small area.
However, cunning fashionistas have come up with a way out: you will need a small round-shaped cap, for example, from varnish. A piece of wide adhesive tape is glued onto it, and then cut along the contour to make a semicircle. You need to make ten such blanks.
Then everything is as usual: the plate is covered with background varnish, dried, the forms are glued, colored or white enamel is applied to the tip of the nail, the sticker is torn off. The result is a perfect French jacket with regular rounded edges.
You can reproduce non-standard options: highlight the free edge of the nail or hole diagonally or crosswise with contrasting colors.
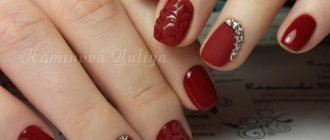
As for the colors you choose, today the classic harmony of white and nude is less valued than before. For everyday looks, choose unusual combinations. For example, good combinations of wine and beige, black and silver, red and gold, rich green and cream.
It all depends on your personal preferences.
Bright geometry
Design geometry remains one of the most popular for many seasons. Agree that manually drawing shapes so that they are even and neat is not an easy task. And again, miracle tape will help us.
Just tape off those areas that will later be painted a different color. To form triangles you will need three sticky strips at once, for a square - four. Play with the placement of the picture, try to create a multifaceted composition.
Practice will do its job, you will be able to get better at it, and soon the decorating process will take less and less time.
The chosen color scheme determines what impression your nail design will make on others.
So, if your life is dominated by business meetings and other work moments, choose a pastel palette. For holidays and vacations, rich shades that improve your mood are suitable.
Diagonals
This wonderful variation also won its admirers. For an elegant and festive look, cover your nails with multi-colored stripes in the shape of a rainbow. Don’t be afraid if the joints are sloppy; subsequently all the irregularities will be hidden under a dark layer.
Now stick several pieces of electrical tape diagonally or parallel, perpendicularly - in general, as your heart desires. Cover the plate with a dark color. After removing the stickers, beautiful rainbow rays will remain in their place.
Photo example
Intriguing puzzles
Everyone knows what this mental entertainment looks like.
For this manicure you will need:
- cut a stencil in the shape of a mosaic piece from a wide ribbon;
- paint your nails with white polish;
- glue two puzzles perpendicularly;
- paint over the part where the sticker is missing;
- As soon as everything is dry, remove the glued puzzle. The spectacular design is ready.
You can modify the task somewhat. Cut out small squares, and after the enamel has dried and the tape has been removed, draw circles in certain places.
Leaf veins
A spectacular creation, quite suitable for an evening look. For the background, choose an emerald green shade with glitter.
Then apply pieces of tape, imitating the veins of a leaf, like rays coming out from one point. Cover the plate with black and remove the tapes.
Golden chess
The original design will definitely not go unnoticed with the right selection of shades.
Created in a few steps:
- the surface of the nail is covered with a transparent base and then with a black tone;
- then mark a quarter of the plate in the form of a square with electrical tape, paint the free part with gold;
- remove the tape, then cover the second square located diagonally from the previously painted figure;
- Also paint the unpasted area golden;
- cover the work with topcoat.
Water design
Everyone knows what beauty can be achieved with the water nail art technique. In this option, different shades of enamels are dripped alternately into a container of water, then ornate stains are created with a toothpick or thin stick.
Afterwards, all that remains is to soak your nail in a glass and clean your finger from stains. However, this is not so easy to do. Electrical tape will help here; you can use it to cover the skin around the nail so that nothing unnecessary gets on it. Simply removing the sticky one is much easier than wiping your finger with acetone.
Scotch tape as an independent decorative element
Here things are even simpler. It is enough to cut out interesting shapes and paste them after drying the background. All that remains is to cover the work with topcoat.
You can use colored adhesive tape to lay out certain stripes, patterns or ornaments, and also secure the result with a transparent coating.
How to decorate
A seemingly ready-made design can always be supplemented with interesting decor.
Today, nail industry masters prefer to work with the following types of decorative elements:
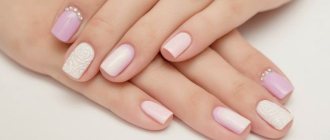
- pebbles and rhinestones;
- broths;
- beads and pearls;
- kamifubika;
- sparkles.
It is important to monitor the overall mood of the design, choose harmonious decorations, and monitor moderation.
You don’t need to decorate all 10 nails; it’s enough to place a catchy composition on two or three fingers.
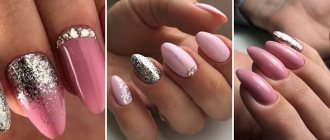
Interesting nail designs with stripes
Striped manicure with gel polish
Standard striped nail art can be effectively complemented with miniature decorative elements, resulting in a manicure with dots and stripes, just like in glossy magazines.
Simple manicure with stripes
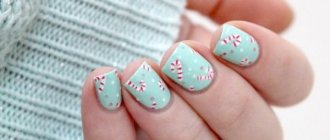
A simple manicure with stripes will be relevant for those who are going on vacation. Summer nail decor is distinguished by brightness, rich colors and variable combinations.
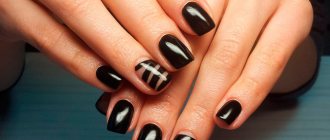
Manicure with gold stripes
Gold stripes look especially advantageous on a laconic, dark, velvet background. This design idea will appeal to sophisticated, elegant young ladies who hold conservative views.
Manicure with transparent stripes
A manicure with transparent stripes delightfully complements any look, but its main advantage is that even as they grow, your nails look neat and presentable. Add nail designs to it and you will definitely become a collector of compliments and admiring glances.
Manicure with silver stripes
A manicure with metallic foil stripes looks quite unusual, futuristic, but at the same time laconic and stylish. Dilute this decor with stripes and rhinestones with some cute element like a logo - and your fingers will collect a million likes on Instagram.
Stripes are a stylish solution for both formal business and everyday looks, regardless of the season. So why not experiment with them now?
Lifehacks for you
Finally, we’ll reveal a few secrets to make the process of creating a nail design easier.
- Removing the old coating. To prevent your hands from looking like you were splashing around in colored ink after erasing a deep red or other color, lubricate the skin of your hands with a rich cream before the procedure.
- A piece of sticky tape will remove excess enamel from the skin if the previous method did not help.
- Whiten your nails. Sometimes a flashy tone is absorbed into the nail plate, leaving behind unsightly stains. To clean, rub your nails with a toothbrush and whitening toothpaste.
- We create the desired shade ourselves. This recommendation will help girls who cannot find the desired tone in the store. Add some mineral shadows to the clear coat. They dissolve perfectly in this substance, and you can personally regulate the saturation.
- Three thin but neat layers of coating are better than one clumsy one. Remember, it is impossible to paint a surface efficiently at once.
- Masking the unevenness of the French coat. You can hide imperfections with glitter. Sprinkle them on the edge of an uneven smile while the coating has not yet dried. It will turn out festive and beautiful.
- If the polish has dried out, professionals advise putting the bottle in the refrigerator for 10-15 minutes and then shaking it well.
And some more cute designs in the next video.