There can be many options for a spectacular manicure: nail decorations on any background, patterns, photo nail designs, etc. After all, most often they take gel polishes as a basis and improvise with the appearance of the nail through combinations of color, rubbing, and painting. Now it has become much easier to make elegant patterns and drawings, since a product has appeared that resembles acrylic paint in pigmentation, but has the structure of a liquid gel. A new convenient material for manicure design is gel nail paint.
Gel nail paint - what is it?
Already from the name it is clear that the cosmetic product has something in common with nail gels and acrylic paint. Many users of gel paints compare it with the usual colored varnishes, since it does not have such a dense texture and consistency as gel polish. The product takes the following features from gels:
- the coating on the nail plate is uniform and perfectly covers the entire surface of the nail;
- polymerization takes place under LED or UV lamp radiation;
- has amazing durability.
The cosmetic product inherits from ordinary colored varnishes and acrylic paints:
- dense pigmentation;
- extensive color palette;
- light texture, which allows you to carry out any artistic painting, even thin lines, and provide convenient mixing of colors;
- the ability to wipe off the drawing without harming the applied base layer (if there is one).
There is no need to stir the colored gel paint before applying it to the nail, and unlike acrylic paints, the product will not dry out while working. Ideal for detailed painting, where you can take your time with the drawing and devote enough time to the process.
You can use gel paint on natural nail plates, as well as on nails after extensions, or any artificial coating. The consumption of the product is quite economical, since it is usually applied with a thin brush, controlling the amount of paint on it. If you use the product to cover the entire surface of the nail, then the product will not only be used up faster, but you will most likely need to apply a second coat.
Reviews
Lyudmila: “I really enjoyed creating masterpieces on my nails with acrylic paints. Drawing with them is simple and convenient. If you make a mistake, you can easily correct it with a damp cotton swab. I come up with the drawing as the work progresses. I must first apply the base to the surface, and then immediately paint it with acrylic and fix it with the composition.”
Evgenia: “I’ve been using these paints for almost two years. I bought them for 600 rubles, but the consumption is very economical, 2-3 drops are enough for one simple manicure, so the money has long since paid off. I grab the paint onto a damp brush and start creating; if I make a slight mistake, I immediately erase it with a damp cotton swab. I like to put two or three different colors on the brush, then the effect of the stroke is immediately visible in the smooth transition of colors. After drying, I cover the top with colorless varnish. I advise everyone to try this kind of creativity.”
Maria: “I used to use regular nail polish. I must say, it is very difficult for them to depict any kind of drawing. It turned out sloppy and took a very long time to dry. When I switched to acrylic paints, it became clear that this was the most suitable option for painting nails. For now I’m making simple versions of patterns, but I’m happy with the work, it’s very convenient to use acrylic. It dries quickly, does not smell and lays down smoothly, and you can easily correct mistakes before it dries completely.”
Advantages and disadvantages
The clear advantage of this product is its resistance to drying out while work on the nail design is still in full swing. Also, the ease of use is also captivating. And many more “positives”:
- when covering the entire surface of the nail with several layers of gel paint, a minimal layer is formed that does not thicken the nail;
- the ability of the nail to “breathe” under a layer of such coating;
- optimally used for various design techniques: Chinese painting, aquarium design, for a “smile” or “moon” in French and lunar manicure, casting technique, etc. Ideal for use in a unique planar design;
- no need to intensively file the nail (remove its shiny layer);
- While the gel paint is drying, you can adjust the design;
- It is possible to mix different colors to obtain a unique shade, just like real artists do.
But besides all the positive qualities of the product, there are also minor disadvantages:
- It will not be possible to remove gel paint with special liquids; you need a mechanical solution to the problem: files, a router;
- It is inconvenient to use on thin nails, since gel paint does not provide them with additional strength.
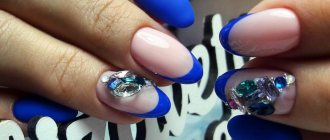
Once you get the hang of using gel pigment to design your nails, you can create real masterpieces. And your inner sense of style will only help you create an organic tandem of gel paint and other auxiliary accessories: foil, mica, rhinestones, stones, etc.
Benefits of acrylic
Acrylic art paints have appeared on the market recently, but are already loved by professional and novice manicure lovers due to their positive properties:
- long-term preservation on nails due to weather resistance and flexibility (do not chip or crack);
- a wide variety of colors, while the brightness and shine are maintained throughout the entire time they are on the nails, and the possibility of mixing provides additional shades and scope for design ideas;
- acceptable, quite affordable cost;
- long shelf life;
- economical material - one tube is enough for several applications;
- quick drying, allowing quick application of the next layer and preventing smearing of the previous layer;
- harmlessness – during operation there is no evaporation of substances harmful to the human body;
- resistance to UV rays, which is why the painting is not susceptible to fading from exposure to sunlight;
- easy solubility in water allows you to adjust patterns during application;
- Acrylic nail paints are very convenient for beginners because of the ease of application.
Information: the only disadvantage of acrylic art paints is the poor tolerance of very low temperatures, at which the coating loses some of its properties.
What is the difference between gel paints and gel polishes?
The opinion that cosmetic products such as gel polish and similar gel paint are one and the same is untrue. Although there is a lot in common between them, there is also a colossal difference:
- Structure. Gel polishes are denser and more viscous, which makes them difficult to work with. With gel paints it’s the opposite: they are pliable due to their fluid structure, and their liquid consistency allows them to be used for various decorative purposes;
- Pigment. To obtain a bright color, varnishes need to be applied a couple of times, and paints only need to be applied in one layer. This is due to the concentration of pigments in both products - there is much more of it in gel paint, even several times higher;
- Persistence. Gel paints are less susceptible to chipping than gel polishes;
- Delete. Gel paints cannot be removed with any solvent, unlike gel polishes.
Although gel-based paints are considered followers of gel polishes, and not a separate type of coating, there is still a difference between them and it is significant.
Which is better to choose?
Nowadays, stores sell a lot of materials for nail art. It is very difficult to choose among the wide variety. Everyone wants the material to please with its properties and cope perfectly with its main function, which is to decorate nails. Acrylic gel nail paints are well suited for these purposes. We will tell you how to use them below. First, let's look at some brands of this product. Note that even masters choose different products, which depends on what they will create on the nail plate. However, most specialists in this field use acrylic gel nail paints, which allow them to create high-quality manicures.
You can experiment to find the right option. You should not use fakes or Chinese gel polishes. It is necessary to choose high-quality and proven products. The most popular brands include: BlueSky, Emi, Kodi, In'Garden, RuNail, Irisk. But other manufacturers also have quality products.
Kinds
Like gel polishes, paints can have a sticky layer after polymerization. But this doesn't always happen. There are also those that do not require dispersion removal. But these are not all the differences between gel paints. They are also distinguished by the following types of structure:
- dense;
- translucent;
- transparent.
Thick paints completely cover the nail, resulting in a monochrome coating. Translucent, as well as transparent, you can tint the previous layer or create the effect of stained glass, penumbra, gradient, etc.
With a sticky layer
There is no particular difference between the result obtained after using gel paint, which has or does not have a dispersion layer after drying. It's more of a production cost. If you use this product, you will need additional liquid to remove stickiness.
Paints with a dispersion layer allow you to create designs using the casting technique and other effects where “gluing” is necessary, for example, velvet manicure.
No sticky layer
For a manicurist, a product without a sticky layer is more convenient to use. Most modern paints have lost the ability to leave stickiness after drying. Practicality is evident: after each drying step under the lamp, you do not need to wipe your nails. Also, products without a sticky layer do not need to be fixed with a top coat if the surface of the design covers less than half the area of the nail.
Paints without a sticky layer are optimal for all painting techniques. You can create original design options by combining a dense texture with a transparent or translucent one.
Acrylic paint
The main advantage of working with acrylic paints is their drying time. If paint for watercolor painting sets within 1 minute, then acrylic paint gives the master 3-7 minutes to maneuver, refine and correct flaws in the drawing.
Prepare for work:
- acrylic paints in the desired tones. You can buy them individually or as a whole set, like TNL or Runail;
- brushes for painting. Choose brushes based on the complexity and composition of the drawing. To draw small details, use the thinnest brush, and to fill a large area, use a flat one;
- base and top;
- water;
- gel polish for the background.
Step-by-step instruction:
- Before painting, cover your nails with base and color, drying each layer in a lamp;
- Drop a little water and 1-2 drops of acrylic paint of the desired shade onto the foil or palette. Try not to add too much water at once, test the dye on a tip and dilute gradually until you get the desired shade;
- With light movements, outline the design on the nail and gradually draw out all the details;
- To add volume, shade large elements of the pattern with highly diluted paint with a light color tint;
- After finishing the painting, wait for 3-7 minutes to dry and cover the pattern with the finish.
Painting on nails: materials, step-by-step instructions, design ideas
How to apply gel paint: step-by-step instructions
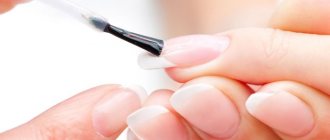
Applying a coating such as gel-based paint does not require any special preparation or special tools. If you have experience working with gel polishes, then mastering the technique of applying paints will not be difficult.
For the paint application procedure, you will need some tools that are best prepared in advance:
- a special thin brush (necessary for creating a French manicure or complex designs). If one is not available, then it can be replaced with a thin artistic brush made of artificial material (nylon, for example);
- a brush of medium thickness (for filling large areas of the nail);
- palette (the most affordable option is a piece of foil or thick polyethylene);
- lamp with UV radiation or LED + related tools for manicure, liquid for removing the dispersion layer, etc.
After preparing the necessary tools, materials, trimmed or hardware manicure (if the nails are well-groomed, then no manicure is done), you can begin to cover the nails.
- Treat the nail with a buff, then with a degreaser.
- Apply base (primer).
- Cover the nail plate with one layer of gel polish (you can use clear or colored gel). Dry. If necessary, repeat the procedure (make a second layer).
- Remove stickiness with a special product (cliner).
- Apply liquid gel paint with a thin brush (the number of colors and shades depends on the design and idea). If you need to get a new shade, you can mix several colors on the palette.
- After completing the drawing, the nail should be dried under a lamp. The polymerization time directly depends on the type of drying lamp and the characteristics of the product. The exact time can be found on the paint bottle.
- If there is any stickiness left, you need to remove it with a cleaner.
- It is better to apply a fixing top coat over the design to extend the durability of the nail design.
If you need to use gel paint not for painting, but for completely coloring your nails, then the coating scheme is as follows:
- Degrease the surface of the nail. You can additionally use a dehydrator.
- Apply the primer by applying it to the nail plate (for high-quality and durable nail paint).
- Using a medium-thick brush, apply an even layer of gel paint. If there are paint leaks onto the skin or far beyond the contour of the nail, correct them with an orange stick.
- Dry for the required amount of time under the lamp.
- High-quality products do not require re-application of gel paint, providing an even coating. But if the required quality of the layer is not achieved, then translucent paint of a similar shade is used or the product must be applied again.
- If there is a dispersion layer, it is removed with a special liquid.
- Cover with top coat, dry under a lamp, remove stickiness.
With the help of gel paints, you can create an original French manicure and simply a bright manicure, because the texture allows you to make uniform ombre-type transitions, as well as make clear lines of different thicknesses. The most popular use of the coating is in tandem with regular gel polish as a base.
How to dry at home
As noted above, gel polish that requires drying in a special lamp will not harden in air. But it is quite possible to make a beautiful and high-quality manicure yourself without a lamp.
The fact is that all gel polishes can be conditionally divided into photosensitive, which require hardening in a lamp, and non-photosensitive, which dry in air or water.
The only difference is that the former do not harden without a special catalyst. A special creamy or liquid product should be applied on top of the gel polish; only with its help will the product become solid.
Today in stores you can find gel polishes that harden without a lamp or additional catalysts. It is enough to immerse your nails in cold water for 8-10 minutes for the gel polish to harden.
The inscription on the bottle “NO-light gel” indicates that this is a product that does not require drying in a lamp. If there is no such inscription, then by default it means that a special UV lamp for drying is simply necessary to harden the coating.
For a DIY manicure at home, it will be more convenient to distribute a small amount of non-photosensitive gel polish on a palette and apply it to the nail plate using a brush. This way the layer of material will be as thin as possible. Then fix the product with a catalyst (it’s more convenient to use a spray) or put your hands in water.
Due to the similarity of the effect on nails, special varnishes with a glassy coating can replace gel polish. They do not require drying with a lamp, but the duration of wearing a manicure will not be as long.
And finally, I would like to note the sequence of stages of manicure with gel polish, strict adherence to which will make you the owner of a high-quality and super-wearable coating:
Firstly, you should very carefully process the free edge of the nail, make it as smooth and free of dust as possible. Remove the top layer with a buff file. This rule especially applies to nails after a manicure with scissors or a cutter. Nails must be degreased and dried for at least 10 minutes, otherwise the coating will peel off.
Then you should apply a base shellac in the shade of your choice. The basic rule is that the layer should be as thin as possible! Dry each layer in a polymerization lamp.
And finally, the last stage is coating with a finishing gel. It will protect your shellac coating and give your nails a beautiful shine. It is also necessary to dry the final topcoat well in a lamp. If the topcoat, when drying, forms a sticky film, then it should be removed with a special means after it has completely dried.
Apply a little caring oil to the cuticle. Your perfect manicure is ready!
For more information on how to choose a lamp for drying varnish, see the following video.
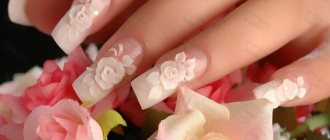
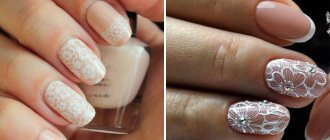
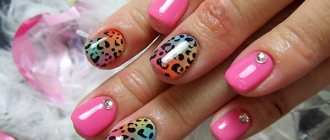
Photo examples of designs on nails with gel paints
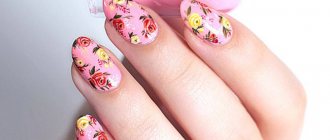
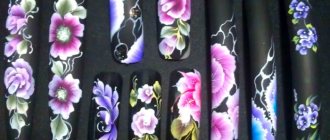
Nails can be decorated with designs of varying complexity. It all depends on the skills of the master. The simplest painting options are geometric motifs (dots, stripes, combining various geometric shapes into one composition, etc.). Some of the more complex ones include floristry and animal patterns. Shades and competent color transitions are important here.
Review of brands of gel paints for manicure
A beautiful design can be obtained from the use of high-quality materials. Proven products will provide stable results after each use and will not give unexpected effects.
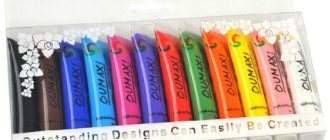
Paints are usually produced in small jars (bottles) with a volume of 4-6 ml. The consistency allows you to take the required amount of product onto the palette for subsequent painting so that use is economical.
Kodi
The most popular brand for nail technicians (and not only). One of the first to produce high-quality gel paints. The amount of product is 4 ml in one jar. Gel paint self-levels after application, thanks to the gel included in its composition.
Video on the topic:
The product does not leave a sticky layer after polymerization. Suitable for various design ideas: planar drawings, casting, volumes. The low cost of the product allows it to be used not only in salons, but also at home.
E.Mi
A good range of colors of these gel paints can be purchased individually, as well as in sets. Among the palette there are special colors - silver and gold. Products in a bottle (tube) – 5 ml. Polymerization takes place quickly if you use a LED lamp.
A large number of pigments in the gel makes it possible to apply clear designs and mix colors evenly.
RuNail
Branded gel paints from RuNeil can be purchased in different volumes - 5 ml and 8 ml (depending on needs and volume of work). The paint does not spread, the optimal consistency allows you to easily apply any decorative paintings.
Although the palette does not contain hundreds of shades, the existing quantity is enough to obtain new necessary shades after mixing paints.
Canni
Economical 5 ml jars from the budget segment have a high concentration of pigment, are easy to apply and dry quickly (especially if the lamp has good power). Gel paint mixes well to form the desired shade.
The paint applies evenly, does not form thickenings in some areas of the nail, and does not spread.
Miranda
A good selection of shades can be found in gel paints from Miranda. Various shimmers of mother-of-pearl, matte or shiny paints can be mixed with each other, combined and created real masterpieces. The affordable price only contributes to this. The cosmetic product is produced in small jars containing 8 ml of paint.
The product has a high concentration of pigment, which allows you to apply bright and rich designs. Doesn't spread over the nail, holds the contours well.
This video will tell you how to choose the right gel paint
It is very important to read:
- Matte manicure for long nails
- What are nail sliders?
Product price
You can purchase manicure paints at any specialized or chain store. You should avoid retail places of sale with mountains of vials or tubes piled into boxes - their cost and quality will be extremely low.
To check the suitability of the purchased paint, you need to lightly dip the brush into acrylic liquid. If the dipping area immediately begins to “tighten”, the paint is fresh; if the damage to the surface remains for a long time, the paint is expired or counterfeit.
Tip: If you buy a set of acrylic paints, check all the containers, not just one to choose from. You should not trust the information about the expiration date indicated by the manufacturer on the packaging, since its storage conditions are unknown.
The price of a bottle (20 ml) of acrylic paint for painting on nails from a well-known brand is 200 rubles. and more.
Formulations of the same volume from less popular companies cost 70-90 rubles. Standard forms of release of acrylate compositions are soft tubes, glass or plastic jars, as well as pencils for creating thin and clear inscriptions.
It's time to learn how to use acrylic nail paints.