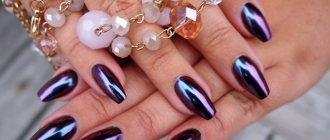
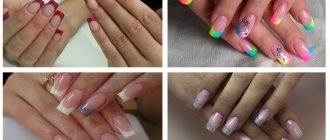
No woman can refuse a beautiful manicure. And how disappointing it is when nails don’t grow, break, peel. And in a few days a celebration is planned that cannot be missed. Or it’s your best friend’s birthday.
Well, don’t sit at a party, hiding your hands under the table, and looking with envy at the long nails of female guests. But there is a way out, just visit a beauty salon and they will definitely offer a popular procedure - gel nail extensions.
Advantages and disadvantages of the procedure
Before agreeing to any nail manipulation, be sure to weigh the pros and cons. It is necessary to find out what contraindications and side effects there are. The following factors speak in favor of gel extensions:
- By spending no more than two hours of your time, you will become the happy owner of beautiful long nails. And this does not depend on what the original length of the nails was.
- Durability is another advantage of gel nails. Even acrylic is inferior to them in this regard. The service life of such a manicure is at least three weeks.
- Easily amenable to correction. If you manage to break your nail, damage it, or don’t like the shape, then any experienced nail technician will spend no more than an hour fixing these problems. You can wear gel nails for a long time. It is enough to carry out the correction regularly and in a timely manner.
- The gel does not have a sharp, unpleasant odor. If you've ever had acrylic nails done, you know how bad they smell. After undergoing the gel extension procedure, your nails will not have a specific smell.
- Not subject to deformation, safe. Nails are strong and elastic. Even if you work physically and there is a possibility of damaging your nail, you will have to put in a lot of effort to break it. If you do this, only the artificial material will burst, and the natural nail will not be damaged.
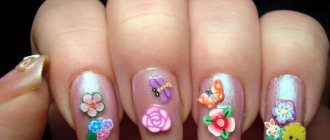
Gel nail extension with design The disadvantages of the procedure include the following factors:
- Since before applying the gel the master is forced to file off the top layer of the nail, the plate becomes thinner. Because of this, when you dry the gel under the lamp, an unpleasant burning sensation will occur.
- A broken nail cannot be repaired; it will have to be completely removed and re-grown. It is impossible to glue a cracked plate.
- If you have never worn gel nails, it is recommended to start with a short length. Otherwise, there is a risk of snagging and breaking the nail.
- When you decide to get rid of your nail extensions, you won’t be able to do it yourself. All you need is a master. DIY can be expensive - the surface of the nail will be damaged, and you will need to wait at least 4 months to grow the damaged plate.
All about nail extensions. 8 myths and facts about nail extensions
Once upon a time, nail extensions were the number one trend. People lined up at beauty salons for acrylic or gel cat claws. But over the years, the reputation of the extension procedure has been slightly tarnished. Who is to blame for this? Unscrupulous and illiterate craftsmen, materials or the procedure itself?
Extended nails damage natural ones
. Nail extensions have a history of forty years, during which time the technology has developed. Modern materials and proper implementation of the procedure guarantee that your nails will be in perfect order and even more. With acrylic or gel, you can grow long nails if this was not possible before.
Extensions contribute to the development of nail infections
. But only if the procedure is performed incorrectly. If the master did not close the edges or applied the coating unevenly, then a gap may form between the nail and the material, where dirt and water will accumulate. Against this background, inflammation can actually occur.
There is also a risk of getting an infection if you do not comply with the time intervals for replacing or correcting the coating. In this case, as with teeth, if you don’t brush them constantly, problems cannot be avoided.
Extended nails can be worn for a short period of time
. The nail consists of a plate and a matrix. Only the last one is alive; it is the one that forms the nail. The artificial turf does not affect the matrix in any way. Therefore, you can wear extended nails all the time; they do not affect the health and formation of the nail. The main thing is to change and adjust the coating in a timely manner, as well as find a competent technician.
Gel is much safer for nails than acrylic
. It was formed due to the fact that acrylic itself has a strong irritating odor. So popular rumor put it in the category of materials that can cause irritation, allergies and harm health. But that's not true. The drug itself can cause allergies only when it gets on the mucous membranes.
And this often happens with the “sticky” gel. And only the master who creates the design can harm the material in the process. Therefore, when working with any material, you need to follow technology and use an individual approach.
If you damage your nail extensions, you can also damage your own nails.
. When a person receives a severe injury to an artificial nail, his own nail plate will also be injured. But not much. After all, artificial coating acts as armor, minimizing damage to natural nails and even saving them from injury. You can get injured nails with artificial coating if correction is not done in time.
That is, if the free edge of natural nails is longer than the coating. If you just catch your fingernail on something, injury is guaranteed. But in this case, the reason will not be the coating, but the length of your nails.
. If you buy a lamp, material, and take a course for a young nail technician on the Internet, this also means that you will be able to extend your nails yourself like a pro. To perform this procedure correctly, in addition to specialized training, constant practice is required. People who work only with their own hands are deprived of it. Therefore, it is difficult to achieve the ideal on your own in this matter.
Filing the nails before and after the procedure can deform the nail plate
. The nail plate can be deformed by damaging the matrix. Only an illiterate master can do this, who works too roughly and illiterately with the tool in the cuticle area. Artificial coatings do not require any strong filing, except for light sanding with a soft buff.
This type of file levels the nail plate, but in no case deforms it. If the nail is initially uneven (with the exception of fungal diseases), then the artificial material acts as a splint that helps the nail plate grow more evenly.
You can't do housework normally with extended nails.
. Artificial nails are not a reason to skip homework. The coating will protect your nails from the aggressive effects of household chemicals and detergents. True, you will still have to wear rubber gloves to take care of the skin of your hands.
Tools and materials
Let's consider what tools and materials are needed for gel nail extensions. It is worth mentioning that the final result directly depends on their quality, so you should not buy cheap gels and tools.
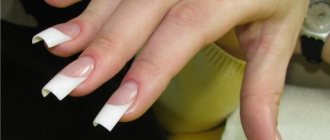
There are only two ways to create gel nails, using tips or an extension form. Tips are plastic extensions that imitate a natural nail and are used to increase the required length. The tips are secured with special glue. The form is a template with marks for increasing the required length. Depending on the material, you can buy disposable (paper) and reusable (metal).
Gel extensions, “Square” shape: laying out, sawdust - video tutorial by Natalia Golokh
The primer is used before applying the gel to the nail. It removes excess moisture and fatty film from the surface of the nail. After using it, the nail plate becomes white. Thanks to him, the artificial material holds well. The primer prevents peeling and prolongs the life of the extended nail.
Brush for applying gel. You need to take a flat one, with a beveled or rounded edge. It can be made from natural or synthetic fibers. Natural ones are more expensive, but they will also last longer than synthetic ones.
Gels for extensions are single-phase and three-phase. The three-phase gel consists of a base, sculpting and protective layer, they are applied in turn. For beginners, a single-phase gel is more suitable, since all three components are mixed and are in one package.
A product for removing the sticky layer that forms after polymerization of the gel under the influence of ultraviolet radiation. It is problematic to remove this layer with any other means.
Files for artificial nails with a high degree of abrasiveness. One should be for working on the upper surface of the extended nail. The second is to give the desired shape to the free edge and at the base of the plate. A thin artificial nail file is good for this.
A soft brush will be needed to remove sawdust from the skin of your hands. A stiff brush is suitable for cleaning filed nails.
Varieties
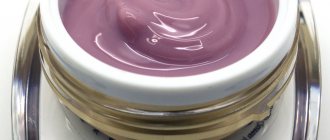
An incorrectly selected base contributes to the appearance of unevenness, delamination, cracks and the formation of white spots. In the modern nail industry there is a wide variety of bases, which can be divided into the following groups:
- Solid bases . This material practically does not bend after drying and is characterized by increased strength. This variety is represented by some brands of rubber bases, as well as bases made of acrylic powder. Rubber materials are thick and have good adhesion. Other solid gels, on the contrary, may have increased fluidity during the modeling procedure. These varnishes are only suitable for strong nails with sufficient thickness, otherwise the dense, inflexible layer of the hardened base can damage the natural keratin.
- Elastic bases. More flexible elastic materials that create a remarkable effect of leveling the surface of the plates. These bases are thicker than others, making them easy to apply because they do not flow or spread. The product is suitable for those with thin nails, but it cannot be used for extending long lengths. Typically, such materials are used to correct or extend the free edge. Elastic bases also include silicone bases. Quite often they take the form of stickers or liquid tips that are attached on top of the nails.
- Camouflage bases. Such products simultaneously act as a base, top, and decorative gel polish. Thanks to this, the base is easy to apply, so extensions can be quickly mastered at home. Usually the camouflage base is beige, light pink or cream. There are also bolder colors.
In addition to the listed bases suitable for nail extensions, manufacturers create all kinds of bases with vitamins and minerals that help strengthen nails. Any product must be selected to match the characteristics of natural plates, otherwise extended artificial nails will not last long enough.
Execution Rules
The technology for gel nail extensions is not too complicated, but it has a number of features that you need to know. Just a little practice and you can perform the procedure yourself.
The first thing you need to do before you start working on your nails is to disinfect your hands and tools. Inspect your nails - if you see fungal infections, applying extensions is strictly prohibited.
If there is polish or any other coating on your nails, it must be removed. Then use a pusher to push back the cuticle, without pressing too hard. Before extensions, you should not do a classic trimmed manicure, there is a risk of damaging the skin.
Gel nail extensions. Rainbow French
Using a natural nail file, we carefully file the surface of the plate, making movements towards ourselves. We carefully clean the area near the cuticle, there is a pterygium that must be completely removed. If you don't clean it well, the extended nail may peel off. Next, we file the free edge so that it is convenient to place the form.
We treat the prepared nails with prime. When applying, make sure that the layer is not thick. When working with a brush, we try not to catch the cuticle. Let dry for two minutes.
At the next stage, we put on a uniform; it is better to take a disposable one. Before use, you need to slightly bend it lengthwise, giving it a roundness. Glue the ears to the finger and look at the side view, the shape should continue the natural growth line of the nail. Make sure there is no bending. If there is a gap between the nail, then the shape should be trimmed.
Once the form is established, we can proceed directly to extensions. To lay out the free edge of an artificial nail, you need to use a not very viscous transparent building gel. Apply the desired length with a brush. Let dry for two minutes. When the gel has polymerized, carefully remove the mold downward.
We use a thick, transparent gel to build the architecture of the nail. Apply it in a thin strip near the cuticle without touching the skin. In the stress zone, we make the required thickness with gel. Let dry for two minutes.
Remove the sticky layer with a napkin soaked in cleanser. Using an artificial nail file, we file down the free edge of the plate to correct and even out the shape. The transition from a natural nail to an artificial material should not be noticeable. We polish the surface with a buff to smooth out the unevenness left by the nail file.
We complete the treatment by applying the finishing gel. Do not go beyond the edges of the artificial nail and do not touch the cuticle. Lubricate the cuticle itself with nail oil.
Gel nail extension on form
If the nail extension technology is done correctly step by step, then you can wear your nails for up to three weeks or more. And timely correction will help keep them in perfect condition.
Nail correction after extensions
After 3-4 weeks after extensions, the natural nail grows back and the manicure loses its well-groomed appearance. The darker the varnish is applied to the nail, the more noticeable the regrown strip becomes. It's time for a correction.
As always, we start with disinfection. Apply it to your fingers and treat the instrument with an antiseptic. If there are rhinestones on the nails, remove them with pliers, because removing them with a cutter is dangerous. Then we remove the colored coating and file away the detachments with a carbide cone-shaped cutter with a green notch. We make movements smoothly, without pressing. Do not touch the natural nail or side ridges. We use the same cutter to file and remove the excess length.
Using a needle-shaped cutter, we push back the cuticle, remove the pterygium, and move the side ridges. Use a nozzle in the form of a small ball to lift the cuticle and thoroughly clean underneath it. We change to a cutter with a large ball, and finally remove the excess skin. Apply an acid primer and dry for about a minute.
Let's move on to nail modeling. Apply the base gel with light rubbing movements of the brush. We use camouflage gel to complete the shape of the nail and give it the desired volume. Apply the gel in a not too thick layer and dry for approximately 2-3 minutes. After drying, we wipe off the sticky layer and begin filing, giving the edge the desired shape. We do the cutting with an artificial nail file with 240 grit abrasiveness.
Gel nail extensions on top forms / www.formulaprofi.plus
After shaping, degrease the nails and apply a color coating in several layers. We dry all layers in a lamp. Cover with top coat and dry again for 2 minutes. The finishing touch is to apply oil to the cuticle. And here is the result - your nails are beautiful and well-groomed again.
Cost of gel nail extensions
Nail extensions are an expensive procedure. The price is affected by the quality of materials. There is no point in saving money here, as cheap gels will not stick well, peel off, and will not adhere well to the nail. As a result, time will be wasted on work, and the result will not please you.
Will affect price and design. Rhinestones, modeling, hand painting, as a rule, the master charges an additional fee for this. You will also have to pay extra for the French jacket. Long nails will cost more, since the procedure will require more gel.
Correction usually costs 20-50 percent less. Here the price may be affected by how long you wore your nails before correction.
The work of an experienced master is more expensive than that of a beginner. But here the costs will be justified, because an inexperienced specialist will spend more time on the work and may make mistakes that will affect the quality of the work. It will be a shame if your nails fall off after a few days.
Gel nail extensions at home It also matters where the master does the manicure. In an expensive salon, the price may differ several times from the cost of the procedure performed at home. On average, extensions will cost, depending on the complexity, approximately $10-70.
Strengthening nails with gel under gel polish
It's interesting to learn new knowledge and skills. The process is especially exciting when it comes to preserving beauty and health. Moreover, in the nail business industry, the flight of creative thought and concern for health are successfully combined. It is not easy to create something original and spectacular on uneven, flaky nails. Well-groomed hands and beautiful nails with a stylish manicure give a woman confidence in herself and her attractiveness. Therefore, the main task when caring for nails is to strengthen and improve them.
Applying the base
Recently, it has become fashionable to learn how to do nail extensions and manicures at home. Many affordable, high-quality and easy-to-use materials have appeared. Strengthening nails with gel under gel polish has become a fairly popular procedure.
Advantages of using strengthening gel under gel polish
No matter how long your nails are, they should look neat and well-groomed. But the nail plate is constantly exposed to various mechanical and chemical influences. A special gel was developed to protect it. If your nails are thin and brittle, then it would be most rational to use this product.
- The gel strengthens nails, making them denser and stronger.
- Gives a well-groomed appearance.
- Reduces the impact of harmful factors on the nail plate.
- Prevents delamination and reduces fragility.
- Allows you to grow your nails to the desired length.
Gel polish coating on nails
How to work with gel under gel polish
Nail strengthening is becoming popular and should be done regularly. Since the procedure is not cheap, it is worth mastering it to do it yourself at home. It does not imply any special difficulties. This method is quite easy to use and gives noticeable health and cosmetic results.
Filing nails before applying gel
For beginners, there are many instructions and descriptions of the principles of working with the material, but it’s easier to watch the video
lesson. It tells step by step how to perform the procedure, the expected results, the most common mistakes and shortcomings of beginners. A complete list of necessary materials and tools is also given.
Degreasing agent
In general terms, for work you will need:
- antiseptic solution;
- degreaser;
- 1-2 files with the finest abrasive;
- buff;
- several cuticle sticks.
During the work process, it is necessary to strictly follow the sequence of actions so as not to violate the technology. There is a preparatory stage and, directly, strengthening.
Nail treatment
During preparation, the following manipulations are carried out:
- antiseptic treatment;
- removing excess skin from the cuticle;
- giving the nail plate the desired shape;
- degreasing.
Rules for applying the gel
The gel is applied in three stages.
- The first layer, the base layer, is very thin and dries quickly, only 30 seconds. under an ultraviolet lamp.
- The second layer will become the main one, so it is applied tightly, from the edge of the nail to the cuticle. Drying is carried out within 3 minutes. If correction is required, it is carried out with a buff and a nail file.
- Finish - the gel is also applied in a thin layer, but dries for 3 minutes. If it is sticky after drying, you can remove the top film with an acetone-free remover.
You can apply layers using different compositions, but the “from one jar” option is allowed, observing the technology and drying time.
Applying the base
You can clarify the questions from the video and attached photo. Careful implementation of all manipulations in stages will gradually give the necessary skill and excellent results in the form of well-groomed nails, as well as possible additional income if you want to receive clients and perform gel coating at home.
Contraindications for using the gel
It is necessary to exclude allergic reactions to all components.
Strengthening nails before applying gel polish
The main prohibition will be applying it to a sore nail. Since the film does not allow air to pass through, an exacerbation of the disease occurs.
Important! Do not apply gel or other coatings to a nail affected by fungus. It is necessary to carry out complex treatment and only after that use strengthening and decorative coatings. It should be remembered that the treatment period for a fungal infection takes a long time, so at the first improvement you should not delude yourself and stop carrying out the procedures. It’s better to carry out the full complex once and then enjoy the health and aesthetic appearance of your nails.
By mastering the technique of independent work with strengthening gel, you not only acquire new knowledge and skills. Having spent once on the purchase of the necessary tools for work, then you get a complete saving of money and time. Gel strengthening requires regular correction. Depending on the rate of growth of the nail plate, you need to repeat the procedure every 2, 5-3 weeks. And if you already have the necessary materials and skills in your arsenal, then making the correction will not be difficult.
Nails will always be healthy, strong and well-groomed.
Home recovery after extensions
Sooner or later the moment will come when you do not correct the gel coating, but completely remove it. I don't think you'll be happy with the look of your natural nails. The plate will be thin, brittle, and lacking natural shine. And it will be necessary to urgently begin restoration.
Masks, baths for hands and nails, which can always be made at home, have proven themselves well. The necessary products are available in any supermarket at an affordable price. Herbs are sold at your nearest pharmacy. And if you regularly use these procedures, your nails will soon become dense and healthy again.
Salt scrub
A salt scrub that is easy to prepare yourself will perfectly restore your nails and the skin around them. You need to take sea salt and mix it with shower gel. You should get a mass of mushy consistency. Apply to fingertips and massage lightly for several minutes. We especially carefully work on the area near the cuticle.
Nourishing, vitamin mask
You will need 100 grams of honey (if you are not allergic to it), 100 ml of lemon juice, which will whiten the plate, 50 ml of olive oil, which will soften the effect of lemon. Mix all the ingredients, dip your fingers into the mixture and, without wiping, put on cellophane gloves. We wait about ten minutes, rinse our hands with warm water.
Gel nail extension technology
Wax mask-bath
Heated natural wax facilitates the penetration of all the beneficial substances contained in the mask into the skin and nail plate. We melt it in a water bath. We crush the aloe leaves in a mortar and squeeze out the juice through cheesecloth; we need to get 100 ml. You will also need 3 dessert spoons of honey, which we combine with aloe juice, and then add a tablespoon of peach oil. Dip your fingers into the resulting mass and hold for a while. We take our hands out of the bath and, without wiping the skin, dip them into warm wax. Wrap your hands in cling film for 15 minutes. Then remove the wax and apply nourishing hand cream.