Shellac is one of the most common decorative coatings now used in salons. The composition has high strength and wear resistance, which is why it remains on the nails in the same condition for up to a month.
However, the price for the procedure from the master is quite high, which is why many girls learn how to make shellac at home. Despite the fact that manipulation requires a large number of tools and consumables, they do not require special skill, so shellac coating can be done by everyone.
How long does it take on average to apply shellac?
One of the main reasons why girls do not want a procedure in a salon, but prefer to do it at home, is saving time. To come to a session with a master, you need to adjust your schedule to his schedule and spend time traveling there and back. In addition, the price for a manicure in a salon now ranges from 500-2000 rubles.
Shellac coating can be done quite quickly, since there is no need to waste time on lengthy drying of the work. Typically, time is divided into stages:
- Rough processing of nail plates – up to 40 minutes;
- Preparing the surface for decoration – up to 20 minutes;
- Application of decorative coating – up to 40 minutes;
- Design – up to 40 minutes.
On average, it takes from 2 to 2.5 hours to perform manipulations at home. However, if you first need to remove the previous work, the time increases to three hours.
Before applying shellac step by step, make sure that you have enough free time so as not to rush yourself while distributing the pigment, as this may affect the quality of the manicure.
It is worth noting
Manufacturers promise 2-3 weeks of cloudless life with perfect manicure, bright nail color and long-lasting coating. True, they make a reservation. Shellac does not withstand constant water treatments, exposure to detergents, or impacts, for example, on a keyboard.
It turns out that for the average woman, who is responsible for washing dishes, cleaning the apartment and shopping for groceries, shellac becomes something unattainable. But every representative of the fair sex wants to have beautiful and well-groomed nails for a long time.
Rubber gloves save the situation. They will help extend the life of shellac on your nails. Plus, the skin of your hands will be less susceptible to household chemicals and dehydrated. At first it will be inconvenient to do household chores wearing gloves. But believe me, you just need to get used to it.
How long shellac lasts depends only on you. But the optimal period would be 7-10 days.
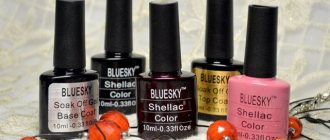
We recommend: Shellac Bluesky: how to apply correctly to create the perfect manicure
Tools needed to apply shellac
To get a neat, effective manicure, you should pay attention to the choice of devices and instruments for preparing nails for home procedures.
In the salon, disposable instruments are often used, however, since only you use them during home processing, it is recommended to simply pre-treat them with an antiseptic, eliminating pathogenic microflora.
You will need several tools:
- File;
- Orange stick or metal pusher;
- Wire cutters;
- Bafik.
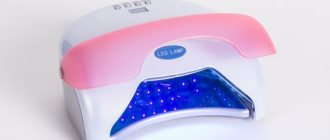
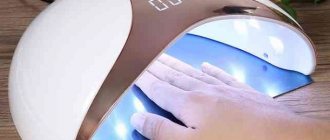
Additionally, to dry the shellac, you need to prepare an ultraviolet or LED lamp. Make sure it is powerful enough to allow the applied pigment to harden quickly.
Also, before applying shellac, it is recommended to prepare extension molds and gel if you plan to repair a broken nail bed or slightly increase its length or shape.
Materials required for applying shellac
After preparing the tools for the technology, choose what you need for shellac at home from consumables and compositions.
You need quite a lot of similar materials:
- Cuticle remover;
- Dehydrator (degreaser);
- Base;
- Color pigments;
- Top;
- Sticky layer remover;
- Decorative elements that you plan to use: rhinestones, stamping, drawings, stickers, etc.
When using base, top and colored shellac from different brands, you need to be careful, as they may conflict with each other due to the presence of different components in the composition.
It is recommended to choose products from one manufacturer to increase the efficiency of manipulations.
If you don't have a dehydrator that is used to degrease your nail beds, you can substitute rubbing alcohol or acetone (nail polish remover). The effect will be the same - you will remove the fatty film from the surface, increasing the adhesion of the decorative layer.
How long to dry the shellac base: sequence of all procedures
As noted above, applying shellac begins with preparing the nail plate .
Remove cuticles in a way convenient for you. Use a file to give your nails the desired length and shape.
An important step is degreasing the nails . This can be done with regular nail polish remover, alcohol or a special degreaser. In any case, you cannot skip this stage, since the durability of the coating directly depends on degreasing.
The main recommendation here is that you should not apply oil to your nails before the procedure. Fat impairs the adhesion of the material to the nail.
Next you should apply the base coat . Here we need a lamp for drying shellac. Opinions differ on how long to dry the shellac base. Everything depends, first of all, on the power of the lamp. The manufacturer strongly recommends drying shellac in 36 W lamps. However, even in lamps of lower power, gel polish polymerizes perfectly, but this will take more time. In fact, it doesn’t matter how long the shellac base was dried. This coating will still remain tacky for better adhesion between the polish and the nail. In lamps with a power of 36 W, 10 seconds will be enough.
Preparing nails for shellac application
In order for shellac to last longer, you should pay attention to rough processing of the nail bed. It takes about forty minutes, but there is no need to rush with it, since cosmetic defects and irregularities will lead to premature convergence of the method’s results.
Salon treatment is no different from home treatment, so you should follow the step-by-step instructions for its implementation:
- Treat your hands with antiseptic.
- Use a file to adjust the shape of the free edge.
- Apply remover to the cuticle (at home you can replace it with hydrogen peroxide).
- After a minute, use an orange stick or pusher to push away the keratinized epidermis, slightly lifting it.
- Cut the cuticle with cuticle cutters.
- Use buff to polish the surface, eliminating unevenness and defects.
- Remove excess sawdust.
- Apply dehydrator.
The preparatory stage ends with the distribution of degreaser over all nails. There is no need to dry it in a lamp; it dries spontaneously in 20-30 seconds.
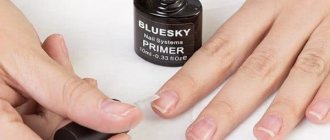
Often home technology includes the use of a primer, but when working with shellac there is no need to apply it, since the modern product has a high adhesion rate to the nail bed.
Manicure that is now in fashion
Designers and stylists attach great importance to manicure; they build on past trends and create something that will be relevant in the coming year or season. They are the ones who tell us what will be fashionable not only in clothes and hairstyles, but even in such little things as nail design.
What kind of manicure is in fashion? At the moment, a simple, neat and laconic manicure is relevant, suitable for both everyday life and holidays. Monochromatic coating is gaining popularity. But you have to be careful with bright red and black manicure, which is not always suitable for an everyday look.
Not a season is complete without a practical and already traditional French and lunar manicure. They are always relevant. These two types go well together and allow you to create original variations.
Applying shellac at home: step-by-step instructions
After preparing your nails for applying shellac, you can begin the main stage, which includes performing a single-color manicure or home design, which any girl can do without practice.
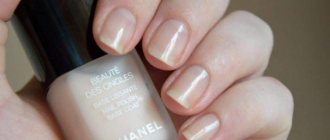
Applying the base layer
Using a base is a mandatory step to enhance the adhesion of shellac to the nail bed. It is recommended to use it from the same brand as the main pigment.
The base must be applied in one thin layer, and then dried in an ultraviolet or LED lamp for a minute. If a layer is applied too thickly, the following consequences may occur:
- Uneven drying of the coating;
- Leakage of compound to the side rollers;
- Getting a home manicure that is too thick and will look messy.
There is no need to do any special manipulations with the base; you can immediately apply shellac of the main color to it. Make sure you dry it completely before doing this.
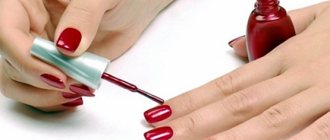
Applying shellac
Like the base, the base gel polish should be spread in thin layers so that they evenly cover the nail bed without leaving streaks or gaps. If the consistency of the composition is thick, you can turn the nail face down for a few seconds so that it flows towards the center, and then return it to its previous position.
As a standard, the main shade should be distributed in two layers to completely cover the natural surface. This way your home manicure will look more well-groomed and neat. The work is dried in the lamp for 1-1.5 minutes.
Applying decor
To diversify a basic home manicure, you can decorate your nails in an unusual way using decorative elements. There are quite a lot of options that can be performed in the absence of experience and skill.
To complete the design, you need to pay attention only to the preparation of consumables and tools:
- Stamping. A technique that involves using a stamp to imprint a design from a disc in which its borders are engraved and transfer it to the nail plate. The home technique is simple to perform, and visually it gives the impression that you drew the pattern yourself.
- Stickers. You can fix small fragments or full-fledged canvases that fill the entire nail.
- Foil. There are several types of material, including self-adhesive, so a girl can create a unique home manicure that will effectively shimmer and shimmer in different shades.
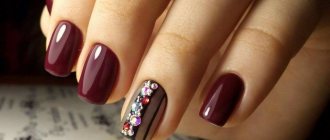
- Rhinestones. A classic that won't go out of style.
Pay attention to drying the design for a long time so as not to accidentally smear it.
You can combine design options, but be careful - a large number of decorative elements may look sloppy.
Applying top coat
To fix the entire work, a finishing coating is always used - top. It fills the entire nail bed in one layer. Be careful - be sure to pay attention to applying the composition to the end of the plate to prevent premature convergence of the effect.
The top is dried in the lamp for the maximum amount of time - 1.5-2 minutes for the shellac to completely harden.
Diseases of the body
If your endocrine digestive or excretory system is affected, then extensions or coating with any composition are not recommended. If these systems are damaged, the nails may become brittle and thin and cannot withstand the weight of the coating.
Before you go for extensions, consider all these tips and tricks. Then, you won’t have to overpay the master and waste time. This is an expensive and time-consuming procedure, so it is better to take care in advance that the coating lasts as long as possible.
How to correct gel nails correctly?
Gel base layer
Apply evenly over all parts of the nail plate.
Usually a little more material is needed for the area slightly above the middle of the nail
, but do not overdo it.
Next, dry everything again in a UV lamp; Correct
again with a nail file, smooth out defects and unevenness.
Interesting materials:
Is it possible to take out trash on Trinity Sunday? Is it possible to pay compensation upon dismissal before the day of dismissal? Is it possible to embroider on Trinity Day? Is it possible to call the doctor on duty on Saturday? Is it possible for dad to take sick leave? Is it possible to take out a loan while working in another city? Is it possible to take out a loan a second time? Is it possible to take one day without sick leave? Is it possible to take custody of my brother? Is it possible to take more than 14 days off?
What methods do specialized centers use?
In most cases, damage to the nail plate is caused not by the shellac itself, but by its “erasing” that does not comply with the rules. Professional solvents - removers or a special device with a cutter, which in some salons replace regular nail files, since the principle of the procedure is similar, helps to remove shellac correctly in the salon. The second method, despite its apparent danger, is more preferable from the point of view of preserving the integrity and health of the cuticle, nail plate and skin around it. Choosing the right way to remove shellac in a salon is not so easy. More on this later.
New shellac 2022
Women want to keep up with modern trends. And we couldn’t ignore the new items for 2022 in shellac nail design.
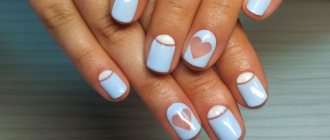
Minimalism . One of the most advanced concepts in shellac manicure in 2020 is stylish laconicism. It includes a single-color coating, play with matte and glossy textures, and the use of two colors.
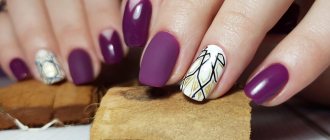
Geometry . The top list of shellac nail designs includes geometric patterns. Gone are the intricate patterns and over-saturated design elements. One of the most stylish shellac manicures of 2022 is a pattern of thin, laconic lines.
Glitter . Echoes of the New Year holidays have not left manicure fashion. Pay attention to the new 2020 design of nails with shellac - the stylish use of glitter. Choose fine glitter and cover several nails with it. Limit yourself to sparkles and do not add any other elements to the design.
Shellac – popular colors in 2022
The shellac color palette is constantly updated with new fashionable shades. The most popular are nudes: beige, creamy, powdery pink and nude. They go perfectly with any length and shape of nails.
Red shellac is in constant demand. A manicure with shellac in all shades of red is suitable for bright, feminine young ladies. In the CND red shellac palette, we would like to highlight the shades Wildfire and Hollywood. Luxio boasts eye-catching red shellac shades: Formidable, Tango and Distraction. The Jessica brand produces elegant red shellac Royal Red and Roadster.
Black shellac looks especially impressive on short nails. The glossy shine of black shellac is mesmerizing and looks very stylish. One of the latest innovations is a black shellac manicure with a matte top. You can draw interesting patterns on black shellac and combine it with French, reverse French, geometry and others.
The benefits and harms of shellac
Everyone knows the saying: forewarned is forearmed! We suggest studying the benefits and harms of shellac point by point and assess how much your nails need it.
The benefits of shellac
- Persistence. Having done a shellac manicure, you can forget about it for almost a month, which saves a lot of time and money.
- Accuracy. Since shellac hardens instantly in the lamp, damage to the coating is virtually impossible.
- Compound. Shellac does not contain formaldehyde, therefore it is considered a harmless cosmetic product.
- Strengthening. Let us make a reservation that this point is very conditional. Shellac will not strengthen your own nails, but it will help prevent brittleness and splitting while you wear the coating. It is not for nothing that the name is derived from the word Shell, which means “shell”.
- Availability. Shellac can be applied to your nails in almost any salon or done at home.
- Wide selection of shades. The shellac palette is constantly being replenished, which cannot but please fans of this coating.
The harm of shellac
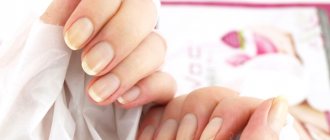
- Dehydration of the nail plate. After removing shellac, you may notice that your nails look dull and dry. They may even begin to break or peel. Manicurists advise periodically taking a break from using shellac.
- Application technique. If you are going to do a shellac manicure in a salon, the master must be fluent in the technique of working with it. It's not easy to master at home. You may not be able to apply shellac perfectly the first time.
- As they grow out, nails with shellac look untidy. Remove and renew the coating in a timely manner.
- If you have flexible and thin nails, shellac may peel off. There is also a risk of damaging the nail plate.
- Shellac is absolutely not suitable for nails affected by fungus.
- Shellac can give your nails a yellowish tint. Choose high-quality, proven shellac brands.
Benefits of gel polish
Just 5-6 years ago, getting your nails done with gel meant getting rid of the need to get a manicure every couple of days. Getting your nails done today is not cheap. And correction of artificial nails is more expensive than a salon manicure. Therefore, manufacturers of cosmetics for manicure have long been looking for a balance between affordability and durability of the coating. And we developed a new product that allows you to do a long-lasting manicure at home. Step-by-step instructions allow you to perform this procedure even for those who have picked up a bottle of shellac for the first time.
Gel polishes - hybrid products for long-lasting manicures - appeared several years ago. CND was one of the first to produce them. She called her product Shellac. This initiative was taken up by other manufacturers. But out of habit, many people still call their products shellac. Although the concepts of shellac and gel polish are not identical.
Gel polish combines the properties of two products. It applies easily, like a varnish, has a liquid texture, and blends well with a brush. But it requires a lamp to harden - just like when working with gel when doing nail extensions. But if extensions are a longer process, a manicure with shellac can be done in 30-40 minutes.
This product has a rich, bright color and a beautiful glossy shine that lasts up to two weeks. Nails under gel polish do not break: strength is ensured by several layers - from the base to the top coat.
Shellac is a premium gel polish that costs more than most similar products from other brands. At the same time, it has a number of advantages.
- To paint your nails with it, it is not necessary to use a primer (a product that improves adhesion between layers). This allows you to paint your nails with shellac at home much faster.
- It is easier to remove than other gel polishes and does not damage the nail plate.
- It is long-lasting - if applied correctly, it can last up to three weeks. All you need is a simple and quick correction on the overgrown area of the nail.
- It is characterized by a large color palette.
- It is much easier to apply - even a beginner can handle it.
There is only one drawback: this coating dries out the nail plate. Therefore, in between applications, you need to give your nails a rest and additionally nourish them with oils.
How long does the varnish dry and last?
Varnishes dry on nails differently. For regular varnishes, depending on their density and thickness, this may take several minutes. As for gel polishes, they can dry for no more than two minutes, even in one layer with a slider. Do not increase the drying time as this may cause bubbles to form on the coating.
A high-quality manicure can last on your nails for two to four weeks without adjustments. In some cases, clients can walk with the design for two to two and a half months. However, masters repeatedly emphasize that excessive use of painted and extended nails is not recommended. The correction should be completed within two to three weeks after the manicure.
Peculiarities
The time required to trim your nails depends on the type of procedure. It is important to understand that it consists of step-by-step procedures, each of which takes a different amount of time. In this case, there are no hard and fast rules, because in one case a professional takes over the job, and in the other, we do the manicure ourselves without any specific experience.
This can be cut or uncut, with or without soaking the nails. There is also a quick method that compresses from 20 minutes to half an hour. Of course, the master does not have time for artistic painting, but in half an hour he exfoliates the cuticle, processes the nails and applies a high-quality coating that will decorate the nails for at least two weeks.