- August 1, 2018
- Nail care
- Alexander Enotov
Every woman wants to look beautiful and well-groomed. A neat manicure can become both a continuation of the image and an extravagant bright “spot” on the hands of a fashionista. Many girls dream of taking care of their nails on their own or even becoming a professional, but when choosing the necessary items for a manicure, they fall into a stupor. This article will help you decide on the necessary set of tools. So, what does a beginner manicurist need?
Varnish or gel polish?
You should definitely buy starter kits: they are already equipped with everything you need. The sets come in a variety of varieties, but the more and better the material it contains, the higher the price. First of all, you need to decide what kind of manicure you plan to perform: varnish, gel polish, gel, acrylic, men's, using a special device or a classic edged one, and then you can choose the set itself or make a list of what you need yourself.
List
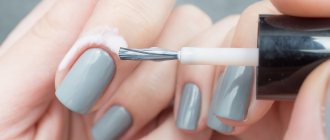
The most convenient and fastest nail care is a neat manicure and varnish. What should you pay attention to when choosing a starter kit or purchasing all items and tools separately? What do you need for a manicure with varnish? A list of all materials and consumables is given below. First of all, study the market and decide on the amount that you can spend on everything you need. Thus, based on your budget, choose the brands of tools and other items that will suit you best.
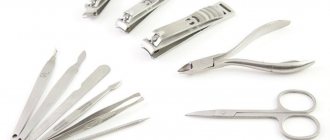
So, what do you need for a manicure for beginners? Let's look at the list of tools:
- manicure scissors;
- files of different abrasiveness;
- scraper or pusher;
- trimmer;
- nippers (cutters);
- polishers.
This is what tools are all about. We will look at each of them in more detail later in the article.
Manicure set as a gift
A manicure set as a gift is a great idea. But the following rules must be observed:
- Do not give an expensive manicure set to strangers whose preferences you know nothing about. Perhaps the recipient of the gift constantly uses the services of a nail salon, and your gift will be completely unnecessary.
- Choose only high-quality manicure tools. If its price is too high, choose another gift.
- Try to quietly study the habits and preferences of the recipient - this will help you choose the right package for the future gift.
- Give manicure tools only in a case or case.
There are many types of tools that are needed for manicure at home. Therefore, choosing a manicure set involves many subtleties, the observance of which will make the procedure pleasant and desirable for everyone.
More interesting articles:
Scissors or wire cutters
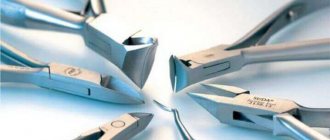
The sharpening of scissors and nippers must be perfect; the quality of the manicure depends on this. There are two types of scissors: one for cutting the free edge, the other for keratinized skin around the nail. The blade must be very thin and made of medical alloy. Before buying scissors, it is important to take them in your hands and try them in action so that you feel comfortable working with them. The quality of the nippers depends on the material from which they are made, as well as on the type of sharpening. The movement of the blades can make work difficult, so it is important to buy a quality tool. The choice of cutting blade depends on your personal preferences: both scissors and wire cutters do an excellent job.
Where is the best place to buy a manicure set?
To protect yourself from counterfeits, it is best to contact a professional store of the appropriate profile. Consultants will help you choose the necessary set of manicure tools.
When ordering a product online, it is better to contact the official representative office of the manufacturer.
Do not order expensive manicure sets from unprofessional sites or intermediary sites. It is impossible to check the quality of tools with such a purchase, and you will not receive a guarantee for the purchased product.
Trimmer
This device is able to remove cuticles and hangnails, which in turn prevents the appearance of the latter. The working surface of the trimmer resembles the Latin letter V, its edges are very sharp. With slight pressure, the cuticle is cut off. A cheap tool quickly becomes dull, so it is important to pay attention to the quality of the material from which it is made. A dull trimmer can easily tear the skin, resulting in hangnails and wounds. The handle, for example, should not be made of thin plastic, otherwise there is a risk of cracks, and the tool will have to be replaced in the future.
Pencil
There are several types of this tool:
- Capillary is a new device designed for painless removal of the cuticle.
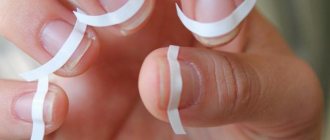
- For French. It makes it possible not to resort to the help of patterns and stencils. It is applied under the nail plate.
- Correction stick. Gently removes varnish and makes it easier to apply French polish.
Nail Edge Tools
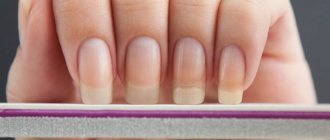
We looked at what you need for manicure and cutting cuticles. But to process the free edge of the nail, a file and a buff (polisher) are used. Files come in different shapes and degrees of abrasive (hardness). For natural nails, you need a glass tool with a fine abrasive coating, and to work with artificial material, coarse files are used.
Buffs are needed to treat the surface of the nail in order to cut off the glossy layer, so the coating will adhere better. Popular filing areas are used only for sharpening strong nails that are not prone to peeling.
Materials for manicure with varnish
You should also purchase consumables and the varnishes themselves. Here are some recommendations on this matter:
- The palette of varnishes should consist of at least the “golden” five: white, black, nude, red and a trendy color, that is, the one that is in fashion at the time of purchase. It is also advisable to have a clear varnish that can be used for the initial coating and finishing to help the design stick better.
- Disinfectants. Don't forget about all kinds of infections that are transmitted through blood. After all, while doing a manicure, you can get hurt and become infected with serious diseases. If you are only going to do a manicure for yourself, this does not mean that there is no danger: the proliferation of bacteria can lead to the formation of fungus (a very unpleasant story).
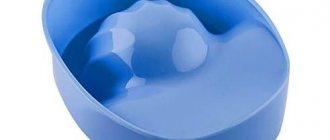
- Consumables. Their variety is too great, but for a manicure with varnish, lint-free and disposable napkins, orange sticks and a bath for soaking the cuticles will be enough (if you plan to purchase a router, there is no need for a bath).
- Cosmetics. It is important to have nail polish remover, cuticle softener or remover, bath softener, cuticle oil, hydrogen peroxide or hemostatic agent, cotton pads and moisturizing hand lotion.
- Electrical equipment. You can skip this point if you wish. The equipment includes a router, attachments, a sterilizer, and a table lamp, but since they are quite expensive, in principle, you can do without them.
We figured out what you need for a manicure with varnish. When working with clients, this is not enough, but the main thing is to start, the rest can be purchased as soon as possible.
What do you need for a gel polish manicure? List of necessary items
The presence of a milling cutter is welcome, since the durability and longevity of the coating depends on the cleanliness of the nail plate treatment. There is no point in repeating the list of tools; the same as described above is enough.
The list of what you need for a gel manicure is practically no different from the one presented below:
- Base and top. These are liquids for covering the nail plate, the base is applied directly to the nail, and the top or finish is applied at the end of the design. The base can be regular or rubber, and its consistency depends on this. You can buy several types of top: glossy, cashmere-effect, matte, without a sticky layer. All are in great demand, so if you plan to work on the flow and accept clients, do not skimp on these liquids.
- Gel polish. The palette of gel polishes again depends on their purpose. Buy for yourself the colors that you like, and when working with clients, take an interest in their preferences and gradually expand the color palette.
- Consumables. List of materials for coating with gel polish: cuticle softener, softener for gel polish, ultrabond or primer, dehydrator or degreaser, lint-free wipes, liquid for removing the sticky layer, cuticle oil, clips or foil, orange sticks, brushes of different sizes, disposable wipes, brush for shaking off dust.
- Disinfection and sterilization. A means for disarming hands and instruments is considered mandatory, but when working with clients or girlfriends, you need to buy a full list of sterilizing agents, namely: a means for disinfecting hands and instruments, liquid for sterilizing instruments and containers for storing sterile instruments.
- Cosmetics. Which should contain: a hemostatic agent or hydrogen peroxide, cotton wool or cotton pads, moisturizing hand lotion.
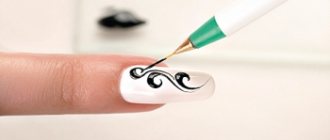
- Design. What do you need for a manicure with a design? Let's look at some items: several colors of gel paints, rhinestones, sequins, kamifibuki, acrylic powder, etc.
- Electrical appliances. The most important device is a drying lamp, which comes with ultraviolet and LED lamps. To work with clients, you definitely need a sterilizer.
- When doing gel extensions, it is worth adding gel and forms. Mold clamps are also available, but they are not required.
If you find it difficult to decide or remember what you need for a gel polish manicure, then feel free to choose starter kits that are on sale.
Accessories for design
The choice of materials and tools for nail design - creating patterns and decorations - is huge. Conventionally, all these funds are divided into 2 categories:
- To create a flat manicure. This group includes foil, stickers, ribbons and other materials for nail extensions that do not rise above the main coating.
- Tools for 3D design. These are voluminous beads, rhinestones, bouillons, intertwined threads. They may protrude above the surface of the nail.
Stickers, ribbons and foil
The most popular design accessories:
- Stickers are drawings on a durable adhesive base. They are applied to dry varnish and covered with a quick-drying transparent layer.
- Ribbons. There are different textures (from fabric to metal) and colors (plain, patterned, fabric design). They also have a sticky base and are applied to a dry coating.
- Foil. This is a special film with amalgam coating. The master applies it to the painted nail and presses lightly. The foil print is secured on top with transparent varnish.
- Signs of liver disease
- Chicken gizzards in a slow cooker - recipes with photos. How to cook chicken gizzards in a slow cooker with sauce
- Trainers for teeth
Glitter powder
It is not necessary to have a shiny polish in your arsenal - you can always add a little brightness to your nails with the help of a special powder. Small glitter comes in small plastic packages and can have different shapes: round, square, triangular, diamond. Glitter is applied to the top coat of varnish using a brush.
You can also add shine to your nails using special rubs. This is a fine powder with different shades. It is applied to a painted and dried nail and rubbed in using a sponge. Remaining powder can be easily removed with a brush.
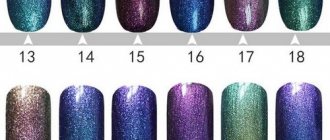
The most popular rubbing effects are metallic, holography, chameleon.
Beads and rhinestones
Colored glitters and films can be used alone or mixed with other design components. The most popular accessory for decorating nails is rhinestones. They are attached to a small drop of varnish, acrylic or embedded in gel. Rhinestones give a manicure design a special charm.
The beads are slightly larger than rhinestones and will rise noticeably above the surface of the nail plate. Professional masters use them only for decorating manicures that will be worn for no longer than 7 days. Beads are attached to acrylic or topcoat. There is also a smaller version of beads on sale - broths. They are used in the “Caviar manicure” design.
Stamping
If you don’t have the skills of an artist, you can always use ready-made drawings.
Stamping is a method of applying patterns to nails that does not require additional painting.
This is a nail art tool kit equipped with a stamp, stencil and scraper. Before applying the design, coat your nails with polish of the desired color.
Apply some paint to the stencil. Holding the scraper at a 45° angle, remove excess varnish. Press the stamp firmly onto the stencil with paint and roll it back and forth and on the sides a little. Use the stamp to create decorations on your nails by pressing it onto the desired area. Remove any remaining polish from the skin with a lint-free cloth.
Base and top coat
To ensure that the gel polish sticks well, a base coat is used. This is the first transparent layer that evens out the nail plate, hides minor imperfections and bonds the polish to the surface.
It is better to apply the base coat with a flat brush and dry it in an LED lamp for about a minute.
The top transparent coating is called topcoat. Its purpose is to fix the entire manicure and protect the varnish from external damage. The top can be matte (creates a coating without shine), with a sticky layer (this must be removed with a lint-free cloth) and without stickiness. It is recommended to apply the topcoat after creating the design. It is advisable to purchase the top and base from the same company.
Nail restoration products
With frequent use of gel polish, nails can peel off, become brittle and dull. The following tools will help fix the problem:
- Keratin masks. They contain liquid keratin, medicinal oils and vitamins. The base should be applied to clean nails and left for 5-7 minutes. Rub in the remaining mask with light movements.
- Strengthening varnishes. They contain calcium, wheat proteins and other beneficial substances. The varnish is applied once every 2-3 days to clean nails. The treatment course is 10–15 days.
- Restorative oils . They additionally contain vitamins and minerals. Such products not only strengthen the nail plate, but also make the cuticle softer and more pliable. The oil should be rubbed into the surface of the nail every day. The treatment course is 7–14 days.
