Being at the very first stage of the journey in the field of nail design, novice manicurists often make mistakes when purchasing the first basic set. This occurs due to confusion and a lack of understanding of what tools and tools will be required when working with clients.
First of all, you need to find out what sets of tools exist in the nail industry, what a novice master will need, as well as how to correctly form the first basic set and start working.
Ready-made starter kits - pros and cons
If you enter the request “Buy a starter kit for nail design” into a search engine, Google and Yandex will return thousands of relevant pages with offers to buy budget starter kits, but this is not the best idea for a novice master.
IMPORTANT! The main reason why you should not purchase a ready-made set made in China is its low quality. To attract buyers, manufacturers fill the set with cheap, low-quality goods and set an attractive price.
The right way is to independently purchase the necessary equipment and consumables according to the checklist that you will find in this article. The online store pilitte.com always has the necessary tools and consumables in stock. It is enough to decide on the direction in nail design and collect the necessary base.
List
The most convenient and fastest nail care is a neat manicure and varnish. What should you pay attention to when choosing a starter kit or purchasing all items and tools separately? What do you need for a manicure with varnish? A list of all materials and consumables is given below. First of all, study the market and decide on the amount that you can spend on everything you need. Thus, based on your budget, choose the brands of tools and other items that will suit you best.
So, what do you need for a manicure for beginners? Let's look at the list of tools:
- manicure scissors;
- files of different abrasiveness;
- scraper or pusher;
- trimmer;
- nippers (cutters);
- polishers.
This is what tools are all about. We will look at each of them in more detail later in the article.
What is a starter kit for a manicurist and why is it needed?
When starting to work with your first clients, it is important to have all the necessary tools at hand, because it is almost impossible to predict what kind of design they will be asked to make and what will be required for it. However, trying to please all visitors to your manicure salon, you should not buy up all the contents of the store for masters - this approach leads to the fact that unused gels quickly expire and go into the trash.
The basic set of tools will depend on what type of manicure the master decides to do. A prerequisite is hand washing before starting work, as well as disinfection of tools - so the kit always includes disinfectants.
ON A NOTE! Three large categories of necessary tools and products are disinfectants, manicure tools and gel polishes.
Each of these points should be considered in more detail in order to create the most detailed checklist for the first purchase.
What you absolutely need to know and be able to do
Before making big plans and counting future earnings, be patient. This profession, like any other, needs to be learned. Don't expect to acquire all the necessary skills on your own. You can find many video tutorials and useful materials on the Internet, but this is not enough. You should definitely enroll in courses that provide not only a theoretical basis, but also practice. Don’t skimp – give preference to qualified teachers with recommendations and international diplomas. You will need not only money, but also time, because in the case of manicure, skill comes with experience.
However, great desire, perseverance and financial investments are not a guarantee of a good result. The profession of a nail technician is not suitable for everyone. It is necessary not only to bring beauty to the hands of clients, but also to communicate with them, listen to their tastes and wishes. If working with people tires you, it’s better not to start at all. As practice shows, clients most often return to sociable and friendly professionals who know how to create a comfortable atmosphere during the session.
If you are ready to work with people, which is often tiring, and you are not afraid of the pitfalls of the profession, check out the most important skills for a novice master:
- it is necessary to learn how to work with mechanical manicure tools - files, buffs, nippers, scissors, orange sticks and others;
- possession of electrical equipment that a modern master cannot do without - a sterilizer, an ultraviolet lamp, an extractor hood, a device for hardware manicure;
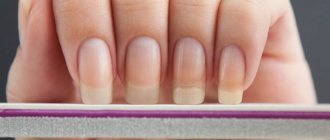
- knowledge of the anatomical features of the structure of the nail plate, nail architecture, basic principles of their processing and design;
- ability to use cosmetics for decorative manicure - primers, gel polishes, extension materials, base and top coats;
- knowledge of sanitary standards and rules that will keep you and your clients healthy, and are prescribed at the legislative level.
At the same time, you should not miss a single point, even if it seems unnecessary to you. Manicure is not only about beauty, but also about safety. It involves contact with the client’s skin, so it requires a careful and attentive approach. This way you will not only delight girls with amazing results on their nails, but also protect them from dangerous diseases.
Sterilization and disinfection of instruments
The key to the health of the master and clients is the correct, high-quality processing of all tools, so this step should not be neglected. It may seem to a novice craftsman that simply treating scissors and tweezers with an alcohol-based disinfectant solution is a sufficient measure, but this is not the case.
Anyone who wants to become a professional and do manicures for clients on an occasional basis should have in their arsenal special chemical solutions, as well as a dry-heat cabinet or a UV sterilizer.
At the very beginning, it is enough to use a disinfectant like Optimax Prof.
A complete set of tools and devices for high-quality sterilization of work equipment:
- disinfectant solution marked “for treating surfaces and instruments;
- hand sanitizer – the hands of the master and the client are treated before the procedure begins;
- box for pre-processing scissors and nippers;
- gloves - put on before starting processing;
- craft bags with adhesive base for sealing clean instruments;
- face masks or respirator. Protects the respiratory system from fine dust that appears when working with a router.
This may seem like an impressive list, and at the very beginning of work you can do without these devices, but this is not so. The better the master takes care of cleanliness and safety, the higher the level of service he provides, so you should set the quality bar high from the very beginning and not lower it.
Types of manicure, techniques
Everything about manicure for beginners is a necessary piece of information about the nail industry that will help a beginner begin practical training. It includes basic knowledge of the 3 main manicure techniques.
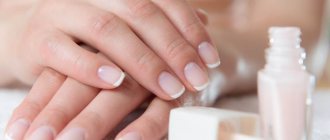
Classic manicure
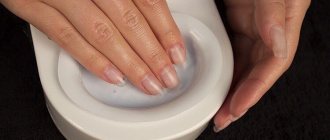
The very first manicure technique, which appeared several centuries ago. Undoubtedly, a lot has changed in it since its inception, but the essence remains the same - cutting the cuticle with cutting tools. To perform this technique, you will need a hand bath, detergent or foaming agent (optional), a towel, a pusher or orange stick, scissors or wire cutters.
So, the manicure process begins by filling the hand bath with warm water. For a more pleasant feeling, you can add a small amount of liquid or cream soap. Now you need to dip your fingers into this bath.
Holding time 7-10 minutes.
Next, each finger is pulled out one by one and wiped dry with a towel. After this, the cuticle is carefully pushed back with a pusher or an orange stick and the pterygium is cleaned from the resulting subcuticular space.
Now you need to make a cut so that the skin can be cut easier; you can slightly stretch it with the finger of your other hand. At the end of the procedure, if gel polish is not required, it is advisable to moisturize and nourish the cuticles and hands with oil, lotion or cream.
So, this type of manicure has several advantages:
- Availability. Any girl can perform a manicure, since there is no need to buy expensive equipment.
- Thanks to preliminary soaking, even inexperienced professionals or ordinary girls will be able to cut the cuticle and get rid of rough skin without much difficulty.
Unfortunately, there are several disadvantages:
- High risk of cutting yourself. Cutting tools are dangerous even in the hands of an experienced craftsman. It's always possible to accidentally press too hard, position your hands incorrectly, or cut too deep. You can get injured in an instant.
- Lack of complete security. If a client comes to a salon or to a professional at home for the first time, you should definitely ask about how the instrument is sterilized. This is a very important aspect that definitely cannot be missed. Because we are talking about our own health.
- For some girls, the cuticle grows faster after a classic manicure.
Combined manicure
At the moment, this is the most common technique that combines the main advantages of hardware and classic manicure. For this technique you will need a manicure machine, a cutter with a “flame” shape, an orange stick or pusher, scissors or wire cutters.
The manicure process begins with pushing back the cuticle with a pusher or an orange stick. Movements at this stage should be smooth and careful so as not to go too deep and injure the nail plate.
Next, using a milling cutter, the pterygium is cleared from the subcuticular space, while lifting the skin upward for a quick cut. The movement is carried out to the middle of the nail, then the direction of the cutter is switched and the other side is processed. After this, the remaining cuticle must be carefully cut off with scissors or nippers.
Combined manicure has the following advantages:
- A variety of cutters allows you to create a quick, safe and deep manicure even for girls with sensitive skin and closely spaced capillaries.
- The combination of techniques allows you to make the most precise and even cut.
- For some girls, with the correct technique, the time for cuticle regrowth noticeably increases.
- Lower rate of cuts and wounds.
Unfortunately, there are also disadvantages:
- A wide variety of cutters is needed. For each client, it is necessary to select the ideal shape of the cutter and its degree of rigidity.
- Only with a lot of experience and knowledge can you create a truly ideal combined manicure. That is why the master will have to take a single training course.
Hardware manicure
This is the newest manicure technique that is only gaining momentum. There are many nuances in its execution that need to be worked out in practice. That is why it is better for a master who wants to learn this type of manicure to take an additional course, perhaps not even one.
To perform the hardware technique, you will need a manicure machine, a pusher or an orange stick, a flame cutter, a ball or barrel cutter, and a soft cutter for final polishing.
The article tells in detail everything about hardware manicure for beginners.
First you need to carefully push back the cuticle with a pusher or an orange stick. Now, using a “flame” cutter, you need to clean the spaces under the cuticle and lift it up, creating a so-called “skirt”.
Next, using a “ball” or “barrel” cutter, you need to make a cut. To remove short remnants of leather, most craftsmen recommend sanding with a soft milling cutter using special oil.
So, hardware manicure has the following advantages:
- Hardware manicure is the safest. Due to the absence of cutting tools, the risk of cuts and wounds is minimized.
- With constant use of this technique, the time for cuticle regrowth also increases.
- Working with dry cuticles prevents the development of fungus.
- The technique is ideal for people with dry skin and a lot of hangnails and wounds.
- The technique is ideal for diabetics as it minimizes the risk of cuts.
The hardware manicure technique has a number of disadvantages:
- It is not advisable to perform it if the cuticle is wet and thin, because removing the skin will make it more difficult and dangerous.
- Requires the purchase of expensive materials. To perform a hardware manicure, you need a device and several cutters, which cost quite a bit.
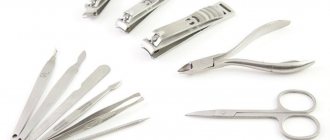
Manicure tools
One of the main categories of accessories is metal tools. It is important that all scissors, pliers and pliers are of high quality - it is recommended to purchase tools only from a reliable store.
Basic set includes:
- manicure cuticle scissors Staleks EXCLUSIVE;
- file with replaceable Kodi abrasives;
- cuticle shovel (pusher) Staleks Beauty.
All devices to get started are functional and ergonomic, which allows the master to quickly perform processing and hone the technique of performing a particular manicure.
IMPORTANT! The first stage of any manicure is processing the cuticle. Decide in advance what type of manicure will be the main one - trimmed or untrimmed, and depending on this decision, purchase cuticle scissors or a set of orange sticks to move it to the base of the nail without removing it.
A separate question often raises the required number of nail files. The more there are, the better. Just don’t need to purchase 10 types of the same file; it’s better to buy a set of different files according to the degree of hardness - from 200 to 1200 grit.
The most consumable option is 200-400 grit files, since they are used to work with extended nails and polish them - up to 10 such files will be required to get started, with the possibility of further purchasing.
Important nuances
You've probably thought about the cost of all the goods you'll need to add to your professional arsenal. If we summarize, we can determine the approximate amount. It is about 50 thousand rubles - this is enough to buy inexpensive but high-quality equipment, materials and tools.
It is better to purchase a starter kit at one time - consider it as a reasonable investment in development and promotion. You can save on electrical equipment by choosing the simplest models without fancy functions. At the same time, do not spare money on good gel polishes and liquids, files, scissors and nippers - the result of your work and the mood of your clients depend on them.
When will income exceed expenses? Practice shows that financial investments will pay off after 3–6 months, depending on the number of clients, your diligence and hard work. By working daily, you will quickly gain profit and start earning decent money for your services.
As you can see, the profession of a manicurist should not be romanticized - at the first stage it requires time, effort and finance. You also need to spend money on training, courses, master classes, and advanced training. Certified products from well-known brands presented in the Royal Gel online store will help you avoid unpleasant surprises and create exceptional beauty.
Gel polish
Purchasing a set of gel polishes is the most exciting part for a beginning artist, but at the same time, it is a significant expense item. In order not to accumulate extra funds at the initial stage, you need to decide on the basic shades, and also study nail design trends in order to understand what requests clients will come with.
To get started, it is recommended to purchase a set of 5-8 basic shades, for example: black, white, beige, red, pink.
Also, to replenish the collection of gels, the master can purchase one non-standard, but popular set, for example, for performing a design using the cat's eye technique - this manicure option has remained relevant for several years. The Gellaktik illusion set contains three of the most popular shades.
In addition to the gel, you will need products to prepare nails for extensions - base, primers and bonders. The use of these products is necessary in order to ensure a good connection between the gel polish and nails and to degrease the nail well. After the nail is degreased, the extension process itself begins, which will require three main products - a base, colored gel polish and top coat (finish coat).
Colored gel polishes can be selected according to the time of year - this way you can save on purchases and not buy all the shades at once. In spring, the most popular colors are pink, green, beige and red. In winter - blue and dark blue.
Necessary materials
materials are needed for nail extensions :
- gel;
- tips;
- primer;
- cuticle oil;
- forms;
- degreaser;
- napkins;
- finish.
For high-quality extensions, you should pay special attention to the choice of materials. The gel should not be the cheapest and should not have a strong odor.
Let's take a closer look at the process of choosing materials for beginners and what you should pay attention to when purchasing them.
Gel
Gel for nail extensions is the main material in the master’s work. It should be chosen with extreme care and attention. Gel happens:
- Single-phase. Standard option for extension material. This gel is considered the most economical and multifunctional. One product is used as a base, anchoring and modeling;
- Two-phase. The gel contains 2 components that: cover;
- protect;
- form the nail plate.
Gel for nail extensions can be transparent and colored, but this does not affect its hardening under UV rays. Its speed depends on the quality of the material and its application scheme.
At home, a single-phase type of gel polish is used.
Tips
Tips are plastic molds that look like natural nails. When doing nail extensions, they are needed to increase the length of the nail plate. Tips can be of different shapes and lengths, colors and designs, and the material from which they are made differs.
When choosing tips for nail extensions, you should give preference to a type that is close to the shape of the nails. This will allow them to be firmly installed and avoid deformation of the nail plate. Also, when choosing a material, pay attention to the material of manufacture. They should be soft, but not breakable.
To give the tips the desired shape, do not cut them with nail scissors. To carry out this procedure, there is a special tool - a tip cutter.
Tips are divided into sizes - there are 10 in total. Numbering is from 1 (smallest) and above. When using the material, the numbers are removed with a nail file.
Primer
Nail primer is a product used to degrease the nail plate in order to prepare it for the application of gel for a long period. The material protects the nail from exposure to chemically harmful substances.
The primer cannot be dried in a UV lamp.
In the process of gel nail extensions, the primer can be replaced with simple vinegar or alcohol. These two products do an excellent job of degreasing the nail plate and disinfecting it.
Cuticle oil
Applying oil to the cuticles is the final step in gel nail extensions. It is used to prolong the effect of trimmed manicure. Thanks to the oil, a woman can forget about the need to trim her cuticles until her next extension correction. And this is approximately 4-5 weeks.
Finish
The main task of the finish is to preserve the gel coating for a long period. When applying a high-quality finish, you can forget about re-extension for 3-4 weeks.
Finish gel comes in two types:
- With a sticky layer. This type of material covers the entire nail to preserve the design for a long time. If you do not cover the design with a finish with a sticky layer, the design will crack and look sloppy;
- No sticky layer. This finish polymerizes quickly and does not require further removal.
Popular finishes include the following brands:
Finish gel Planet nails
Finish gel Kodi
Finish gel for CND extensions
Gel polish lamp
A mandatory attribute of a master in the field of nail design is a lamp for drying gel polish. It is not recommended to save on the purchase of such a lamp, so that in the future you do not have to change it every 2-3 procedures. It is best to immediately purchase a high-quality model that will last a long time and dry the varnish well.
To make the right choice of lamp, you first need to find out what devices are sold in specialized stores. There are three types of lamps - UV, LED and mixed.
For a novice master, an LED lamp is best suited - it lasts longer, does not break, and most importantly, dries nails quickly. A good option is SUN 5 plus
.
However, if you need to save money, you can also purchase a UV lamp at the very beginning.
Differences and advantages of professional tools for manicure and pedicure
Tools for professional manicure and pedicure must be reliable and of high quality. The convenience and effectiveness of nail treatment depends on their characteristics.
Distinctive features of professional tools:
- They are made of expensive medical steel, which is not susceptible to moisture and corrosion.
- The cutting blades are sharply sharpened and do not have chips or irregularities.
- They do not require frequent sharpening and remain sharp for a long time.
- All connections are strong and reliable.
- The tools fit comfortably in the hand and are easy to use independently.
- The smooth stroke allows you to work with your fingers carefully.
The article discusses in detail all the necessary tools for a professional manicure.
Good tools have an attractive appearance. Some manufacturers produce kits made of metals coated with color.
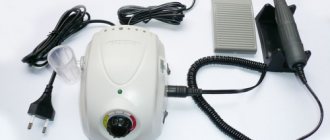
How to choose a device
A manicure machine is a must-have tool, without which it is impossible to achieve the ideal shape of your nails. There are several types of devices, and before you buy one of them, you need to understand the features of each type.
IMPORTANT! It is very difficult to work on cheap equipment - it often jams, so the recommended option for beginners is a device in the middle or high price category. This is the only way to avoid cuts, injuries and burns, and as a result, the loss of your first clients.
When choosing a device, the master must answer three questions: will the device be used at home or in a professional office, is it planned to create only a manicure, or also a pedicure, and also, does he have experience in handling the device, or will it be used for the first time.
When choosing a device, you need to consider the following characteristics:
- Power.
This is the most important indicator on which not only the cost, but also the quality of the device depends. For a beginning master, a great option is a manicure machine with a power of at least 30 W. Such a device will work properly and will not break down at the most inopportune moment. - Rotational speed.
Depending on how fast the cutter rotates, the degree to which the top of the nail is cut changes. The optimal option for a beginner is about 30,000 rpm - this information is always indicated on the packaging with the equipment. If you choose a device with a higher speed and do not train in advance, you can make mistakes, so to begin with it is better to work more slowly, but efficiently. - Cutter clamp.
On sale you can find devices with automatic, manual and semi-automatic clamping options. For a beginner, an automatic or semi-automatic clamp is best. This is due to the fact that inserting cutters manually is quite difficult; you need to know how to do it correctly, and during one manicure session the master changes the type of cutter up to five times. However, a device with an automatic clamp also requires careful handling - if you forget to insert the plug after completing the procedure, you will have to take it for repairs. It is recommended that you carefully study the attached instructions.
To get started, high-quality Marathon brand devices are suitable, for example, Marathon 3 Champion, which has several operating modes, the ability to switch forward or reverse reverse, as well as a special compartment for storing burs and polishers.
The cost of manicure machines is quite high, so to get started, you can choose an inexpensive model of average quality, but from a good manufacturer.
What to look for when purchasing
Despite the enormous variability of offers, when buying a starter manicure set, a novice master needs to take into account several main points:
Now regarding the brand. It seems that the more famous a brand is, the higher quality its products are supposed to be. But this belief is not always justified. Today, even less “advanced” manufacturers are trying to supply the market with products of excellent quality. Don't neglect starter kits from unknown manufacturers! Sometimes they are no different from branded options, but are much cheaper.
Choosing cutters for manicure
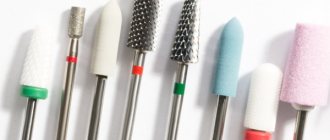
A set of cutters (attachments) of varying degrees of hardness is purchased separately for the manicure apparatus - soft, very soft, medium or very hard.
Visually, all types of cutters differ in the degree of rigidity and the color of the notches - a novice nail artist will need cutters with blue, green and red notches. For those who are doing a manicure for the first time, or are just training with tips, it is recommended to use a cutter with blue notches, for example, TBC
.
Types of cutters for different tasks: for removing coatings - fine-toothed, cone-shaped and for treating the surface of the nail and skin - diamond. It would be better if the basic set included both.
In the field of manicure, names such as “flame”, “ball” or “needle” are used - they correspond to the shape of the cutter. A “flame” cutter is used to remove the cuticle and process side ridges, a “Needle” is used to remove pterygium, and a “Ball” is used to process burrs. If you have no experience in processing rollers and nail plates, the “Ball” cutter will be suitable for the first time.
Nail Edge Tools
We looked at what you need for manicure and cutting cuticles. But to process the free edge of the nail, a file and a buff (polisher) are used. Files come in different shapes and degrees of abrasive (hardness). For natural nails, you need a glass tool with a fine abrasive coating, and to work with artificial material, coarse files are used.
Buffs are needed to treat the surface of the nail in order to cut off the glossy layer, so the coating will adhere better. Popular filing areas are used only for sharpening strong nails that are not prone to peeling.
Auxiliary tools and basic consumables
In addition to the main devices, such as a lamp, a manicure machine and gels, the master also purchases auxiliary and consumable materials - they need to be regularly updated and replenished, so at the first stage there is no need to completely fill the desk drawers, it is enough to select the essentials in the amount of 5-6 pieces per item.
Types of consumables:
- gloves – 1 box. A master who works with gloves not only ensures safety for himself, but also shows respect for the client;
- masks – 1 pack. Masks are used not only to protect against viruses - they also need to be worn when working with the device, since fine dust from the nail being filed scatters throughout the office;
- brush for removing dust. Wiping the table with a cloth will not be enough; fine dust gets clogged into the manicure machine and other areas;
- cotton pads. It is better to choose discs and, in addition to them, lint-free wipes. Before you do your first manicure, it is recommended to test them on yourself, since even the smallest particle of lint can greatly spoil the design and complicate the task;
- nail polish remover;
- acid-free primer;
- rubber base;
- cuticle oil.
Also, consumables are purchased for nail design - glitter, rubbing, rhinestones and sliders of different colors.
How to get the hang of a novice master
The profession of a manicurist requires practice and constant improvement of acquired skills. At the first stage, training is very helpful - we are not talking about online courses, but offline lessons, where each technique will have to be honed on a model. It may be difficult, and a manicure procedure with the simplest coating will take you several hours.
Over time, you will learn to do everything as quickly as possible - from cleaning to design. Professional masters do a single-color manicure under the cuticle in 40–50 minutes. But this ability comes with experience - after many weeks of struggling with sagging, unevenness, detachments and other unpleasant surprises. Hone your skills on those close to you - the price tag can be set to a minimum, because your first clients will not always be delighted with the result.
General recommendations for beginners when purchasing a starter tool kit
To make starting work as easy as possible, the master should take care in advance of having all the necessary materials, but most importantly, check their quality. Saving is not the best option when it comes to providing nail design services, especially if you want to develop a base of regular customers.
FOR YOUR INFORMATION! Cheap gels and bases do not stick well to the nails, causing chips and cracks to form - all this contributes to customer dissatisfaction, which is best avoided. In addition, materials of the middle or high price category are much easier to work with - they “lay” on the base easier and more beautifully, dry faster and hold up well.
In addition to cost, you should pay attention to such characteristics as; expiration date, presence of markings with the batch number and manufacturer, integrity of the packaging, as well as the presence of a warranty card.
The easiest option is to purchase a complete starter kit, but this is not recommended - most often such kits are of dubious quality and are produced in cheap factories in China.
A good way is to assemble the first set yourself, taking into account the chosen direction in nail design, the season and the expected number of first clients.
Trimmer
This device is able to remove cuticles and hangnails, which in turn prevents the appearance of the latter. The working surface of the trimmer resembles the Latin letter V, its edges are very sharp. With slight pressure, the cuticle is cut off. A cheap tool quickly becomes dull, so it is important to pay attention to the quality of the material from which it is made. A dull trimmer can easily tear the skin, resulting in hangnails and wounds. The handle, for example, should not be made of thin plastic, otherwise there is a risk of cracks, and the tool will have to be replaced in the future.
Common mistakes when purchasing a starter kit
A novice master is not familiar with the market for nail design products, and because of this, he makes a lot of mistakes, wasting time and money. To avoid this, it is recommended to choose one trusted store, for example, pilitte.com, and gradually, step by step, replenish your stock of working tools.
Mistake #1.
Buying a cheap lamp. Due to the huge list of necessary materials, beginning craftsmen save on a lamp by purchasing the cheapest option, but this often results in the need to purchase new equipment within a week or month after use. Chinese models under 1000 rubles are strictly not recommended for purchase.
Mistake #2.
Purchasing a ready-made set of gel polishes that do not match the colors for the season. For example, in winter the least popular shades are pink, yellow, blue, and if they are in the set, they will last until the weather warms up and will most likely be out of date.
Mistake #3.
Lack of necessary consumables, such as cotton wool, degreaser, files of varying degrees of hardness, orange sticks. In an effort to acquire “everything at once,” novice artists often forget about the most necessary little things, without which nail extensions become impossible. To avoid this, you should use the ready-made checklist below and purchase all consumables according to the list.
Sharpening a manicure tool
In order to extend the life of your manicure set, you need to take care of it:
- clean it after each use;
- do not forget to put on special protective caps or place them in cases;
- do not use the tool for other purposes;
- sharpen dull edges.
If while working you notice that your tools have become dull, there are several ways to solve this problem:
- use the services of an individual master, who can be called to your home, and he will solve the problem using manual grinding;
- contact a workshop where experienced craftsmen will sharpen on a professional machine and give a guarantee for the service life;
- sharpen yourself at home.
If you decide to sharpen at home, you will need a regular carbon steel file.
Step-by-step sharpening:
- We eliminate the backlash.
- Clean the hinge joint.
- We sharpen the planes of the blade.
- Sharpen the corners of the blade.
- Sharpen the outer cutting edges.
- We polish the “cheeks”.
- Polish and lubricate.
A complete checklist of tools and consumables for a beginning nail artist
To make your first purchase of material easy and quick, follow the checklist:
- Desktop. If at home or in your office there is no table that is comfortable and suitable in height, it is better to buy one before starting work.
- Desk lamp. The master must be able to clearly see the client's hands, so even when it is light outside, a lamp with white light will be required.
- A manicure machine and a set of cutters with a blue notch.
- Lamp for drying gel polish – UV or LED.
- Dry heat cabinet and/or a set of disinfectants.
- Manicure tool pre-treatment box.
- Manicure scissors for cuticles.
- Cuticle spatula.
- A set of files with different degrees of abrasiveness.
- A set of craft bags for sealing clean tools.
- A set of gel polishes of different shades, primer, base and top.
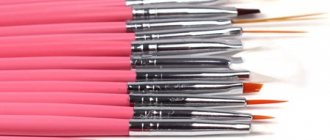
- Design brushes.
- A set of rubs, glitters and magnetic gel polishes.
- Consumables: gloves, face masks, nail polish remover, cotton pads and swabs, cuticle oil, sticker forms for nail extensions.
A novice craftsman will also need a set of tips and a stand to practice his skills. It is recommended to make several types of nail designs on tips in order to estimate the material consumption, the number of certain colors and draw conclusions about the need to purchase additional consumables.
The set for starting is impressive, therefore, if you are planning to become a nail artist, you should take care of your savings in advance, and also understand whether you want to engage in nail design on an ongoing basis.
If you really have a desire, but don’t have enough savings, you can start with one type of design and purchase the necessary consumables for it, and then, in the process of working with your first clients, make additional purchases of materials. The most important thing is not to give up and continue your business, only in this case you can become a first-class master and earn the trust and love of clients.
What can't you do without?
Of course, it is impossible to start immediately from scratch: you need to have special tools and equipment. Among them are the following.
Furniture
Yes, yes, you heard right. You will have to purchase not only materials and tools, but also furniture . The main rule is that it must be multifunctional. Modern manufacturing companies offer a wide range of products, but the following items are in particular demand:
- manicure tables;
- manicure trolley with stand and bath;
- master chairs.
What equipment should I buy?
First of all, you should pay attention to lighting . Choose good ceiling lights, as well as table and spot lamps that direct the light to a specific point. In addition, purchase sterilizers. Their roles are:
- dry heat cabinet;
- autoclave or ultraviolet box sterilizer.
The equipment also includes a lamp for drying nails. Today there are two types:
- LED;
- ultraviolet.
Note ! If you choose a UV lamp, choose a soft spectrum one, as they provide the fastest drying of your nails. For a beginner, any will do.
In professional salons, you can most often find an LED lamp for drying. It is more durable and consumes only 40 watts. It also makes sense to purchase a manicure machine for mechanical filing of nails. With it you will save energy and time. However, remember that using the device requires some skill, so practice on mannequins before using it.
The next thing you should buy is a desktop vacuum cleaner for manicure . Its very presence indicates that the master is an expert in his field and cares about the health of his clients, because the vacuum cleaner can protect against such troubles as:
- allergy;
- dyspnea;
- polluted air that prevents free breathing;
- pain in the eyes from dust from nails;
- dust settling on furniture and clothes.
Sterilizer for manicure:
Nail drying lamp:
Desktop vacuum cleaner:
What tools will you need: list
To get a salon-like manicure, be sure to have the appropriate set.:
- nail scissors;
- nail file – for finishing filing;
- sticks and “pushers” - for pushing back the cuticle;
- special scissors for cutting cuticles;
- buff (emery file) – for “sanding” the nail;
- brush – for sweeping away the resulting dust.
As you gain more experience, the range of tools will increase to include things like:
- Suede leather. Used to gently polish delicate or damaged nails. Be sure to use only natural fabric.
- A set of thin brushes for creating nail art.
- The thinnest tweezers for fixing rhinestones and other small details on the surface of the nail plate.
Working materials - gel polishes, bases, tops, etc.
The next thing you need to create a manicure is a set of cosmetics. It includes:
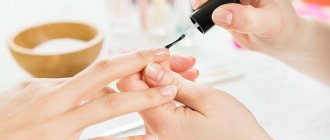
- Degreasers . This is where the process begins, otherwise the gel polish may peel off. The product will degrease the surface of the nail and prepare it for subsequent application of varnish. Primer, prep or bonder are perfect.
- Base . A transparent liquid that is applied under colored polish for better adhesion of the nail to the gel.
- Colored gel polishes . To get started, a small set of red, black, nude colors and a set for a French manicure will suffice. But you can buy a set that includes 6 or 12 shades.
- Fixer tops . Apply over a colored coating to protect against chips and scratches. Toppers also extend the life of your manicure.
For design
To become a professional in your field, it is not enough to learn how to make an even, durable coating. You also need to learn nail art - the art of painting on nails. Jewelry that you can purchase both in a specialized store and in an online store will help with this. Particularly popular are :
- Rhinestones and metal jewelry . They come in different types, sizes, shapes and colors, which will add shine, volume and personality to your manicure and give it a festive look.
- Sequins . There is a whole extravaganza here: mica, shimmers, confetti, sand, even crystal chips. There is a choice for every taste and budget!
- Foil . Used to finish the design of nails. It comes in tear-off, transfer and in the form of fragments.
- A variety of stickers, stickers, sliders and stencils . With their help, you can create an interesting manicure in a matter of minutes.
- Rubbing and powder . It will give your finished work the effect of metal or mirror.
- Stamping . This is a kit that includes a silicone stamp and stencil. Ideal for those who have not yet learned how to paint their nails by hand.
- Liquid rhinestones . A new word in manicure. Used as a stand-alone coating or for design.
Glitter for nail decoration:
Foil for nail art:
Stickers for nail design:
Consumables
In any work you cannot do without little things that at first glance seem unimportant. It’s the same in the manicure business. So, the following materials are used as auxiliary materials:
- nail polish remover;
- silicone mat for the convenience of the client and the master himself;
- cotton swabs and disposable napkins;
- special cuticle remover;
- moisturizing hand cream;
- a bath and a bowl of medium depth for steaming hands;
- liquid soap, essential oils or aromatic salt;
- gloves;
- antiseptics for treating skin, tools and surfaces;
- medical protective mask.
Keep in mind that disposable paper towels and disposable wipes are always purchased in excess of twice as many customers. For example, if you receive 10 people per day, then you should prepare 20 napkins, and 100 pieces per week, subject to 5 working days.