Peculiarities
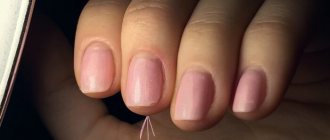
Nail plates in the shape of an “arch” look not only aesthetically pleasing, but also stylish. This extension is acceptable for any coating and different designs.
Professional nail specialists will help you choose a technique for extensions and create a manicure from acrylic or gel. You can use ready-made products to match the shape of your nails or perform the procedure directly on the plate, which is acceptable for those with brittle nails. This technology is not suitable for independent implementation, since there are many subtleties of the process.
- When building in an arched form, the resistance of natural and artificial plates to external influences is maintained.
- The procedure is done once a month. Considering that natural nails grow faster, you have to resort to correction.
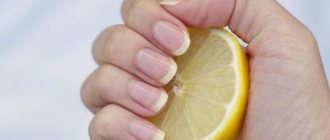
- The condition for helium extensions is that a couple of days before the start of the procedure, you need to have a trimmed manicure.
- With the help of extended manicure, a beautiful and even shape of the nails is created.
- Nail plates become stronger.
- There is a guarantee of long wear of the artificial product until the first correction.
Infections after nail extensions
When using non-sterile tools for nail extensions, various types of infections may appear that violate the natural integrity of the natural nail. When the gel or acrylic layer on the nail is damaged, a small gap (air gap) appears, which is an ideal environment for the proliferation of pathogenic fungi and microorganisms. If the damaged nail is not freed from the artificial layer, this can lead to negative consequences.
gribok-nogtej-pod-gelevim-nogtem
It is worth remembering that even after high-quality extensions, the nail plate weakens significantly, which increases the risk of infection with many fungi and infections. If you find a damaged nail, it is recommended to go to a salon or remove the artificial layer yourself using a file. Treatment of fungal infections takes a fairly long period of time, which averages 6 months. If you do not consult a doctor in a timely manner, there is a high probability of losing your own nail and damaging the soft tissues of the hands. Manicurists and doctors advise constantly monitoring changes in the color and structure of the nail plate.
Technique for nail extension using tips
Tips are plastic plates that are attached to the natural nail and are not removed at the end of the extension. They consist of a free and contact zone. The latter is attached to the nail, and the free part serves as its regrown edge.
Tips are used on any nails, even very thin and damaged ones. They strengthen the natural nail and are characterized by sufficient strength. When working with tips, the main thing is to select the correct shape and size, otherwise the manicure will look sloppy.
Care during treatment
Until a new nail grows after stripping and its connection with the nail bed is restored, gentle care will be required.
It is forbidden:
- apply any irritating substances to the nail of the affected finger;
- paint your nails with varnish or try to disguise the defect with gel polish;
- wash dishes, use household detergents without gloves;
- use sharp instruments when performing a pedicure or manicure.
Take care of the health of your nails! Visit a podiatrist periodically to detect violations in a timely manner. To treat onycholysis in Moscow, ingrown toenails, fight against onychomycosis, calluses and other problems, contact the Eva Korneeva Podology Center for professional help from specialists with more than 10 years of experience.
Make an appointment by phone.
Disadvantages of gel extensions
We already know how long gel nail extensions last. This is their huge advantage. But it's time to mention the shortcomings. Compared to acrylic coating, gel is more brittle and fragile. Even if an acrylic nail can be easily corrected or simply repaired, then if the gel plate breaks this issue disappears by itself, because it cannot be repaired. The broken nail will simply need to be removed and a new one made. The gel also cannot withstand very sudden changes in temperature conditions; it instantly begins to crack. Popularly, gel tip extensions are called reinforced concrete, which means it will be very difficult to remove such luxury. Only the filing procedure will help - long, tedious, and very careful so as not to damage the natural nail.
What is needed for nail extensions on forms?
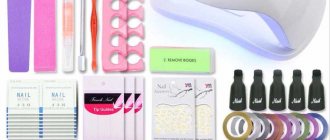
To model gel nails you will need:
- Antiseptic.
- Composition for removing cuticles (or a bath to soften it).
- Pusher.
- Nippers for removing skin around the nail.
- Degreaser to remove the sticky layer.
- Several files of different abrasiveness.
- Buffs for polishing.
- Brush for removing dust after polishing.
- Gel coatings: base and top.
- Colored coating.
- Gel.
- Primer (for bonding extended and natural nails).
- Forms.
- Brush.
- Lint-free wipes (for treating nails with a dehydrator).
- Lamp.
Technology and necessary tools
It is best to have your nails strengthened with acrylic at a professional salon. The master will tell you in detail about the coating technology itself and prepare your hands for the procedure. Acrylic hardens quickly, so the process itself takes little time. If you wish, you can perform this procedure at home. And we will tell you how to cover your nails with acrylic yourself. First you need to buy special products. Choose high-quality proven materials, because the condition of your nails will depend on this. You will need:
- degreaser;
- acrylic liquid;
- tassels;
- manicure set (orange stick, files, brush, etc.)
Coverage step-by-step guide
Wash your hands with soap. You can take a relaxing bath. Then do a regular hygienic manicure: give your nails the desired shape, polish them, remove all dust from the nail plate with a brush and push back the cuticle. In the process of strengthening nails with acrylic, the cuticle is not removed, it is only pushed back with an orange stick. Degrease your nails with a special product. If it is not available, this can be done with alcohol. Dip the brush into the acrylic liquid and gently apply it to the nail plate, avoiding the cuticle.
It is important that the acrylic is applied in an even, thin layer. After a couple of seconds, apply a second coat. It should also be fairly thin and even. After a couple of minutes, when the acrylic coating has completely dried, use a sanding file to remove any unevenness from the nail. Apply special oil to the cuticles.
The acrylic coating is ready. Assess the condition of your nails before and after the procedure. Now your nails look shiny, well-groomed and healthy. The acrylic coating can be removed using a special liquid. Soak a cotton pad in the remover, apply to the nail, then wrap your fingers in foil for 10 minutes. Then carefully remove the coating with an orange stick.
There is another option for the procedure with acrylic - strengthening with acrylic powder. You can also buy it in a specialty store or order it online. The method of strengthening with powder is similar to the process of applying acrylic coating. Complete the first two points, that is, get a manicure and degrease the nail plate. Then dip the brush into acrylic liquid and squeeze well. Next, dip the tip of the brush into acrylic powder. A small ball should form on it. Apply this ball to your nail. While the acrylic is still wet, use a brush to stretch it over the entire surface of the nail. You can apply any color of varnish on top, decorate your manicure with designs, rhinestones, etc. For examples of spectacular manicure, see the photo.
Technique for nail extensions on forms
The extension procedure itself begins with the correct fixation of the form. The final result of the manicure depends on this. Therefore, it is necessary to devote enough time to the stage of securing the workpiece. If you are using a reusable template, just select the desired size and accurately place it on the nail.
When using soft blanks, the master needs to adjust the slot in the form in advance to the size of the client’s nail plate. Then the form is tightly fixed on the nail without gaps or gaps to avoid getting the gel under the workpiece. After installation, you need to look at the curves from all sides to ensure the aesthetic appearance of the future nail.
When modeling nails, you must first treat 4 fingers of one hand , and then do the same procedure on the other limb. Thumbs are treated at the very end to avoid runoff of the product while working. Modeling involves the technology of applying gel to various parts of the nail.
The nail is divided into the following zones:
- The cuticle is the area of the nail at the base.
- The stress area is the largest part, which includes the nail, the transition of the tip of the nail to the template and the beginning of the workpiece.
- The free edge is the future tip of the artificial nail.
The cuticle is covered with the thinnest layer of gel, which is compacted closer to the beginning of the form. The thickest layer should be in the area from the tip of the natural nail to the beginning of the template. The tip of the extended nail is also applied thinly.
The final stage of modeling is polymerization in drying for 2 minutes.
Strengthening with modeling materials
The modeling material for the nail can be gel or acrylic. In what cases do you resort to strengthening a natural nail? If you like the thickness and shape of the nail, but are not satisfied with the length, then it is recommended to strengthen the plate. This allows you to overcome the critical length when your nails break.
The natural nail plate is covered with a thin layer of acrylic or gel, slightly filed, sanded a little, polished, and then varnished. After two weeks you can make a correction.
However, strengthened claws do not have the same strength as extended ones, but are much stronger than natural ones. The procedure for strengthening with gel and acrylic is done as a full-fledged extension, the only difference is that the thickness of the material is less.
Nails that are strengthened with synthetic material do not change their properties. They will be stronger as long as they are covered with gel or acrylic. This material does not perform any therapeutic function; it simply mechanically makes your plate stable and elastic, helping it not to break. However, as soon as this artificial material is removed, the nail will return to its original state.
What to do if your nails are peeling off the gel
If your health is in order, then you should change your manicurist, or choose material from a different company. For girls who want to do their own manicure, it is advisable to take training courses, and then write out a reminder for yourself with all the stages of work. By updating your manicure once a month, you may forget some details. The main thing is to maintain sterility and monitor the instrument.
If it’s a matter of how you feel, then you should immediately go and see a doctor. Before this, the gel must be removed. It is better if a master does this, carefully preserving the native nail. The technician needs to be warned about the problem, because the fungus is transmitted through hands. If you are allergic to the material, then it is useful for the master to know about such a dangerous reaction in the client.
Treatment of onycholysis
Treatment should be comprehensive, especially for advanced cases. First, the doctor conducts an examination and the necessary examinations to determine the causes and contributing factors in the development of the pathology.
Among the means and methods of general influence, physiotherapeutic procedures, massage, probiotics, and angioprotectors are used. In addition, yeast extract, amino acid and vitamin-mineral complexes for oral administration are recommended, containing:
- vitamins of group “B”, stimulating metabolic processes, improving the function of peripheral nerves, etc.;
- antioxidant complex in the form of vitamins “A”, “E” and “C”, beta-carotene, which stimulates regeneration processes;
- macro- and microelements, especially with a high content of calcium, sulfur, zinc, copper and iron.
Local treatment at home consists of cutting off a section of the nail at its edge. Solcoseryl in the form of an ointment or gel helps to get rid of onycholysis. This drug, which improves blood circulation in tissues, has angio- and cytoprotective, antihypoxic, membrane-stabilizing and regenerative properties.
In the presence of a fungal infection, antimycotic drugs Mikospor, Lotseril, Ketonazole, Intraconazole, Batrafen are used topically. But the most effective (in the presence of a fungal infection) is the treatment of onycholysis with Exoderil, which in the form of a solution or cream is applied to the affected area and surrounding areas twice a day. The duration of therapy with this drug depends on the speed of recovery of the nail plate. The maximum course of treatment for hands is 6 months, for legs - from six months to 1 year. If the course is persistent, it is necessary to use antifungal agents not only locally, but also systemically.
Other emulsions and ointments are also used for onycholysis. Thus, for the purpose of prevention or in the presence of a bacterial (streptococcal and/or staphylococcal infection), synthomycin emulsion or heliomycin ointment is most often used, which are applied to the bed at the site of nail detachment and to the affected areas of soft tissue up to twice a day. Levomikol and Vishnevsky ointment, containing castor oil, birch tar and xeroform, have good antiseptic and regenerating properties.
Modeling using extensions
An artificial nail is not just covered with gel or acrylic, but an artificial one of the correct architecture and corresponding to certain parameters, which ensures the duration of the manicure. Extended claws are gaining great popularity today. However, it must be remembered that any innovation will have both advantages and disadvantages.
First you need to decide on the material for a piece nail, finding out all the pros and cons of acrylic and gel.
Gel is a less allergenic raw material. Under such material the nail feels more comfortable, but it cannot be restored if damaged. After damage, gel extension plates must be completely removed and a new one added. Therefore, manicurists give preference to acrylic, which hardens easily without the use of additional equipment, and removing nails extended using this technique is easier.
Care for gel nails
Extended nails need care
In order for a beautiful manicure to last for a long time, you need to take proper care of your nails. Masks and creams should be regularly applied to the cuticle, and it is better to avoid baths. It is forbidden to knock your nails on hard surfaces or click them; in the first couple of days you should not work at the computer for a long time and go to the bathhouse or sauna.
All housework should be done with gloves. You are not allowed to file your nails or change the design yourself. Correction of nail plates is best done no later than after 21 days.
Thus, gel peeling often occurs not only due to the fault of the master due to non-compliance with extension technology and poor materials, but also due to the negligence of the client himself. To wear a manicure for a long time, you should familiarize yourself with the intricacies of the procedure in advance and strictly follow the rules for caring for extended nails.
Preparing nails for extensions
Before extensions, it is necessary to carry out normal hygiene procedures. Before starting work, you need to wash your hands thoroughly. The disinfection step is considered the cornerstone of the simulation. The entire affected surface of the skin and nails must be treated with an antiseptic to avoid infection or fungus.
The cuticle must be removed or trimmed - at the request of the client.
Many nail service specialists insist on a classic edged manicure, while others choose a European one, with the softened cuticle being pushed back. After working with the cuticle, you need to file the overgrown tip of the nail in accordance with its future shape and remove all nail dust.
Then the nails and the surface around them are degreased with a dehydrator and a top gel coating is applied , which is dried for 2 minutes. before fixing the nail extension template.
Perfect manicure
To get perfectly extended plates, you need to train your hand at all stages of modeling. Let's consider what an ideal artificial nail plate with acrylic or gel nail extensions should be like.
General form
The extended nail must have clear, even contours, the same length and shape, as well as shine. The shape of the nails is selected according to the configuration of the natural nail plate and fingers.
Length of the extended nail
Its choice should be justified by the length of the plate.
The area near the cuticle, where a new nail bed is born, should have an almost imperceptible, smooth transition from artificial to natural.
The configuration of the transverse C-bend on the inside should match the outside, the arch should be the same on all plates and be fifty percent of the circle.
Thickness
The thickness of the free edge should ideally not exceed 3/4 millimeter in height. This is approximately the thickness of a plastic card. You should definitely check what its shape is, and whether there are any irregularities.
According to plate modeling standards, the thickness of the extended nail should be similar to the thickness of a rolled business card. This is equal to approximately one and a half millimeters, and in the middle this thickness indicator should be thicker, because this is where the stress zone is located.
This indicator should be thicker along the smile line, where damage occurs. The length also depends on the thickness - the longer the plate, the thicker it is.
There are no air bubbles. The shape of the smile is the same on all plates.
The lateral lines smoothly transition from the natural material, receding at a distance into a thin, almost imperceptible hair. The lines on the sides should be straight, parallel to the fingers on all plates.
Modeled plates must be clean and tidy. Residues of gel or acrylic, dust and other foreign materials are unacceptable.
A beautiful manicure is an essential part of well-groomed women's hands.
Whether it’s a design on your nails, false nails, or extensions, it doesn’t matter at all, the main thing is that it brings you joy
Gel detachment due to violation of extension technology
Common Causes of Gel Peeling
Lack of experience and the necessary tools, choice of poor material are good reasons for the low quality of artificial nails.
Peeled nail extensions
Peeling often occurs in those who do their own nails - due to carelessness and inconvenience in applying the material.
Even experienced professionals may try to save time by skipping some steps of the procedure, which leads to chipping and peeling of the gel. It is better to visit a trusted specialist or learn how to do quality extensions at home.
Technical reasons for peeling nails
- Incorrect nail modeling,
- applying the finishing coat in a thick layer,
Compliance with all extension technologies is the key to flawless extended nails
air bubbles getting under the material, poor preparation of the nail, insufficient polishing, the presence of particles of the old coating in the cuticle area, lack of antibacterial treatment of the nail plates, the master did not create a stiffener, forgot about the primer, bond, degreaser, the gel was applied to a non-dried surface.
Compliance with nail extension technology is an important factor in avoiding manicure delamination. Watch the video master class on gel nail extensions from a professional master:
Pros and cons of gel nail extensions
How to extend nails with gel to avoid negative effects on health? You should take the advice of professional cosmetologists and manicurists. Despite the existence of various extension methods, many women simply do not know about them and do not use them for themselves, preferring the simplest classic type of extension - one of the available inexpensive gel polishes.
The advantages of gel extensions are:
- The gel is a polymer of natural origin, the composition closest to natural nails.
- There is no unpleasant aroma.
- They are fixed only under ultraviolet light.
- The extension lasts about 2.5 hours.
- The gel allows oxygen to pass through, allowing the nail to “breathe.”
- Your own nails are able to grow freely under the gel.
- Natural nails stop peeling after using the gel.
- The use of an ultraviolet lamp protects against fungal infection.
- The gel is evenly distributed over the nail and creates a perfectly smooth surface.
- Gel nails can be painted with regular polish and removed using acetone removers.
- The gel surface does not turn yellow and retains its smoothness and shine for a long time.
Gel nails are as flexible as natural nails.
Disadvantages of extended nails:
- The gel takes a long time to harden.
- Treatment with a UV lamp is quite painful due to the strong release of heat, which causes a burning sensation.
- Gel is considered a rather fragile material, so it is necessary to protect your nails from impacts and temperature changes.
- High cost of the procedure.
- When a crack appears, the entire extended nail must be replaced.
- It is difficult to remove gel at home without damaging the keratin layer of natural nails.
Ways to solve the problem
The right solution to prevent manicure deformation is proper care. Do not forget that before the procedure, manicure should not be done for about four days.
After the extension procedure has been carried out, you should not engage in self-correction; a timely visit to the specialist for this work is mandatory. Do not ignore the recommendations of the salon employee who performed the work. Proper care and following the master's recommendations are the key to ensuring that your manicure will last a long time.
Beautiful, long nails that look well-groomed are not only a luxury, but also a necessity. A well-done manicure will save time and always look amazing. Do not be afraid to extend your nails with gel for fear that they may quickly break or peel off. Choose a good master, don’t skimp on your beauty and take proper care of your nails, and then everyone will be the envy of your hands.
The attached video lists the reasons that lead to damage to extended nails.
Lamps for gel nail extensions
The lamp is used in nail extensions as a gel fixer , for drying and baking it on natural nails. A regular UV lamp is suitable for polymerizing gel polish, but directly for the gel, which has a thick and dense layer, a more powerful device is needed.
Before choosing a lamp, you need to carefully study the instructions for the gel. Manufacturers indicate the type of radiation that is necessary to fix the manicure. The gel is dried under ultraviolet light, so UV lamps, as well as CCFL and hybrid dryers are suitable for it.
| Lamp type | Description |
| Ultraviolet lamps | The most inexpensive device for gel extensions. It works using incandescent lamps in the amount of 1-6 pieces per device. Lamp power ranges from 9 to 54 W. On average, 36 W is enough to dry manicure with relief elements. The lamps of the device should be changed every 4 months. You also need to remember that over time, the inner coating of the device becomes thinner, which leads to uneven and lengthy drying of the gel. In this regard, it is necessary to monitor the condition of the device and promptly troubleshoot problems in its operation. |
| CCFL lamps (cold cathode stoves) | They work using lamps filled with a special gas. Such a radiating element allows you to use the device much longer, which does not overheat during operation and creates minimal energy consumption. The disadvantage of the device is the high cost and difficulty of replacing parts in case of breakdown. |
| Hybrid drying (UV+LED) | They successfully cope with the polymerization of any type of gel for nail extensions. They are distinguished by a large range of ultraviolet waves , small size and resistance to wear. A huge selection of hybrid lamps allows you to choose a device in any price range. |
Why do extended nails turn out flat?
A beautifully executed manicure can decorate any woman, giving her image well-groomed and sophistication. Nails with a hump do not look natural, so when applying extensions, you must ensure that the gel lies evenly on the plates.
Why do nails end up with a hump during extensions and how can you avoid this? After all, women come to the salon to beautify themselves and it is important that everything is done at the highest level. It is common that representatives of the fair sex naturally have crooked nails
The reasons for this phenomenon are varied. Among the most basic are:
It happens that representatives of the fair sex naturally have crooked nails. The reasons for this phenomenon are varied. Among the most basic are:
- changes in the level of hormones in the blood;
- poorly executed manicure.
The first five reasons do not depend on the master. To eliminate them, a woman must take care of her health and hygiene. Injured and fungal nails, for example, can only be cured over time. After a few months, the old plate will completely peel off and a new one will grow. During the treatment period, it is recommended to apply special ointments to the nails and refuse manicures, much less extensions. It is permissible to use only medicinal gel.
If the cause of the appearance of a hump on the plates is vitamin deficiency, you need to adjust your diet. This phenomenon is often observed in the spring, when the body is exhausted. It is not recommended to coat damaged plates with gel. If it is impossible to refuse the procedure, you need to talk to the specialist. An experienced professional knows how to give your nails a well-groomed look and perfect smoothness. There are techniques that help deal with unevenness. For example, thickenings and bumps can be cut down. Before applying the coating to the nails, the master always sands the surface of the nails. If there is a defect, you can pay special attention to the bulges and simply remove them mechanically. There are special bases designed for leveling nail plates. A competent master always uses such products before applying colored gel or acrylic.
A hump on the plates can also appear as a result of improperly performed extensions. There are different reasons. The most important ones are the use of low-quality material and insufficient qualifications of the craftsman. Nail gel should have a normal shelf life and not be too thick. If the material is very thick, it will not be possible to apply it evenly. Unsightly humps will most likely form on your nails. It will be more difficult to correct the defect after modeling, but you can try to cut off the high spots and then paint the plate with another layer of gel.
If the qualifications of the master are not very high, the likelihood of an error when performing a manicure is high. It is in the process of learning the art of extensions that nails with a hump are most often obtained.
It is very important to choose the right specialist. Nails with a hump can also result if the rules for drying the gel are not followed.
After applying the material to the plate, you need to place your hands on the table for a while so that your fingers are parallel to the horizontal surface. In the same position, the drying procedure should be carried out under a lamp. If you dry your nails vertically, with your hands down or up, gel streaks may form on the plates, which will look like humps. You can get rid of them only by cutting them down.
Nails with a hump do not look very neat. To ensure a perfect manicure, you should monitor the condition of the nail plates, and when applying extensions, use the services of trusted professionals, and also avoid purchasing low-quality materials.
How to choose gel for nail extensions?
Nail extension is a labor-intensive procedure that requires many special tools. The main composition of the future nail is gel. The strength and durability of the manicure depends on its quality.
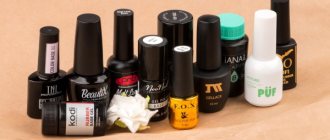
Nail technicians choose gels for extensions according to several criteria:
- The absence of a sharp chemical odor guarantees a minimum content of harmful substances in the composition of the material.
- Medium thickness of the product – for uniform application of a medium layer thickness, without drips.
- The brush in the gel bottle should be smooth , without protruding fibers.
- The bottle of a quality product itself contains all the necessary information - expiration date, composition, information about the manufacturer.
- The BigFree label indicates the absence of unsafe components in the gel.
- A high-quality extension product lasts 3-4 weeks and is easily removed by filing.
What types of gels for nail extensions there are, you can find out from this video:
There are also 2 types of gels:
- Single-phase (direct gel, no additional means required).
- Three-phase (applied together with base and top coat).
The list of the best gels for nail extensions includes Kodi, CND and Master Professional brands. All of these companies produce professional products that are quality tested and provide excellent results.
Causes of premature detachment of extended nails
Sometimes the answer to the question of how long nail extensions last can be completely ambiguous. This can be purely individual. If you suddenly notice that peeling has appeared on your nails or their shine has completely faded, and very little time has passed since a fresh overlay, then sound the alarm and immediately visit your master.
Causes:
- a mistake made by the master because he incorrectly calculated the architecture of the applied nail;
- the tip is sanded unevenly or the coating is applied very carelessly;
- inflammation of the skin, due to which the applied plate becomes foreign, and a process of rejection occurs;
- fungal disease or the presence of other body disorders;
- medications that interact poorly with foreign bodies;
- your own manicure, which was performed before the extension procedure and was not removed properly;
- hormonal status (nail extensions cannot be done during the menstrual cycle, pregnancy and the early postpartum period).
Reasons for chipping of gel-based coating on the tips
The causes of chipped ends most often lie in poor technique and improper care:
- The layer is not sealed at the end. Some masters are guilty of this, especially when they work with short lengths. If you don't paint the end, the coating will probably start to chip.
- Sometimes clients apply the layer themselves when they adjust their clothes, pick up the phone, or put their hand under a lamp.
- Improper care after the procedure makes the manicure short-lived. It is better to avoid water for several hours before and after the procedure, but many girls neglect this.
- Gel polish is a fairly durable material, but it cannot withstand severe or frequent mechanical damage. Impacts or scratches damage the integrity of the coating.
- You cannot adjust the length or file the nail yourself, otherwise the coating may crack.
- Thin nails will probably break off under gel polish, thereby causing chips.
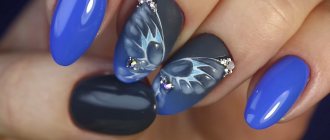
Additional decor of extended nails
Unlike short nails, extended nails allow you to create incredibly beautiful designs and entire paintings. Therefore, one of the most popular is graphic manicure. That is, various kinds of abstract drawings
They look great on nails and draw attention to the hands.
Bright, stylish manicure using the shading technique and a beautiful, elegant abstract design.
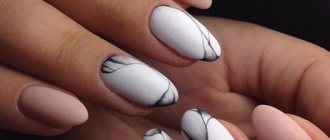
Mini-landscapes on marigolds look no less fascinating
But in this option, it is very important to find a nail artist who is really good at drawing and can create something very beautiful. For example, lush greenery, various marine motifs or floral designs
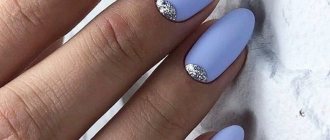
To create a festive version of the manicure, you can use additional decor in the form of rhinestones, special powder, lace and even small shells.
The delicate shade on the nails looks very harmonious in combination with powder and rhinestones that are correctly matched to the tone.
Stylish, sophisticated manicure design is made using adhesive tape and different shades of varnish.
French and lunar manicure is not losing ground. This classic is immortal and will always be especially popular. As for colors, in 2022, to create such a manicure, you can use not only the classic combination, but also add some variety. For example, red and black or white and black look great on extended nails.
An incredibly beautiful French manicure in a soft pink shade is complemented by additional decor in the form of flowers in a contrasting color.
An interesting option for a dot design on extended nails.
A rather unusual execution of French manicure due to correctly positioned lines.
French manicure does not have to be done in the classic version. Imagine, use your imagination and always try something new.
Of course, not every girl can make beautiful designs. And if you are one of them, then just use the slider design. With its help, you can create a simply stunning drawing without spending much time on it. It is enough just to wet the pre-prepared picture with water and transfer it to the nail. And of course, in order for the design to last as long as possible, you need to cover it with a transparent varnish or topcoat.
To create a truly interesting and unique design, use several decor options. For example, the photo combines several types of varnish, special powder, slider design and rhinestones
But it is very important that everything together looks stylish and not too bulky
An equally well-known way to create an irresistible design for extended nails is stamping. This is also a fairly popular technique, for which you will need a stamp, stencil, and high-quality varnish. Try transferring the design onto paper several times, after which you can experiment on your nails. Believe me, the result will definitely surprise you.
Of course, if you draw beautifully, you can make the design yourself. Many girls make simply amazing drawings. Thus showing originality and your own sense of taste and style.
Some design options may not be to everyone's liking. But on the other hand, the design on the nails is a vision or feeling of the world of a certain person. So why not experiment?
Delicate, romantic design for delicate and graceful natures.
Perhaps someone will say that extended nails have long been out of fashion and doing them is bad manners. These words are partly justified. But on the other hand, 2022 allows you to show individuality, creativity and your own style. So why not try getting your nails done again? After all, it is their length that allows you to create and draw truly amazing drawings and even whole paintings. How do you feel about extended nails? Do you often resort to this type of manicure?
Gel nail modeling: basic rules and tricks
Not everyone gets strong and strong nails from nature. What can those who are unlucky enough to win the genetic “manicure” lottery do? Of course, increase it! Nail modeling, in particular gel modeling, is a special type of nail art that we want to talk about in this article.
What is special about modeling gel?
Gel is a thick, viscous substance consisting of polymers and specially polymerized monomers. The characteristics of the chemical composition of the material give the gel a number of advantages. It self-levels well, is resistant to household chemicals, and most often does not have an unpleasant pungent odor. With its help, you can give your nails any length and shape without worrying that the artificial nail will fall off.
At the same time, the gel also has disadvantages: it cannot be dissolved - only cut off. In addition, during polymerization the gel undergoes “shrinkage,” during which the client may feel discomfort.
What should a modeling gel be like?
There are many requirements that can be made for extension gel, as for any cosmetic product, but we will focus on those that are really important for the job. So, the modeling gel should:
- Keep in shape . This means that after complete polymerization and removal of the dispersion, in further filing, the extended nail should not lose its originally intended shape, should not float, etc.
- Dry in a lamp . Low-quality gels may not dry out even in powerful lamps. They freeze on top, but not on the inside. And it’s good if you discover this during sawing! But if not, over time, the gel that is not dried from the inside can harm the client’s nails.
- Cover the natural nail . This applies primarily to camouflage gels, which should completely cover the nail bed. This will create the ideal shape, even out the natural nail and hide all imperfections.
Photo courtesy of practicing instructor Olga Sukhareva
Modeling gels differ from each other in consistency and properties:
- Liquid gels are suitable for leveling and also for filing-free modeling techniques. You need to work with them quickly.
- Medium-viscous gels are also suitable for sawdust-free techniques and level well.
- Thick gels are ideal for beginners, as you can tinker with them for a longer time without fear of them running.
As for color, there are several main types:
- Transparent . They are great for creating “aquarium” designs and stained glass manicures. They create an “under glass” effect, but it can be difficult to work with them entirely, since due to their transparency they are difficult to see on the template.
- Transparent pink . Suitable for extensions under coating, under gel polish.
- Camouflage . Most often used under laid out or painted French. Heavily pigmented camouflage gels often suffer from the fact that they dry out poorly, so when working with them you need to carefully monitor the layer thickness and pigmentation time - at least 1 minute. Shades can be different - from beige to hot pink. The color is matched to the skin of the client's hands.
UNO single-phase gels have a medium viscosity, are excellent self-leveling and maintain their shape. When working with them, you don't need a base or top coat. They are well suited for modeling using the sawdust-free technique, they lag well behind the template and have a wide palette of shades from transparent to camouflage dark pink.
UNO, Clear Shaping Gel
UNO, Rose Sugar Camouflage Sculpting Gel - Pink
UNO, Camouflage modeling gel Soft Caramel - “Caramel”
Uno Lux single-phase gels have a thicker consistency, do not spread at all, hold their length and shape well and are excellent for beginners. The camouflage shades of this brand are dense and opaque, drying in a lamp in 1 minute.
Uno Lux, Camouflage modeling gel Forma Gel “Tea Rose”
Uno Lux, Camouflage Sculpting Gel Forma Gel “Cold Pink”
Uno Lux, Camouflage modeling gel Forma Gel “Milk Rose”
Particularly noteworthy is the product Forma Gel Fiber Glass with fiberglass particles, which is suitable for those whose nails have almost nothing on them. It is dense, hard, suitable for gel polish coating. The line is available in transparent and transparent pink versions.
Uno Lux, Modeling transparent pink gel Forma Gel Fiber Glass “Light Rose”
Uno Lux, Modeling transparent gel Forma Gel Fiber Glass “Clear”
Gel modeling technique
To work with the gel system you will need the following tools:
- UV lamp
- A set of files, buffs and grinders for preparatory manicure;
- Orange sticks;
- Lint-free wipes;
- Forms or tips for extensions;
- Dehydrator;
- Primer;
- Brush No. 4 or No. 6, flat, oval or square;
- Modeling gel (one in a single-phase system);
- Antiseptic;
Uno Lux, Forms for extensions
Uno Lux, Acid-free primer
Uno Lux, Gel Cleanser liquid for degreasing and removing the dispersion layer
1. We treat our hands with an antiseptic and do a manicure in the usual way: push back the cuticles, treat the free edge and nail bed, polish the side ridges with a buff;
2. Degrease the nails and treat them with primer;
3. Prepare tips or forms. We cut the tips to the required length and sand them with a buff. We secure the forms firmly under the nails so that they do not move while working.
4. Lay out the first layer of gel, spread with a brush creating the desired shape, paying special attention to the cuticle area and the area of contact with the free edge. Dry it in a lamp.
5. Apply the second - modeling - layer. It should be as uniform as possible. And it’s better to make it 1-2 mm longer than you want, so that you can then cut off the excess. Dry it in a lamp. You can use clamps when drying.
6. We grind and file artificial nails, giving them the desired shape, length and arch.
7. We seal the ends of the nails with the finishing layer and polymerize them.
Next, if desired, you can apply colored gel polish and make a design. Or you can simply treat the cuticle with softening oil.
Photo courtesy of practicing instructor Olga Sukhareva
5 mistakes that are often made when using gel extensions
1. Poor cleaning of the nail plate.
The entire surface of the nail should be polished until the natural shine disappears. If you leave smooth shiny areas in this place, the coating will not adhere to the nail.
2. The plate is not dried after degreasing.
Even though modern products work quite quickly, degreasers still require at least 20 seconds to do their job. If you do not wait time and apply the primer immediately, the degreasing effect will not be achieved.
3. Using hard gel on moving nails.
Very thin and soft nails need an intermediate strengthening layer between them and the modeling gel. If it is not applied, then, firstly, the client will have a very hard time during the polymerization of the gel, and secondly, there is a high probability of detachments.
4. Violation of nail architecture.
Yes, you can create any shape using gel. But this does not mean that she will be persistent. When choosing the optimal length and shape for extensions, you need to take into account the “stress zone” of the nail, with which the apex should coincide.
5. Hoping to file the desired shape at the end, rather than modeling it with a brush.
Most often, beginners make this mistake: they apply a generous, sometimes not very uniform layer, and then try to give it the desired shape using a file. This approach is wrong for several reasons:
- A thick layer of gel may not dry out inside;
- When filing, prolonged vibration of an incompletely polymerized material can lead to its detachment from the natural nail;
Photo courtesy of practicing instructor Olga Sukhareva
Treatment
A dermatologist treats pathology. This specialist, based on one appearance and the result of an analysis of microflora, can determine why this happened and suggest the optimal treatment regimen. The approach to treatment is always comprehensive. First, the cause that caused onycholysis is eliminated. If these are diseases, then they should be treated. If it's a matter of frequent manicures, you need to give your nails a rest and not paint them or expose them to UV radiation for a while.
The exfoliated part with partial damage must be regularly trimmed and treated with antiseptics. It is advisable to protect the injured nail plate with a bactericidal plaster. If the detachment is large in area, surgical treatment involving removal of the nail plate and cleaning of the bed will be used. After this, apply a sterile bandage.
During the entire course of treatment, a woman is prohibited from contacting the damaged nail plate with water, manicure products, varnishes and any household chemicals. If there is a need to wash dishes, you need to do this with special durable rubber gloves; while bathing in the shower or bath, you need to isolate the diseased nail with a bactericidal plaster.
Stages of extension on tips
Detailed step-by-step instructions will tell you how to extend nails with gel using tips:
- Treat your nails with an antiseptic composition.
- File down the free edge until it has a rounded shape.
- Remove or move the cuticle.
- Completely remove the glossy layer of the nail plate using a buff.
- Treat the surface of the nail with a degreaser.
- Apply primer.
- Glue the tip onto the contact area of the nail.
- Give it the desired length.
- Treat the junction of the nail and the tip until smooth.
- Apply the gel from the middle of the nail to its edges.
- Dry your nails in a lamp (2-3 minutes).
- Give the nail the desired shape.
- Apply finishing agent.
- Polymerize nails in a lamp (3 min.).
- Treat the cuticle with a moisturizer.