- 686
- 04-01-2021
- Author: Mysekret Team
- 0
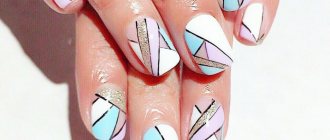
Real ladies pay attention not only to makeup and hairstyle, but also to their hands. A manicure can tell a lot about a lady’s character, so it is important to choose the shape of the nails, the color of the varnish and the design according not only to fashion trends, but also to personal preferences. For many years, geometric manicure has been popular among fashionistas. We’ll talk further about what design nail art masters recommend applying to your nails this year.
Features of geometric nail art
- Geometry on sharp nails
- Can be adjusted to any nail shape.
- A correctly selected design can visually correct the imperfections of the natural nail plate.
For example, a vertically placed pattern or stripes visually lengthen and narrow wide nails. - Geometric manicure universal.
Moderate or muted colors are suitable for work environment and even a strict dress code.But a bright or impressive design with beautiful decorative elements will delight even extravagant fashionistas .
Rainbow geometric manicure
Fashion trends in manicure geometry in 2022
In 2022, it will finally become clear that existing ideas about graphic nail design are too narrow and superficial. There have been even more changes and innovations in this direction than before. We can highlight some features of the “geometry” manicure:
- priority in color is given to natural shades, and chemical, neon and all flashy colors fade into the background;
- the basis of nail design should be femininity and beauty;
- the use of monosyllabic geometric designs is acceptable, but the combination of several elements on one nail at once is especially appreciated - the masterpieces created in this way will not go unnoticed;
- To create a trendy design you will need a whole arsenal of additional tools.
It is quite rare that you can design your nails in one particular style; most often, several trends and techniques are combined in one design, but several main options can be distinguished:
- minimalism;
- eclecticism;
- origami animalism;
- abstraction, etc.
In addition, contrasting design options, such as black and white stripes, remain popular. This manicure is performed using a thin brush, having previously made markings of small drops and lines.
A beautiful “geometry” manicure, which uses several contrasting colors at once, called “colorblock,” has become a very popular design. The graphics obtained using this technique are unique. Let’s say right away that creating an effective drawing is difficult - it requires a lot of time, effort and skills.
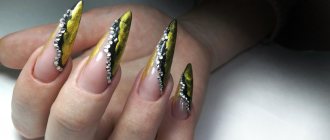
The use of techniques such as “broken glass”, which is created using foil, does not lose its relevance. Combining it with geometric patterns, for example, placing a piece of this material in the center of a figure, you can get a “work of art” of extraordinary beauty and style.
Geometry and length of nails: the best options
Long nails are a real springboard for manicure using any technique.
But even if you don’t have any, you can’t refuse interesting experiments.
Knowing a few rules, you can emphasize the grace and beauty of your hands.
- To create a picture, do not take a lot of saturated shades of varnish, 1-2 bright colors .
- On a short nail plate, large patterns and wide transverse stripes of dark color are not welcome.
- pastel varnish colors as the main coating .
- If the outer edge of the nails protrudes at least 1-2 mm from the edge of the finger, feel free to get creative with colors and shapes.
Geometric manicure in soft pastel colors
Shades of geometry
There are no special preferences or rules in this regard. Everything is given to the tastes of owners of different types and shapes of nails. However, fashion dictates some trends.
This fall season, nude tones, as well as pastel beige and pink, are popular. In addition to them: all tones of red, gray, brown, blue and black varnishes.
A gentle nude manicure is good for all occasions. There is a wide palette and a varied choice of solutions.
We recommend reading:
Water manicure - step-by-step instructions for doing it at home. 120 photos of new exclusive manicure designsOmbre manicure - the most fashionable new items of 2022 -2020. More than 200 photos of exclusive design, execution technique, step-by-step instructions + reviews
Glossy manicure: review of new products, features, fresh design ideas, choice of color and style of manicure with a glossy tint (130 photos)
Delicate nude looks great with a formal dress and a bright evening look. All you have to do is add more shine to the rhinestones.
In red, everything looks no less bright and stylish, and the black design emphasizes the mystery of the fashionista and gives her charm.
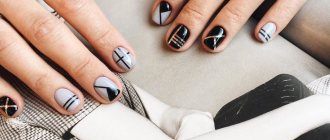
Dark stripes on a light or crisp white background are an excellent solution not only for summer, but also for cloudy autumn or colorful spring. As they say, classics are always in fashion.
Coating for geometric manicure
To successfully implement this design, it is not necessary to purchase a special coating.
- The democratic nature of manicure with lines and shapes explains its incredible popularity: you can use ordinary varnishes.
- For a clearer drawing, it is recommended to use acrylic paints .
They are quite easy to apply, and the color is rich. - Professionals can offer Shellac or gel polish , and this is quite justified: after all, gel and shellac last much longer than usual.
True, each color of such a coating is applied and dried under a lamp separately.
Color palette: basic combinations
Here, as in most nail designs, there are rules for combining shades:
- Monochrome , i.e. different tones of the same color range. To prevent visual merging of segments, the boundaries between them should be clearly defined.
- Contrast – colors that are on opposite sides of the spectral diagram.
- Neutral tones (black, beige, white, gray) highlight any of the shades well.
- When making a drawing with chaotically located figures or multiple elements, you can use several bright colors .
An example of a contrasting manicure with geometry
Design in a geometric style is a continuous flight of fancy, so you should not give up the search for fresh ideas. Your own artistic perception will help convey your individual character in manicure.
Original geometric design with rhinestone decor
Trending trends
From all the variety of geometry in nail art, several groups of designs can be distinguished, which are used most frequently and popularly:
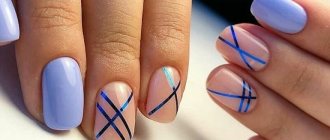
- Minimalism and rather thin lines, arranged in a chaotic manner, at different angles and even with curves.
- Wide stripes.
- Gradient solutions (ombre technique).
Minimalism is in fashion at all times. Making lines in this design is simple, and they look tasteful.
Wide stripes are the latest in nail art fashion. The “path” is decorated with large or small rhinestones and emphasized with lines of silver or golden shades.
Very complex, but also advantageous due to this – gradient geometric design. The technique is not easy, only an experienced master can do it, but over time, a beginner can get the hang of it and apply such solutions.
Design “geometry”: tools and materials
To make a clear, high-quality drawing for work, in addition to varnishes or acrylic paints, you may need additional tools:
- thin brush for drawing fine lines;
- dots , with which it is convenient to draw perfectly even circles and dots;
- manicure tape . Instead of black varnish or paint, it is convenient to use thin manicure tape to highlight the border area, which is glued directly to the painted but already dried surface.
- various stencils . A good helper for weak drawing skills will be stamping - a kind of “stamp” for transferring an image to the surface of the nail.
A video tutorial will show you how to make a geometric manicure in the “cat eye” style using stencils.
If you are doing geometric nail art at home and there are no special tools available, you can use tape instead of stencils, and replace the dots and brush with a regular toothpick or ballpoint pen.
Matte and mirror manicure for short nails
A fashion trend is a combination of matte and mirror manicure of the same color. A matte surface is obtained by applying a special coating to a regular gel polish.
Step-by-step instructions for performing a matte-glossy manicure:
- Preparing nails for coating.
- Apply base, then base. Drying in a lamp.
- Apply matte top coat to selected nails. To combine a matte finish and gloss on one nail, use a stencil. This technique will allow you to create an interesting design.
For a glossy manicure at home, use foil or rubbing, polyester powder. You can buy all this in specialized stores.
Step-by-step instructions for creating a mirror manicure using powder:
- Prepare nails for coating.
- Apply a base layer of gel and dry.
- Immediately after drying, sprinkle the base layer with powder. The powder is applied using a spatula. Rub the powder with the applicator. Remove excess powder with a brush.
- Apply topcoat and dry in a lamp.
Geometric design at home step by step
If you are new to manicure, nail art with a simple geometric pattern is perfect for gaining experience or honing your skills.
You should start by choosing a pattern, then you need to prepare the necessary materials on the working surface.
- We trim off excess skin and push back the cuticle.
- After degreasing the nail surface, cover it with base .
- We divide the nail plate into segments using thin strips of adhesive tape or manicure tape. Make sure that the adhesive side fits as tightly as possible.
- We paint the areas with any shades you like and let them dry completely.
- Carefully remove the tapes .
In their place, you can stick new ones, silver, gold or darker ones, then the pattern will be more contrasting. - Cover with fixative and enjoy the result!
Make your own beautiful geometric manicure together with a master:
Geometric designs on nails
As the name suggests, this technique involves applying geometric shapes to the nails. To create such patterns, you can use special tools or depict them on a whim, relying on your own artistic abilities.
The simplest way to depict geometric designs is with a regular brush. Its thickness should be as thin as possible, so your pattern will turn out more neat and even. Some girls use a toothpick, as it is more stable than a soft brush. In any case, creating geometric nail art requires some drawing skills.
A “steady hand” and confidence in the result can only be acquired by constant practice. Practice your skills as often as possible so that your geometric prints get better and better every time.
To create a geometric pattern with a brush, you need varnishes of several shades, a fixative and the actual drawing tool. First, the nails are covered with 1-2 layers of varnish and patterns are drawn on the dried surface.
Variations of “geometry” in nail design
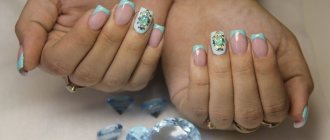
- Lunar manicure (French in reverse), which consists of highlighting the lunula area with a different color. A semicircle, triangle and other elementary shapes at the base of the nail would be equally appropriate here.
- Design with stripes and triangles . Applying several strokes in different directions or at the same angle with minimal effort will definitely help create an original image.
- Painting - mosaic, squares, chess . These painting techniques may seem complicated only at a superficial glance. In fact, a few varnishes (paints), tape or a thin brush are all that can be useful for a novice craftsman.
- Polka dots in manicure are one of the simplest and most effective options. You can apply dots of the same size or combine circles of different diameters and shades within one nail.
- Zigzags are a common motif in geometric nail art. By choosing zigzag stencils or cutting them out of tape, you will get a fashionable pattern on your hands without any extra effort.
- To complement the image, you can use other types of decor: rhinestones, foil, sparkles , etc.
Lunar geometric manicure
Stripes and triangles in geometric manicure
Checkerboard design with rhinestone decor
The combination of geometry and manicure in manicure
Bright manicure with zigzags
Beautiful geometric manicure with rhinestones
Step-by-step instruction
You need to start working with the usual procedure for cleaning the nail plates from the old coating. This can be done quickly and efficiently using nail polish remover (preference should be given to a product without acetone), as well as a cotton pad. If the nails were previously coated with shellac, then the procedure for removing the coating is carried out using a special technology.
Cleaned nails are steamed in a bath, after which the upper edge is given the desired shape, and the cuticle at the base is removed (by trimming or using a special product).
More photos and publications: Photos of summer manicure 2022: fashion trends
To obtain a smooth surface, apply a base coat to the nails. The layer should not be thick, this will ensure quick drying and create a reliable base for the decor. When using the base as a top coat, it becomes necessary to apply a second layer.
To get a beautiful and rich manicure you will need at least 3 contrasting colors of varnish. Preference should be given to coatings with a dense structure so that the base is not visible from under them.
Recommended color combinations:
• pink, yellow and blue;
• red, beige and purple;
• pink, silver and red;
• gold, green and red;
• white, blue and red.
The selection of a combination of tones depends entirely on personal preferences and wishes. Sometimes the combination is dictated by the mood and then you get a bright manicure with geometry, as in the photo.
Further actions include applying the first layer. It is made with the lightest coating from the selected combination. The entire plate should be varnished, not just a fragment of the design. This will highlight other colors, giving them richness. After drying, craftsmen recommend covering the first layer with a transparent varnish to secure the base and add shine to the surface. The technique of applying decor requires compliance with the following rules:
• the first stroke is made in the center of the nail plate in a vertical manner;
• the second and third strokes go on both sides of the central stripe;
• the thickness of all three layers must be equal.
To create colored blocks (fragments that have a geometric shape), a more convenient method from the existing ones is selected. Experts recommend that beginners use the following options.
Method No. 1 involves using tape with a self-adhesive backing. Cut strips create the boundaries of a certain fragment, after which the designated area of the nail is covered with the desired color. It is important to be careful when performing work so as not to spoil the polishing of the first layer. To do this, you need to wait the allotted time for drying.
Method No. 2 is considered more complex, since all the lines are created with a thin brush. Only a well-placed hand can cope with the task. As a rule, people who have a penchant for art, drawing, sewing, and applying makeup possess this skill.
Steps for creating geometry on nails using adhesive tape:
• cut the tape into 2.5-3 cm pieces;
More photos and publications: Do you need to get a manicure and how often?
• stick to a dried surface, laying it diagonally in the desired position (there is no need to apply force to fix the tape, the base layer will deteriorate);
• apply the varnish of the selected tone with a brush in any direction;
• wait for the coating to dry and carefully remove the tape;
• mark another fragment with a strip of tape and paint it with varnish of the planned color;
• remove the tape after drying the coating;
• repeat the procedure with each nail;
• cover the nails with a fixative.
There are a lot of options for using tape and applying varnish. Using stickers you can easily create squares, zigzags, triangles and polyhedra. An oval is also obtained simply using a prepared stencil.
Useful tips
When starting to transfer your intended design to your nails yourself, do not forget about several important points:
- Before starting work, thoroughly clean the surface of the nail plate;
- use fresh varnishes ;
- wait until the varnish or paint dries before removing the tape and applying the next layer;
- You can design all your nails in the same style or focus on one or two fingers.
Manicure using the “geometry” technique is an option that can be adapted to both everyday and evening looks. Relatively simple to perform and not requiring special skills, nail art looks great on your hands. Experiment with shapes and color combinations to create your own unique design.
More interesting articles:
Nail designs for beginners: easy needle designs
Design with a needle is an excellent option for girls who want to get an interesting design in a short time. Needles of various diameters allow you to draw neat lines, place dots and draw other small elements.
Patterns, symbols, and ornaments can be painted with acrylic paints. The technique of making a design with a needle is simple and does not require special knowledge or artistic skills.
Master Class:
- To begin with, the nail plate is covered with a colorless base, which protects it from the bright pigment of colored varnish.
- Next, the nail is completely covered with the selected shade.
- After this, you should act very quickly before the background varnish has time to dry. A contrasting line is drawn on the background surface.
- Then, the needle makes a spiral movement that captures both shades, creating a wonderful effect.
- The resulting pattern, created with a needle, can be supplemented with neat dots.
- The result will need to be secured with a finishing coat.
Easy drawings on nails with a needle, photo
Option for drawing on nails with a needle, photo
Simple designs on nails with a needle, photo
Drawings for beginners with gel polish
When creating drawings with gel varnish, various techniques are used. In order to start “art”, you need to prepare a thin brush, dots and a palette for mixing shades.
This season, a popular design is in which each nail has an individual design.
The color scheme is the same for all nails or may differ slightly. Two fingers can be decorated with a pattern.
Drawings in the form of lines with gel polish, photo
Drawings in the form of monograms with gel polish on a jacket, photo
Geometric designs on nails with gel polish, photo
Patterns on nails with gel polish, photo
Drawings in the form of lines with gel polish, photo
Beautiful designs on nails for beginners with acrylic paints
Using acrylic paints you can create various patterns and compositions. Floral motifs are most often drawn. In order for the drawing to turn out neat, it is recommended to initially practice on a piece of paper.
Beginning needlewomen can start with the simplest option - chamomile. A yellow dot is placed in the middle and white petals are drawn around it. That's all - a cute manicure with a pattern is ready!
Drawings with acrylic paints, photos
Drawings with acrylic paints, photos
Nail designs for beginners, photo
As you can see, you can diversify a boring manicure in no time, and you don’t have to be an artist to do this. A little skill and patience - and you are the owner of stylish and fashionable nail art. In order for you to learn how to quickly and beautifully draw on your nails, we have prepared photos and videos. Let's watch and learn how to make nail designs together!
Video with a lesson on how to make a manicure with a beautiful lace pattern
https://youtube.com/watch?v=ngpVWX8rmXg%3F
Nail design ideas with a pattern:
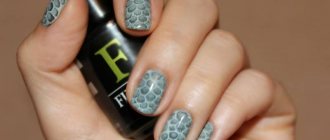
Examples of stylish designs on nails, photos
Bright designs on nails, photo
Beautiful designs on nails, photo
Nail designs lined with special foil using the “broken glass” technique, photo
Options for geometric patterns of triangles on nails, photo
Options for simple designs on nails, photos
