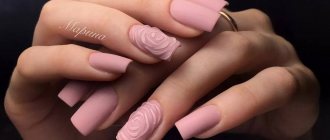
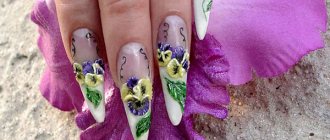
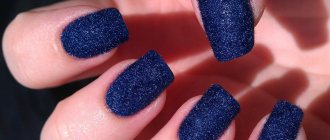
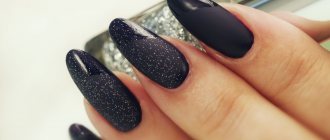
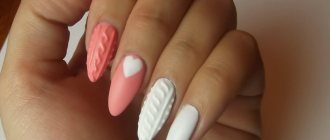
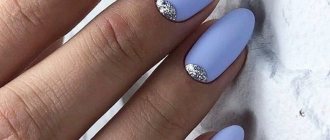
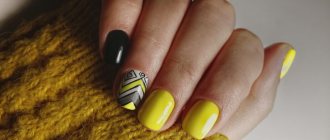
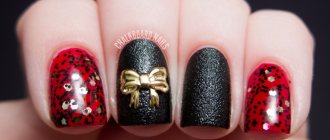
Nail sculpting is an exquisite version of a festive manicure, allowing you to decorate your nails with charming 3D nails. Floral ornaments and three-dimensional patterns look simply magnificent on nails, but only a true master can create such beauty. Or not? It turns out that even a beginner can figure out how to sculpt nails and quickly learn this complex nail art.
How to choose acrylic powder
When choosing, you should consider some points:
- High-quality acrylic powder does not spread or crystallize. The material is laid in a dense layer on the nail plate and can be easily corrected and further processed.
- Thanks to the porous structure of the substance, the natural nail plate receives enough oxygen and “breathes”. This largely determines the duration of wear of the coating and its durability. A manicure made with low-quality materials can harm the nail plate. In addition, such a coating will be subject to detachments, and its service life will be significantly shorter.
- Acrylic powder is white or transparent, but thanks to the use of dyes it is painted in a variety of colors.
- When choosing materials to create a design, it is best to use liquid and acrylic powder from the same manufacturer.
French manicure with sculpting
French manicure has long become the standard of classics for many fashionistas. It is universal, and thanks to the variety of decor options, it remains in demand for daily use and for special events and holidays. We invite you to get acquainted with one of the original French modeling manicure decors. Volumetric and textured patterns go well with French notes and look beautiful on a transparent base with a white tip. Light shades in the design are very appropriate for a light and romantic look. If you want to add a catchy accent to your manicure, make voluminous designs in a more saturated color and give preference to a different shade of nail coating and the color of your smile.
Manicure 2022 photo ideas: heavenly theme
As was previously accepted, the relevance of shades depends on the time of year. Therefore, yellow, green and blue colors will always be popular in summer, which can reflect this season.
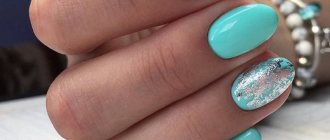
This summer, stylists are paying special attention to the celestial theme. And since there are many shades of blue and blue in the world, a heavenly manicure can surprise everyone.
Summer drawings on a blue background will be especially relevant, writes the portal Therussiantimes.com. These can be either three-dimensional drawings or floral blocks. Here everything will depend on the author’s imagination.
It will be interesting to combine with the blue theme other bed colors, such as beige pink, peach or lilac. In this case, you can play with contrast, or use the ombre technique.
White manicure with modeling
Another stylish option for manicure that will suit any combination of clothes and accessories is the use of white varnish. Any fashionable design based on this color will look advantageous and flawless. Add to this delicate and sophisticated version elements of a three-dimensional pattern in the same color, and your hands will be complemented with grace. It is only important that the composition does not merge with the general background. To avoid such a nuance, complement your manicure with pearl rub. A fashionable solution would be floral modeling on a white background. Stylists recommend making beautiful buds or compositions with a two-finger stretch, and choosing pastel or contrasting shades. The pattern of a “knitted” fabric in dim embossing will also be a very appropriate and original idea.
Manicure with floral sculpting
Floral motifs are popular among feminine, romantic and sophisticated people, as well as among young ladies who want to be in the trend of fashion news. Fashionable floral nail art will help you create textured flowers on your nails. Spectacular floral patterns can be achieved by sculpting with acrylic or gel. For this you will need different types of powder. Beautiful flower sculpting looks very elegant on the nail plates.
For an everyday manicure with floral sculpting, options in the minimalist style, with single designs on one or several nails, would be appropriate. For a more formal or festive version of floral manicure, various elements and decorations are added to the design, and it is performed in brighter shades of color schemes.
Step-by-step technique for volumetric manicure using gel
The technology of gel nail sculpting has significant differences from acrylic. To perform a volumetric manicure, you will need several types of biogel or gel polish - basic, sculptural and top-end, as well as tools for shaping the gel and an ultraviolet lamp.
The process of creating gel stucco is quite lengthy. Start by preparing your nails. They are processed, an artificial coating is applied to the plates, dried in a lamp and the sticky layer is removed from the surface. Then work begins on the relief composition.
Using a convenient tool - an orange stick, a rasp, a dots - take out a special gel, the consistency of which resembles plasticine or clay, and form one of the elements of the stucco molding. Some nail artists prefer to sculpt details with their hands, previously moistened with a leather cleaner - a cleanser.
Each element of the composition is immediately dried under a lamp. This helps avoid deformation and mixing of adjacent colors. When the three-dimensional drawing is ready, it is covered with a layer of finishing coating.
What is volumetric nail sculpting and who is it suitable for?
Volumetric manicure sculpting is undoubtedly an art. It can be compared to a sculpture, since graceful flowers, elaborate monograms and bows, delicate butterflies, and touching ladybugs have a 3D effect, preserving and revealing their beauty when viewed from any angle.
To make embossed nail art look complete, it is often complemented with designs on the nails - it turns out beautiful and stylish.
Manicure with sculpting is usually performed on artificial nail plates, otherwise it can look awkward and rude. It is also not recommended to decorate short nails with voluminous stucco, which can take on a bulky and sloppy appearance.
The exception is minimalist patterns and ornaments: in this case, the resulting modest composition, which rises quite a bit above the surface of the plate, will become a worthy decoration for a discreet manicure.
When choosing volumetric modeling, it is important to remember a sense of proportion.
You should not decorate each nail with large compositions: such a manicure will look too colorful and heavy. One or two nails with stucco on the hand is enough for the design to have the desired effect and not disturb the harmony of the image.
The complexity and creativity of the work must correspond to the ensemble and the nature of the event for which the woman is preparing. Volumetric ornate flowers, patterns, and monograms are appropriate for wedding and evening looks, but are completely unsuitable for urban casual or a strict office dress code.
For ladies who actively work with their fingers or wear gloves at work, it is better to avoid everyday nail art with modeling: a textured manicure will constantly get in the way, cling and will not last long.
Specifics of French nail extensions
The result that everyone expects to see is a perfect nail with an equally perfect smile line.
Glossy surface of the nail with a clear transition between the pink background on the nail bed and the white line along the edge. And this is all Design, decorations, this is all secondary and not so important. Because initially there was none of this, and the French jacket itself, as conceived by its discoverer, was called Natural Look.
First, let’s figure out what kind of miracle a French manicure is and what components make up the French manicure effect:
- smile - a rounded line of transition between white and pink, smoothly disappearing towards the edges;
- whiskers are the side fragments of a smile in which the lines become thinner and disappear.
But the most important thing that you need to study (and perhaps even pass the exam) are the rules and laws of constructing a smile line:
- The white line on the free edge of the nail cannot be wider than the pink layer.
- The longer the nails, the wider the white line can be. But don't forget rule number 1.
- The smile line should be symmetrical relative to the axis of the nail. Antennae – end at the same level. You can, of course, do without them, but then the manicure will no longer be so elegant.
- The width of the white line should be the same on all nails.
A smile and transition can be achieved in several ways, no matter what. The main thing for the client is to get the expected design
A rather complex nail extension is a French extension, consisting of two parts. First, a nail bed is formed using gel or acrylic, and a smile is laid out close to it using the same material, but white. With this double design it is difficult to get a thin white line. But, if you want to quickly master French nail extensions, take the work home, so to speak, and practice.
You can draw a smile line. This option is easier even if you lack artistic talent. The line can always be corrected and completed with a thin brush.
An unsuccessful transition (anything can happen) can be disguised with rhinestones and sparkles. Well, this is an extreme case for the very, very newbies.
Wedding manicure with sculpting
This technology of performing manicure in the wedding look of the bride and guests of the celebration is considered popular. A common option is considered to be a classic French jacket with modeling in light, preferably white, colors. An alternative and no less beautiful option would be a lunar design with sculpting. In addition to textured openwork abstractions and voluminous floral motifs, on a neutral background, you can add rhinestones and pearls. In this option, pastel-colored varnishes will be successful in combination. For the bride's image, it is enough to decorate only the ring fingers with airy flowers or hearts, which will add elegance and sophistication to her hands. Pearl rub will make your nails shine and look simply gorgeous. Guests are allowed to use modeling elements in brighter shades, but do not overdo it with texture and color. Such compositions, unfortunately, look better in the style of minimalism.
French nail design in ombre style - new items
Here the name of the manicure speaks for itself. Ombre involves coloring the very ends. In manicure, this does not mean at all that only the ends of the nails can be painted with a different color. A different color may also occur near the cuticle.
Traditionally, pastel colors are chosen, and then the only question is their reasonable combination.
Current colors:
- pale pink;
- faded green;
- light blue;
- pale blue.
French ombre beige French ombre red
French ombre blue with sparkles French ombre purple ombre nails bright French ombre green
However, these colors are combined almost with their opposite colors:
- light orange;
- beige;
- faded yellow.
Only a qualified specialist can create this effect, so it’s better not to try it at home if you want a good result.
French ombre bright
French ombre pink French ombre scarlet French ombre black
French ombre nude
French ombre pale
Acrylic modeling
Acrylic is considered the most durable and popular material for sculpting nails. For work, acrylic powder of different shades and colors, monomer and special brushes are used. Two types of acrylic modeling are popular: Volumetric and aquarium. When performing aquarium sculpting, the finished decorative element is covered with a layer of transparent gel. Thus, the decor remains inside the nail, which is very convenient. It does not cling to clothes and other objects. When performing volumetric modeling, the decor is not filled with gel, but placed on it. This creates a clear volume of the composition and preserves the texture of the design. The aquarium effect is more practical and is very often used for everyday manicure. Acrylic can be used both on natural nails of sufficient length and on extended ones. The material used in sculpting makes the nail plates stronger, more elastic and does not cause harm. The main advantages of this manicure technique are the strength of the material, the 3D effect of the created compositions and safe removal, without damage or harm to the nail. It is worth noting that sculpting acrylic nails is a labor-intensive process, and it is better to contact an experienced and professional nail technician. A carefully executed manicure will not leave your hands unattended.
Nail sculpting can transform your nails in the most original and unique way. You can sculpt not only flowers and leaves from acrylic. Masters create patterns of different structures and configurations, figures of animals, fruits and entire paintings on the nail plates. These works of masters can be called miniature works of art.
Materials for modeling: their types, differences, advantages and disadvantages
3D manicure is created using two different technologies: using acrylic or a special plastic gel.
Both methods have their advantages and disadvantages, and it is better to choose the optimal one based on the recommendations of professionals and the desired end result.
Modeling with acrylic powder
Acrylic nail sculpting has been known to manicurists for a long time. To create three-dimensional figures, acrylic powder is mixed with monomer. The result is a plastic mass that can easily take any shape and is easily applied to the nail plate.
It is quite difficult for beginners to work with acrylic: the material hardens quickly, so there is very little time to give it the desired shape. However, if you fill your hand, a manicure with acrylic sculpting will look very beautiful and naturalistic.
A significant disadvantage of acrylic is its pungent odor, so it is preferable to work with it in a well-ventilated area. It is important to remember that the material may cause allergic reactions. Those with sensitive skin and girls prone to allergies need to warn the specialist about this and eliminate the possibility of unpleasant consequences of nail art in advance.
ACRYLIC MOLDING. Part 1. A simple three-dimensional design option
Modeling using gel
Sculpting on nails with gel appeared relatively recently. Despite the fact that nail extension with biogel is a common and popular procedure, the thick, viscous material was considered unsuitable for sculpting, because it quickly spread over the surface of the nail and did not hold its shape at all.
The situation changed when thick and plastic gels, like clay, appeared in the arsenal of manicurists. Talented nail designers happily began to bring the craziest and most interesting ideas to life.
To create a voluminous decorative element from the gel, you should form a small ball and place it on the surface of the nail, and then use special tools to give the material the desired shape.
The process will take a long time, since each element must be dried in an ultraviolet lamp. However, it is better for beginners to gain experience by working with this material, since any unsuccessful part can be easily corrected before it is exposed to UV rays.
Flowers on nails. Modeling with gel plasticine. Master class from Ulyana Lobynya
What do you need?
If you are confident and have enough free time, you can learn how to sculpt simple elements yourself. You will need special materials, care and accuracy. And we offer you step-by-step instructions for beginners.
IMPORTANT TO KNOW: Airbrush nail design 2022: photos of new products, the best works from manicurists
First you need to purchase materials and tools; you can buy them in specialized stores.
- acrylic liquid or otherwise monomer;
- acrylic Powder;
- brushes with a sharp end;
- a small container for monomer, for example a shot glass;
- standard manicure set;
- clean napkins;
- degreaser.
How to make a simple jacket with stiletto rhinestones
How often are we willing to take the time to repeat a manicure we like? Especially when stiletto nails became a trend - sharp, dagger-shaped. The shape itself is very demanding, since each tip must have a perfect curve, and not a smooth transition as in the almond shape. An even angle, pointed at the end.
The stiletto is always modeled using polymers. You can use acrylic or gel. The manicure technique involves a certain process, which involves the use of a base for extended nails.
In order to create the French trend with crystals, you must have the following materials available: tips or paper bases for extended nails, acrylic white and camouflage powder, a set of modeling files, decorative materials, finishing gel for coating.
We will use acrylic nails as an example, since modeling does not require a UV lamp or other auxiliary tools.
*The form for extensions must be secured to the finger, moved as close as possible to the natural nail for adhesion of the plate and the future artificial coating. To make the corner sharp, we glue the edges of the backing together to lengthen the bed.
*First of all, we model the nail bed, take camouflage powder and apply it to the edge, forming the base for a future smile. We grab a little more material and place it as close to the cuticle as possible, leveling the acrylic until a uniform surface is formed.
*Formation of the free edge begins from the middle, as if we were adding a smile to the plate. When laying out the white edge on the side, do not add a lot of acrylic so that you don’t have to cut out the shape for a long time. We lay out the free edge to the selected length.
*After the first and second stages are completed, we proceed to leveling the surface using transparent acrylic. Transparent material is necessary to eliminate minor imperfections and defects. When polished, the polymer takes on a natural shine, like a natural plate.
*Once the layout is complete, remove the backing paper and saw out the pointed ends. The stiletto has equal sharp angles without smooth transitions.
When working with acrylic, it is better to lay the stones on a special glue. Upon completion of the laying, it is necessary to apply a finishing coating, which will give a glossy shine to the surface.
