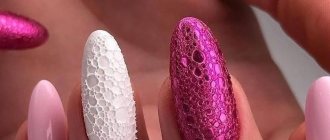
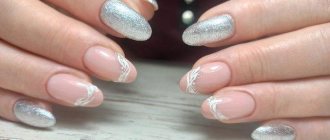
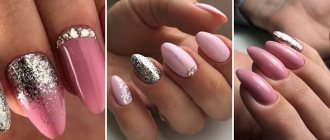
Marigolds with bubble, or as it is also called, foam manicure, are rapidly gaining momentum in popularity, because such a novelty provides young ladies with a wonderful opportunity to try something new and unusual. Various examples of this textured design have simply blown up the Internet and social networks with intriguing ideas. Today you will not find a young lady who will refuse to design her nails in one of the top options offered by nail artists. What ideas should beautiful ladies pay attention to in order to stay on trend, and how to get a foamy effect on their nails? We will talk about this and much more in our material today.
Features of manicure
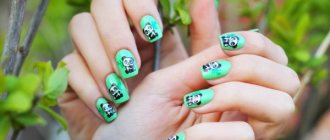
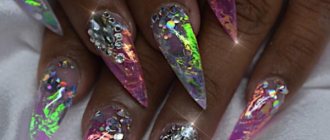
The main feature of the new product being discussed today is the obligatory presence of a bubble effect on the nails, which is created by applying ordinary foam obtained from liquid soap, shampoo or any foaming product to an undried layer of gel polish. After drying in a lamp, the excess foam layer is removed and voila - a stunning foam manicure is ready. The drawing always turns out different and thanks to this, the uniqueness and originality of the design is guaranteed to you.
Bubble manicure or with foam 2019-2020: 50 photo ideas that you won’t pass by
Among the varieties of textured designs that are actively used in the Nail industry, manicure with foam or bubble manicure is rapidly gaining popularity in 2019-2020. This embodiment of minimalism allows you to realistically depict the skin of a snake, crocodile, mermaid tail, lunar crater or lava.
How to do a manicure with foam: step by step (video)
The initial stage involves preliminary preparation of the nail plates. To do this, you will need to do a hardware or combined manicure, as well as remove the gloss of the nail with a buff, apply a degreaser and an acid-free primer.
2. Next, the nails are covered with a base (tinted camouflage for self-coating or rubber). It is important to apply the material exclusively in one layer and polymerize, following the manufacturer's recommendations.
3. The color coating is applied in one or two layers. You can use both light and dark colors, but materials should be used as dense as possible.
4. Dry the nails, remove the sticky layer, apply a matte top, and dry the nails again.
5. The second layer of the same matte top should be applied thinly, using a semi-dry brush. We don't dry it.
6. Now you can safely apply soap foam and immediately send your nails to the lamp for polymerization.
7. Prepare a paper napkin. It will be useful for removing residual foam. The entire surface of the nail is wiped with a lint-free cloth soaked in cleanser.
8. A third layer of topcoat is not required to cover the design. If sharp particles of dried topcoat are detected, it is rational to use nippers and a buff, depending on the location of the flaws.
View this post on Instagram
Probably only the lazy ones didn’t do bubble nail designs..