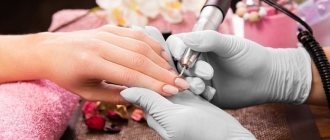
Professional devices designed for treating nails, cuticles and side ridges have become an indispensable attribute of most nail salons. Appreciating the ease of use and excellent results, many fashionistas purchase devices to be able to do a beautiful manicure at home. When choosing a device, you must remember that it requires manicure cutters.
Some manufacturers offer milling cutters with several attachments included. However, often, it does not satisfy all the needs of the owner. In addition, they wear out with use and require replacement. Therefore, women have to independently purchase new attachments, collecting their own tools for work. To make the right choice from the presented assortment, you need to know exactly the purpose of different types of cutters, their differences and characteristics. Only if you use the right tool will your manicure be perfect.
Why do manicure cutters have different shapes?
Initially, these miniature instruments were used by dentists to drill and polish teeth and remove tartar. It is unknown who first thought of using a dental drill to remove old varnish and dead skin, but today this method has found a lot of admirers. And the industry immediately responded to demand by starting to produce small but powerful desktop manicure machines and cutter attachments for them.
Today, a huge number of cutter attachments with a wide variety of shapes are manufactured. For an unprepared person taking his first steps in the field of nail design, this diversity can cause a sensory shock. In front of a display case filled with round, oblong, narrow, cylindrical products, it’s easy to get confused, buying what you don’t need and not paying attention to the truly necessary offers. It is worth dwelling on the purpose of the products in more detail.
In the process of processing nail plates, they perform two important functions:
- remove layers of old varnishes and coatings;
- tidy up the plate and surrounding skin.
View this post on Instagram
Posted by Unreel (@extremeofficial)
Types of nozzles
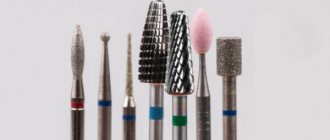
There are 5 attachments for the manicure machine:
- Milling cutters. They are presented in the form of products with a cutting blade. During work, rough skin or gel polish is cut off.
- Bors. The tool has a ball-shaped nozzle, designed to remove cuticles.
- Grinders. The devices make the nail plate smooth. With their help, the stratum corneum, waviness and furrows are eliminated.
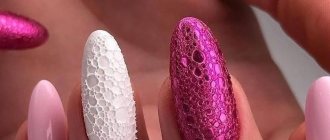
- Polishers. Silicone nozzles have a fine abrasive component. There are dark, blue, white.
- Caps. They are disposable instruments. The base under them is sterilized after the procedure. The manicure attachments are like sandpaper. They are used for rough processing of gel polish or acrylic varnish, exfoliation of rough skin in pedicure.
What brands of manicure cutters are the most popular?
There are highly specialized attachments that are designed to perform one single action - non-functional.
- "Needle". The speaking narrow-elongated shape is suitable for lifting the cuticle and removing pterygium. You can use it to file your nails under the extended plates. Hold the tool parallel to the surface of the nail.
- The “cone” lifts and opens the cuticle. It is necessary to maintain an angle of 900.
- The “ball” cuts off burrs, dead skin of the cuticle and side ridges. May have different diameters.
- “Bullet” perfectly removes pterygium.
- “Corn” is used to remove old coatings, extended plates, and shape the nails along their length. Hold parallel to the nail.
- “Cylinder” is suitable for grinding off excess length of plates. Due to the sharp edges, extreme caution is required when handling.
- The “roller” (rounded cylinder) does an excellent job of cutting cuticles and dead skin from the rollers.
Also, companies offer universal cutters that can be used at several stages of work. They are called functional. Such attachments are the best option for both an experienced craftsman and a beginner, as they allow you to complete all processing without replacing cutters.
- "Flame". A universal tool in the master's arsenal. It has an elongated fan-shaped shape, different diameters. The cheeks are used to clean the cuticle, the nose is used to work with the sinuses, and the “belly” is intended for rollers. Hold at an angle of 450.
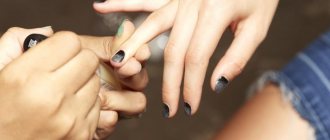
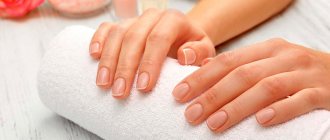
How to properly remove cuticles with a device
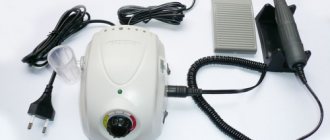
Don’t think that hardware cuticle removal is only possible in a beauty salon. In any household appliance store or specialized studio store you can purchase cuticle treatment machines that are allowed to be used at home. They differ from professional ones only in the small number of attachments and power. However, lower power is even safer. The main thing is to choose a machine with a speed of at least 2000 rpm. This is quite enough to do clean work.
Photo from the site: medaboutme.ru
As for the nozzles, a minimum set will be enough, and if desired, you can purchase the missing cutters.
The cuticle removal procedure is carried out in the following steps:
- The cuticle is lifted and moved back to the base of the nail bed. Then the keratinized layers of skin are carefully removed from it using a cutter.
- Next comes one of the most important work - removal of the pterygium. Here you will need to act delicately and with great care, because the work is carried out in close proximity to the nail plate. The pterygium must be removed carefully, moving the cutter almost parallel to the nail, without pressing on the plate itself.
- After the pterium has been cleaned, you can begin to work on the lateral ridges and sinuses. All burrs and microcracks are also carefully polished.
- At the final stage, the fingertips are treated - all keratinization and calluses around the nail, as well as in the subungual area, if any, are removed.
Photo from the site: rc-garaj.ru
When performing work on cuticle processing, a number of rules should be followed:
- Carry out work at speeds of 15,000 - 20,000 rpm. It is with this power that the keratinized layers are quickly and efficiently cleaned off and there is no unpleasant sensation.
- You cannot stay in one place for more than 4 seconds. – there is a risk of burning the skin.
- Do not press the cutter on the skin and nails, otherwise you may cause a wound.
- For each processing zone, use a suitable cutter option (more on this in the next section of our review).
- When working with a cutter, you should direct it in the opposite direction from its movement. It is with this technique that keratinization and dead skin cells are removed.
Important
You should use different cutters to remove cuticles on your arms and legs. Firstly, this requirement is dictated by hygienic considerations - toes accumulate more dirt and bacteria than fingers and, using the same cutters, you can spread an infection or fungus from your feet to your hands. Secondly, the cuticle on the legs is coarser and its processing will require cutters with a higher abrasive coating, while for the hands a finer grain surface of the cutters is sufficient. Rough abrasion can damage the delicate parts of the fingers.
Gradation of manicure cutters by hardness with color marks
All products have standard color coding according to the degree of abrasiveness (hardness). How to distinguish them?
- Black and purple are the most embossed surfaces designed for removing artificial nails.
- Green – high hardness. This tool is used to remove keratinized corns and calluses on the feet, as well as varnish and decorative coatings from the toes.
- Blue – medium hard. It is used to clean calloused, damaged skin.
- Red is soft. Universal degree of abrasiveness, ideal for working with skin and plates, stripping pterygium. Products with two risks - increased softness.
- Yellow – super soft impact. Used for delicate, allergy-prone skin.
- White – ultra soft. They perform small, delicate work on nails and treat very delicate skin. They are used extremely rarely due to low productivity and narrow specialization.
Recommendations
If you have purchased a device and cutters, then it is advisable to familiarize yourself with tips on how to use manicure attachments:
- The procedure must be performed only on a dry nail plate. Otherwise, it will heat up, which will lead to discomfort. In addition, wet areas are less easily processed.
- When using a combined or customizable device, you need to set the speed to a speed of up to 10 thousand. If it is higher, the nails will be erased due to lack of processing experience.
- Do not press the clipper close to your nail, applying pressure during operation.
- The first few times you need to practice using silicone tips. Then, when working with rough cutters, you will know how to hold them correctly.
What are manicure cutters made of?
Milling cutters differ in the raw materials used to manufacture them.
- Steel ones with diamond chips are needed for working with nails and skin. They are divided by abrasiveness, according to multi-colored stripes.
- Carbide steel ones do an excellent job with artificial nail plates and old layers of varnish.
- Super-strong ceramics with a complex composition have a hardness greater than steel. That is why such products are durable, their service life is four times longer than that of standard nozzles. In addition, they do not heat up when rotating, do not create vibration, and do not become clogged with removed material.
View this post on Instagram
Posted by Unreel (@extremeofficial)
- Corundum tips are hard enough to remove corns, calluses, and artificial materials.
- Disposable silicon carbide and sand caps are designed for pedicure. They remove calluses and rough skin.
- Products for grinding are made from rubber, silicone, suede. For a restorative effect when polishing, add a couple of drops of healing essential oil or cream.
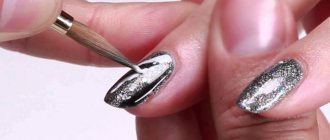
Removing gel polish with a cutter
What is good about this method of removing coating? Firstly, unlike liquid, there is no possibility of drying out the nails and cuticles or affecting their condition in any way. Secondly, the cutter leaves a thin layer of base on the nail plate, which gives the nails additional strength. This process takes the same amount of time as the soaking process.
How does this happen? The cutter rotates at high speed, due to which it cuts down the artificial turf. She “slides” along the nail, as if slowly stroking it. In the hands of a skilled master, this happens quickly, painlessly and safely.
What is the result? After hardware removal, an invisible layer of base coat remains on the nails, which is sanded with a buff. It is this base layer that acts as a protective barrier, preventing the cutter from damaging the nail plate, which as a result looks healthy and natural. The cuticle remains completely intact, so any discomfort, inflammation or pain is excluded.
Differences between manicure cutters and pedicure cutters
The technology for caring for nails on hands and feet is no different. Therefore, the same types of nozzles are used for different stages of work. All the differences are in rougher nails and keratinized skin. Therefore, larger, rigid products with a pronounced relief are used.
Foot care also includes skin treatment. To do this, special attachments are used to remove keratinized, dead skin, clean cracks, as well as subsequent grinding and polishing of the delicate skin.
Selection of nozzles by materials
Of all the materials, ceramics and its variety, corundum, are the most suitable for novice craftsmen. Nozzles made from them carefully treat the surface of the nail plate and skin, with them there is less risk of damaging the client’s hands or causing him pain, even if the cuticle is thinned and the vessels come close to the surface. Silicone carbide tips are often recommended for beginners.
Corundum bits
They are multifunctional, flexible, and safe to use. The material is hypoallergenic and does not cause irritation. These cutters are not very durable. But they are soft, so it is convenient and easy to train with them for those who are studying or working recently.
Diamond bits
Diamond bits have also become widespread. For beginners, it is better to use soft or medium nozzles to ensure safe operation. Use other abrasive attachments after positioning your hand. The advantage of diamond bits is a wide range of hardness levels. Let us illustrate their varieties using the example of attachments from the premium HDFREZA series (Myslitsky-Nail’s own brand).
| Abrasiveness of nozzles | Description |
| Super tough and tough | Coarse tips are suitable for working on creeping, “rubber” cuticles and preparing the nail for extensions. |
| Medium hard | Universal attachments are convenient for processing hydrous cuticles, delicate grinding of plates and preparing them for extensions. |
| Soft (fine processing) | Thin cutters polish the nail plate, remove thinned cuticles and “problematic” pterygium. |
| Super soft (super fine processing) | Very fine grinders delicately process plates, cuticles, pterygium, and are convenient at the final stage of preparing nails for extensions. |
"Classical" ceramics
Sintered soft attachments delicately treat weak nail plates and sensitive skin, while medium ones accurately treat cuticles and nail ridges. Models with a coarse abrasive surface are suitable for working with artificial surfaces, hard areas of skin, and calluses.
Silicone carbide tips
They are suitable for study and first steps in the profession. Due to their softness, cutters are used mainly in delicate processing - grinding and polishing, eliminating roughness, and so on. They are convenient for working on thickened plates, in the interdigital area; they can be used to polish hyperkeratotic feet and correct the length of nails.
After “practicing” on safe and comfortable cutters, you can move on to the diamond and metal models popular among professionals. They are durable, practical, and “cope” with severe roughness and dense nails, but they require a steady hand, which is gained through experience.
Recommendations for cutters from experienced specialists
For professional nail care you will need the following set of attachments:
- "Flame", "Bullet" or "Cone" with diamonds and red mark, to lift cuticles and cleanse rollers;
- cut off the cuticle and dead skin from the sides using a “Ball” with diamond chips, medium or miniature;
- The pterygium is cleaned with a diamond “Cone”;
- the old coating is removed with ceramic “Corn”;
- if the nails are extended and trimming of the plates is required, then a carbide “Cylinder” is needed;
- Finish the job with sanding attachments.
Form
Nozzles for manicure apparatus differ in shape:
- Olive. Eliminates cuticles, performs minor adjustments, and treats side rollers.
- The cylinder is straight. Serves for sawing off the modeling layer.
- Needle. Eliminates gel polish, corrects gel nails, removes peeling near the cuticle and artificial material.
- Ball. Suitable for removing build-up and cracks. It also removes rough skin without harming the plates.
- The cylinder is rounded. The attachment for the manicure machine polishes nails, removes calluses, polishes acrylic.
- Flame. The device is used to process the side ridges, remove the artificial material, and drill out a place for rhinestones and nail piercing.
- Cone. The product is sanded and polished.
- The cone is truncated. Has the same functions as the previous view.
- The cylinder is pointed. Performs opening of sinuses and processing of ridges.
- Reverse cone. The device processes nails before a French manicure. The nozzle makes the nail smooth without changes in height.
This is a detailed description of the manicure set attachments. They also differ in the diameter of the working part and the level of abrasiveness. If you use the right cutters for a specific job, you will get excellent results.
How to install cutters before a manicure procedure
Depending on the manufacturer and brand of router, there are three ways to clamp the attachment:
- automatic automatically fixes the inserted shank. Such a mechanism must always have either a cutter or a plug, otherwise it will be blocked. You won’t be able to deal with the blockage on your own - you’ll have to call a technician or go to a service center;
- products with semi-automatic mode have a special handle that opens the collet clamp. Having inserted the nozzle into place, close the clamp by turning the handle;
- manual installation. It involves turning on the button on the body and unscrewing the clamping washer. Once the shank is inserted, the washer is tightened with the press of a button.
The type of clamp and step-by-step installation diagram are in the instructions for the router. Before working, you must familiarize yourself with it to avoid damage.
How to sterilize?
The final stage of processing of cutters is sterilization, chemical (used only in salons) and hardware. There are several types of devices designed for hardware sterilization:
- glasperlene devices, in which processing occurs by heating to 230 ° C and takes 30–180 seconds;
- autoclaves are sterilized with hot steam for 15–40 minutes;
- dry-heat ovens process instruments at a temperature of 180–250 °C for 30 to 120 minutes.
Treated cutters should be stored in a sterile, hermetically sealed container.
Sanders of different sizes and degrees of softness for manicure and pedicure
Beginners are advised to start with tools marked with blue notches and use bits with rounded edges. For example, a blue ceramic cutter is the safest for removing gel polish, but is not suitable for gel and acrylic. To remove artificial material, purchase a ceramic corn attachment, not a cylinder, so as not to damage the cuticle. In the Buy-Nail.com online store you can buy a set of cutters for both beginners and professionals