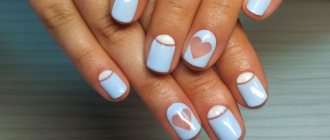
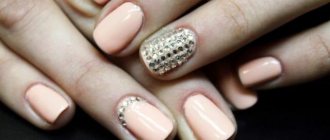
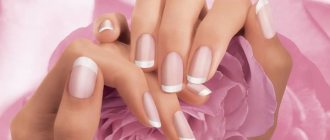
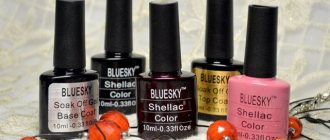
How to make shellac yourself at home? How not to spend a large amount of money on the services of an experienced specialist? You can learn about this and much more from the following material.
Shellac is a new manicure technique. It is not as harmful as the classic method of nail extension. At the moment, applying gel polish to the feet is rapidly replacing other methods of design and treatment of the nail plate. Many ladies of various ages who try to follow fashion use the services of manicurists when they want to get shellac done. No matter how complicated the process may seem, you can do it yourself at home.
What is shellac?
Shellac is a logical, consistent way to extend gel nails. During the procedure, a set of polymers is used, each of which has the properties of both a varnish and a special gel.
The composition of the coating applied to the nails includes the following components:
- Film former. When this substance hardens, it forms a dense coating that is not afraid of any mechanical stress. The component is considered the basis of any type of shellac.
- Photoinitiator. This substance absorbs the sun's rays, thanks to which the varnish hardens faster.
- Pigment . The shade that is the main component of shellac. Using pigment, you can give your nails a certain shade.
- Thinners . Components that allow you to adjust the consistency of the varnish.
- Supplements . These components enhance and regulate the quality of the varnish. Thanks to additives, the color becomes more intense and resistant to abrasion.
- Shellac looks like a medium liquid mass. The color of this mass may vary. It all depends on the pigment present in the composition. To get a new, unusual shade, you can mix several gel polishes at once.
- The varnish dries using a special UV lamp. A coating that dries under other influences is not very stable. Shellac has increased strength. It can be stored for at least 14 days, while maintaining its original appearance.
Type of manicure
How to dry such shellac coating
Many girls and women prefer to take care of their hands and nails at home, developing and implementing their own designs. To successfully apply Shellac to records, you will need a special lamp.
The compact tabletop device has built-in ultraviolet, cathode or LED light sources. Under the influence of light rays, the coating layer hardens in 1-2 minutes, as the polymerization process occurs. The dried composition firmly adheres to the surface of the nails and retains its flawless appearance for three weeks.
The beauty and durability of the manicure depends on the quality of the device, and it lasts for years. Therefore, you should not purchase cheap analogues from dubious sellers. Experienced professionals recommend products from the following brands:
- "OPI", "Harmony";
- "CND", "Gelish".
What you need for a shellac manicure: important tools, materials
For a shellac manicure there is a basic kit that includes tools and materials. Thanks to this set, you can create an exquisite manicure yourself at home:
- UV lamp. The power of such a light bulb should be 36 W. If you have a lamp with a lower power, the varnish may begin to peel off over time. Consequently, you will end up with an ugly manicure.
- Degreaser . Most often, such substances are sold in the same store where all shellac components are sold. If you can't find one, use regular medical alcohol.
- Base coat. Try to choose a high quality foundation.
- Shellac of the required color.
- Finish coating. You also need to choose quality material.
- Orange stick.
- Napkins that have no lint. The fact is that the lint can ruin your manicure. You will have to remove the shellac layer and then reapply it. You will need wipes to remove the sticky layer at the final stage.
- A liquid used to remove shellac.
When choosing, pay attention to the CND brand. The company sells high-quality material for creating shellac. The fact is that the manufacturer is responsible for the quality of its own products and provides a guarantee for each product.
You can, of course, buy material of lower quality. But with such products you may not get a beautiful, long-lasting manicure. If you save, you won’t be able to get an excellent result - a beautiful, long-lasting, elegant manicure.
How to remove shellac
The most common myth is that durable coatings spoil natural nails. In fact, it is not the materials themselves that are harmful to manicure, but the lack of professionalism and non-compliance with technique. Most often, nails deteriorate after improper removal. Do not scrape, pull, rip off or bite off your manicure. Along with the shellac, a layer of the natural nail may “go away.” Lumps and pits will appear on it, rough scales will rise, and the plate will become thinner.
Removing the coating by soaking
The easiest way that even a beginner can handle. To facilitate the procedure, you can use special caps or clothespins. Additionally, you will need cotton pads, cut into pieces slightly larger than the nail plate. For soaking we use a special solvent, also known as a remover. The brand TNL, Severina and others are suitable.
Soaking caps
How to remove shellac correctly:
- Take a coarse file and lightly go over all the nails, removing the top top coat. You don’t have to do this, but the soaking will take longer, so it’s better to take a minute.
- Lubricate the area around the nail with oil or cream. This is an optional step, many instructions don’t even have it, but this way we will protect the skin of our fingers and the solvent will not sting.
- We wet pieces of cotton pads in a special product. We soak it well, but the drops should not flow off. Apply to the nail.
- We put on a cap or clothespin to secure it. If there is nothing, then you can wrap the tip of your finger in foil. We wait until the shellac becomes limp. It will crack and swell.
- Take a pusher or an orange stick and scrape off the coating. We move from the base of the nail to the edge.
If not all of the coating is removed the first time, you can reapply the cotton wool and soak it a little more. It is more convenient to simply go through small pieces with a file.
On sale you can find special bags of solvent into which you stick your fingertips. Judging by numerous reviews, they are not very comfortable, the substance spoils the skin, flows under the cuticle, and stings. It is better to apply the cut-out napkins directly to the nail plate.
Coating remover - how to choose and use
Removing the coating by cutting
The soaking agent is chemical, it often stings the skin, has an unpleasant odor, and with prolonged contact it thins the nail plate. Therefore, more and more craftsmen prefer sawing. It can also be practiced at home.
What can you cut down with:
- machine with a cutter;
- ordinary files.
Filing with a device requires skill and caution; it is easy to file through your nail.
What is hardware manicure, features of its implementation
Working with regular saws takes a lot of time. Therefore, it is recommended to use several pieces, first with a coarse abrasive for artificial nails, then switch to soft files for a natural plate, and finish the job with a buffer.
How to properly make your own shellac nails: preparatory stages
So, having prepared all the necessary tools and materials for a shellac manicure, you can begin the preparatory stages. This includes preparing the nail plates.
Preliminary manipulations consist of the following steps:
- Treat the cuticles on your fingers.
- Form the nail shape that you like best.
- Polish your nails. This procedure is considered mandatory. Thanks to it, the shellac and the surface of the nail plate adhere better.
- Treat your nails with an antibacterial agent. It will degrease your nails and ensure even application of the polish.
- Apply a layer of base coat.
- Warm your nails under a UV lamp to fix the gel polish. The warm-up time should be approximately 30 seconds.
Preparing nails for shellac application
Not only the appearance of the manicure, but also the duration of its wear will depend on the correct preparation of the nail.
At this stage, you need to complete the following steps:
- Nutrition of the nail plate . Hands need to be steamed in a special bath, preferably based on medicinal herbs, for example, aloe. This is necessary to keep the nail in good condition.
- Cuticle removal . Steaming also helps to soften the cuticle, which means its better removal. You should also apply a special cuticle remover to the cuticle. Then move it to the edge of the nail using an “orange” stick and cut it off with pliers. It is worth noting that this “island” of skin must be trimmed as much as possible: the smaller the cuticle, the longer the regrowth of the plate will not be noticeable.
- Shaping. To a large extent, a successfully done manicure can be judged by the shape of the nail. It is worth remembering that after applying shellac it will not be possible to correct the shape. That is why it is necessary to give the nail the most attractive contours from the very beginning through the use of a nail file.
- Polishing . In order for the gel polish to lay evenly, without depressions and “incisors,” the nails must be “smoothed” using a special polishing file.
- Cleansing . Clean the nail from any nail powder remaining after the previous 2 steps. This must be done with a brush: the usual “blowing off” of dust will not be effective enough in this case.
- Removing fatty components . The completion of nail preparation is degreasing them with a special product. This is necessary for good bonding of the nail and shellac. After this procedure, you should not touch your nails with your hands or touch any other surfaces or objects with them.
Shellac at home for beginners step by step: base coating
Covering your nails after preparing them begins with applying a base. This layer protects nails from the negative effects of the pigment layer. In addition, the base makes the adhesion of the polish and nail much better.
according to the following instructions:
- Paint the left edge of the nail plate.
- Paint the right edge.
- Apply the base in the center of the nail.
- Before moving on to the next step, make sure that the edges of each nail are carefully “sealed.”
- Thanks to this technique, you will evenly distribute the base over your nails without catching the skin.
The entire database processing procedure consists of the following steps:
- To begin, twist . This way you will warm up the base, after which it will lie evenly on the nails.
- Apply foundation. Make sure the layer is not too thick. Otherwise, the base will take longer to harden, which can cause unwanted stains on your nails.
- Dry your nails for 30 seconds.
What is the difference between gel polish and shellac?
On the one hand, gel polish is a broader concept than shellac. Some even believe that these are the same product, but there are differences. Each company uses its own production technology and adjusts the composition of the product, which ultimately affects the coating application method.
Compound
It is impossible to unequivocally answer which is better: gel polish or shellac. Externally, both coatings are similar. It is not always possible even for a professional to distinguish them when viewed from afar. However, the differences lie in the composition. There are several of them.
- Each product has its own consistency due to the different proportions of varnish and gel. When coating with shellac, it is obvious that it is more liquid. The gel polish formula is different. The product is thick and viscous. It is distributed more slowly over the nail plate.
- The manicure stays on the nails the same way, but gel polish contains more chemical components. It necessarily contains acetone, toluene, formaldehyde. Shellac differs in the list of ingredients. It contains no toxic organic solvents.
- There are other components in shellac that provide its properties. These are methacrylates and titanium dioxide, but they are less toxic than acetone and formaldehyde. Its formula is considered safer as it causes less damage to nails.
Polymerization
One product differs from another not only in its chemical composition. Masters who work with both types of nail coatings know that they have their own polymerization time. In addition, the equipment used for gel polish and shellac is different.
Shellacs harden quickly, but they require a UV lamp. Any equipment is suitable for polymerizing gel polishes, but the speed of fixation of the coating depends on the type of rays:
- The gel polish hardens in a UV lamp in 2-3 minutes;
- You only need to keep your nails in the LED lamp for 30-60 seconds.
Advantages
The choice is always up to the client. Many people try both options, test the coating, evaluate its durability on the nails, and later settle on one specific manicure method. Both methods have their advantages.
Advantages of gel polishes:
- More varied color palette. Many manufacturers offer 60 shades, regularly updating their collections. Among the assortment of gel polishes you can find unusual options, for example, with the “cat eye” effect. They are ideal for lovers of fancy nail designs.
- Maximum durability. Manicure with gel polish is considered the most long-lasting. Three weeks without cracks, chips, or peelings is possible if you follow the correct application technology and carefully prepare your nails. Gel polish is highly durable, making it ideal for vacation.
- Additional nail protection. To choose gel or shellac, professionals advise assessing the characteristics of the nail plates. If they grow well and rarely break, then there is no difference. But for those who cannot grow their length for a long time, it is recommended to use gel polishes, which form a hard protective coating on the surface, with which even accidental blows are not dangerous.
Advantages of shellacs:
- Convenient brush for smooth application. The CND brand has taken care of the comfort of nail artists and girls who do their own manicures at home. With shellac, you don't have to worry about the coating going on unevenly or affecting the cuticles.
- Low toxicity. Due to their gentle composition, shellacs are suitable for those with sensitive skin and nails. The risk of irritation or allergies is minimal.
- Quick removal. This is another key difference between shellacs, for which they are valued by modern girls. You can remove the colored layer in just 5-10 minutes at home, without the risk of mechanical damage or harm to your nails.
Flaws
A long-lasting manicure has many advantages, but it is not without its disadvantages. Both types of coverage have their drawbacks.
Disadvantages of gel polishes:
- Risk of irritation. The composition contains many chemical compounds, so the reaction is unpredictable. Allergies are possible, so when testing a new brand, do not rush and do a full manicure. It is better to cover one nail and check if there are any negative changes.
- Mechanical damage. Applying gel polishes is impossible without actually filing off the top layer of the nail. Over time, the plate becomes thinner, becomes fragile and sensitive. It is for this reason that experts warn that when choosing a gel consistency, it is better to take breaks periodically.
- Difficult to apply and remove. Gel polishes always stick well to nails, but only an experienced nail technician can apply them correctly. It will not be possible to make a correction or remove the coating completely at home. You will need to visit a beauty studio.
Disadvantages of shellacs:
- Impossibility of correction. As they grow back, you will have to completely remove the material and re-cover the nails. This disadvantage is compensated by the speed of removal and ease of application of shellacs. This can be done even at home.
- Unstable coating. Shellac polish lasts longer than regular colored polishes, which can peel off within a day of application. However, CND products are less durable compared to gel polishes. It lasts less than two weeks on nails and fades quickly. Impacts may cause cracks.
- Risk of buying a fake. Craftsmen in salons work with original shellac, but products in stores may turn out to be only a copy of a CND brand product. The coating will not fit well on the nails and will most likely disappoint.
Application
Before deciding for yourself which is better: gel polish or shellac, you should try both coating technologies. Application methods will vary.
Gel polish, like regular gel, is used as part of a three-phase system and requires careful preparation of each nail. Sequence of work:
- The cuticle on the nails is removed.
- Each nail is given the desired shape.
- Nails are treated with a buff to create a relief surface.
- A layer of degreaser and primer are applied.
- The base is applied, then the color layer and top coat. Each stage is accompanied by drying in a lamp.
The difference between the technology of applying gel polish and shellac is the reduction in preparation steps. CND products are applied to the smooth surface of the nail. There is no need to polish it with a buff. In addition, you can safely skip the step of using a primer.
Duration of wearing
The durability of different coatings varies. Performing a manicure with gel polish is more difficult and takes longer, but the hard, dense coating is stronger. It stays on your nails for three weeks without chipping. Good adhesion to the surface ensures even longer wearing, but experts advise coming for correction in a timely manner. The free edge becomes long, causing the center of gravity to shift towards it. As a result, the risk of breaking a nail increases.
Soft shellac is safe and low-toxic, but it also wears less. You will have to think about a new manicure in two weeks.
Removal
Gel or gel polish is extremely difficult to remove on your own. If it is not possible to visit a nail specialist, you will either have to wait for the coating to grow back, periodically shortening the free edge, or file off the colored layer completely. Home removal will take a lot of time. In addition, there is a high risk of accidentally damaging the cuticle or leaving a cut on the surface of the nail.
Fans of CND coating value it precisely for its simple removal of the house. Gel polish and shellac differ in texture after polymerization. The first hardens, while the second remains soft. It can be removed using specialized solvents or by carefully prying it off with a wooden stick. Only the top top layer will need to be cut off.
How to apply shellac?
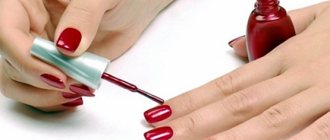
This layer makes your nails the color you want. To properly apply shellac, follow these instructions:
- Apply a thin layer of product. Do not seal the edges of your nails.
- Dry the shellac under the lamp for approximately 3 minutes.
- Next, reapply shellac . You can apply the same varnish or use a different color. With this technique, an original, unusual drawing is obtained.
- Hold your painted nails under a special lamp for approximately 3 minutes.
Keep in mind that each layer of shellac must be thin enough, otherwise the varnish will begin to swell and bubbles will form underneath.
The layer should be thin
- Before applying the varnish, check what condition it is in - the product should not be very thick. Varnish can deteriorate over time if you store it incorrectly.
- Make sure that the cap on the tube is screwed on well. Store the varnish only in a dark place where the temperature is no more than +25°C.
Why shellac is better
Shellac has many advantages:
- Natural appearance. The demonstrated shellac nail extension in the photo below allows you to verify this. The gel material easily camouflages existing grooves; the varnish needs to be renewed very rarely.
- There is no need to file your nails. When applying shellac, correction or removal of a layer does not cause any unpleasant sensations in a woman. It is known that in order to completely remove the plate, the master has to treat the surface of the plate with a nail file.
- Shellac is suitable for women who believe that there is nothing better than short, well-groomed nails. In the photo you can see how organic the material looks.
- Gel polish is a great option for those who do a lot of housework. If the step-by-step instructions are strictly followed, the surface will be durable and resistant to detergents.
Combining shellac and extensions is not recommended. The video demonstrates all the negative sides of combining the two procedures. Which one to choose is up to the woman.
Shellac manicure: how to apply decorative elements correctly?
The scheme and method of applying decor during a manicure with shellac is almost no different from decorating nails during a manicure with ordinary varnish. But here, after applying the decorations, you should also re-coat your nails with a finishing coat of varnish.
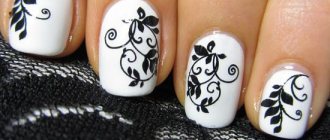
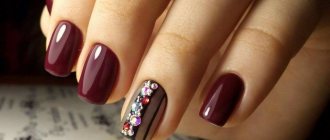
The decor on the nails during a shellac manicure can look like:
- Ribbon, stripe.
- Ornaments.
- Various patterns.
- Images.
- Applying several shades of varnish at once.
- Glitter and so on.
Images
Ribbons
Stones
Glitter and powder
How to extend the wearing period
To extend the wearing of shellac or gel polish, you should follow the following recommendations from the experts:
- do not allow aggressive substances to get on your nails;
- prevent exposure of plates with decorative coating to high temperatures;
- do not wash dishes or clean without gloves;
- do not scratch the coating;
- Do not try to remove it with nail scissors, knives, or flat screwdrivers.
Watch the video on how to extend the wearing time of gel polish:
The final stage of a shellac manicure is applying the top.
During the final stage of the manicure, the last layer, the top coat, is applied with shellac. This procedure is performed as follows:
- Apply top coat in a thick layer. Seal each open edge of your nails with topcoat. This way the colored varnish will be in a closed “vessel”.
- Dry your nails. The drying time under a special lamp should be approximately 2 minutes.
- Take a lint-free cloth and a special product. Remove the sticky layer.
- If you don’t have a means to remove the sticky layer, acetone or ordinary alcohol will do. But these substances can ruin your manicure. Therefore, use them extremely carefully.
What is more harmful - gel or shellac?
Experts are still arguing which is more harmful - gel or shellac, and based on reviews from women and doctors, we can conclude that gel polish has the most negative effect on the nail plate. And this happens because of the composition of the coating, because it contains toxic compounds - toxins automatically enter the body, accumulate and disrupt the functioning of organs and systems.
In addition, shellac is applied in a thinner layer, wears less time and makes the plate heavier, which eliminates its thinning and increased fragility.
How to properly apply shellac at home: secrets
Making your nails beautiful can sometimes be very difficult, especially when it comes to shellac. If you are a beginner, you can use the detailed instructions above, but it may not be enough for you. After all, you are not familiar with the secrets that real professionals know.
To get the perfect manicure, experts recommend using the following tips:
- To evenly distribute the glitter on the surface of the nail, mix it with a small amount of transparent base. Mix the mixture thoroughly, then apply a second layer of jewelry to your nails.
- To make your manicure last longer, apply shellac in a thin layer. Avoid touching the cuticles to keep your manicure looking neat.
- To do a French manicure, do not use stencils. After all, after drying the varnish, it will be difficult for you to remove them. If you remove the stencils before the gel has dried, it may run.
- If you use shellac to extend your nails, do not file the entire nail down. Just sand .
- To remove cuticles, experts advise using a special product. However, if the cuticles are not very noticeable, then take an orange stick and use it to push back the cuticles on your fingers.
Instructions for home
- When buying a UV lamp , pay special attention to the power of the equipment. The best option is a 36 W lamp. In this case, the varnish will dry quite quickly.
- Any correction must be carried out under this mandatory condition - the nail plate must be dry. Even a gentle file will not be able to keep wet nails intact.
- Use cuticle oil every day. Apply it in the morning, then in the evening. Only in this case will you not get hangnails on your fingers.
- Before visiting a beauty salon, first treat your nails. If your nails are sick, shellac will only make the problem worse. The nails will begin to break, peel, and fungus may appear.
- Do not apply hand cream before applying shellac.
New shellac ideas 2022 from leading designers
Each new season has its own fashion trends, innovative ideas from the previous year are developed, and some become a thing of the past. 2022 was no exception.
Minimalism style
For several seasons in a row, minimalist designs have been breaking all popularity records. Laconic pictures on a plain neutral background look both modest and stylish. They perfectly express the mood of the owner, her hobbies or life position. They go perfectly with different textures, negative space, and two-color duets.
Geometric figures
This year in fashion:
- monochrome and multi-color solutions;
- single-color and multi-colored stripes, parallel and intersecting lines;
- diagonal, horizontal and vertical stripes, dots and polka dots;
- triangles, complex shapes filled with color and glitter;
- active use of “negative space”, French, lunar techniques.
It is possible to creatively combine a variety of solutions and elements that will appeal to the fashionista. Rhinestones and pearls, kamifubuki, and different types of foil will help decorate your nails.
Sequins
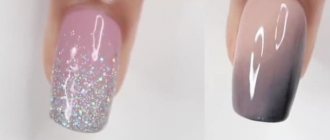
Glitter powder and glitter are an excellent choice for creating an unusual, expressive manicure. It is not only suitable for holidays. With a little glitter, bright spring-summer nails will sparkle with refreshing colors. And soft pastel colors will reveal new, unexpected facets. Glitter can be applied to the entire surface or partially. Stretching or emphasizing drawings made by hand or using stickers.
Benefits of shellac manicure
As you can already understand, shellac has many positive aspects. Among them we highlight the following:
- looks just as good on short nails as it does on long nails. This method makes it possible to paint nails to the required length.
- Since shellac is considered a natural remedy, thanks to it, nails are strengthened breaking .
- Shellac can last on nails for quite a long time. Many women wear this manicure for almost 3 weeks.
- To remove shellac, you need a special product. This means that nails coated with this method are not afraid of various household chemicals.
- Thanks to shellac, nails become shiny . The shine on them can last for quite a long period without fading over time.
- Companies that produce shellac products try to closely follow fashion. Therefore, the palette of varnish colors is regularly updated. On sale you can always find both classic shades and bright, interesting, avant-garde tones of gel polishes.
- The main advantage of shellac is that this method of painting nails is considered completely safe . The main components of shellac contain no formaldehyde. That is why such a manicure can be done not only by girls prone to allergies, but also by pregnant women.
- If you suddenly get tired of shellac , you can remove it yourself at home. To do this, purchase a gel polish remover or film in advance from a specialized store. Then carefully study the instructions for beginners , and only after that clean your nails of polish.
Depends on the mood
Gently
Unusual
Bright blue
Reds
How to distinguish real shellac from fake?
The first and main sign of a fake is the low price. When purchasing any cosmetic product, cheapness is a sign of savings on product components. For example, cheap gel polishes have fewer components that help protect the nail. They are more harmful and also less durable.
Another indicator is smell. Almost all good cosmetics stores should have a sample next to each product. Which needs to be examined not only for color, but also for smell. Real shellac should not emit a sharp, unpleasant chemical aroma.
Next, using the same probe, you need to study the consistency of the drug. Its density should be medium: not too liquid, but not thick either. The first indicator will indicate that the gel polish was diluted with acetone (or any other similar product) to increase the volume of the batch. The second will indicate an expired expiration date or incorrect storage principle.
The most important thing when buying gel polish is to use only professional stores and purchase exclusively familiar brands.
Otherwise, you can allegedly save time and money, but not achieve the desired result (loss of money), or even ruin the appearance of the nail (wasting a lot of time on restoration).
Disadvantages of shellac manicure
Everything that exists on our planet has negative sides. Shellac was no exception. There are few disadvantages to manicure, but you should definitely know about them:
- The shellac procedure is quite expensive . Correction can also cost you a decent amount. So if your nails are growing quickly, accept that you may be incurring additional costs.
- The next negative side of shellac is the following - despite the fact that manufacturers claim that the coating is very durable, due to high temperature, nails can expand and then shrink, returning to their original size.
- Due to warm water while washing dishes or taking a bath, nails can become deformed, resulting in micro-cracks in the coating. Due to such cracks, dirt can get under the varnish, causing the development of bacteria.
- Shellac can stay on nails for a long time, so microbes have a lot of time to develop and damage the nails. If you want to avoid such consequences, try to do all your homework with gloves.
The service is expensive
Long periods of wear can promote the development of bacteria
Chips and detachments
Most of all, women are interested in how long shellac lasts and whether it lasts longer than other gel polish. It is durability that influences the choice of material. And here’s the absurdity: once a manicure lasts for three weeks, but with another shellac it’s impossible to last more than 5-10 days. Sometimes chips and detachments begin to appear earlier. In rare cases, the reason is the quality of the material itself, more often it is a violation of technology.
Why there are chips on the tips:
- A clinser or primer was not used, or it was done incorrectly, leaving untreated areas.
- Thick layers are applied that simply do not have time to dry properly, or a weak lamp is used. There is no need to take 12-24 W, although, according to sellers, it is ideal.
- The ends of the nail are not sealed, it is important to do this. If you can’t work on all the corners and edges, you can use a separate thin brush for the base and shellac.
- The ends were sealed too much. You only need to apply one layer of base, color coating and top coat. If you cover the edge with each layer, a thick roller will form on it, which will definitely chip.
- Thin nails. Even under the coating, the ends bend strongly, small cracks appear, and the free edge breaks off.
Sometimes chips at the very tips occur under heavy load. For example, a girl types a lot on the keyboard and does it with her nails. As a result, the top coating wears off, small cracks appear, and the coating chips.
Why detachments happen:
- The cuticle is poorly processed; pterygium remains along the edges of the nail, which does not provide a strong grip.
- The plate is not prepared. The surface needs to be sanded thoroughly to remove all gloss. Pay attention to your buffs and files, maybe it's time to update?
- The materials do not dry out. Here the problem can be found in the thickness of the layers or in the operation of the lamp.
- Sloppy application with streaks. As a result, after 2-3 days, the filled areas lag behind the skin, rise, peel off, and pull the rest of the nail area with them.
No matter how durable and expensive the coating material is, it is important to take care of it. You should not open jars with your nails, scrape or scratch anything. Housework, especially when coming into contact with household chemicals, should be done with gloves.
How to do a manicure with Cat's Eye shellac?
This type of manicure is considered very popular. By using a varnish that contains metal particles in the procedure, you can create unusual patterns that resemble a cat’s eye.
For this design, prepare the following materials:
- Varnish. It should be green.
- Magnet.
If you don't have a special magnet, then take a regular one.
Cat's eye
The process of creating such a manicure consists of the following steps:
- For shellac, prepare your nails and apply a base.
- Dry the base under a UV lamp.
- Apply a special green varnish and dry it too.
- Reapply the polish and hold the magnet near it. The metal particles will form an unusual pattern.
If you approach the magnet with its edge, you will get a pattern in the form of stripes. By twisting the magnet, you will get an interesting pattern that resembles a cat's eye. At the very end, coat the varnish with topcoat.
Is it possible to apply shellac on short nails?
Previously, many nail technicians did not recommend applying shellac to very short nails, because they believed that a decorative coating, especially a dark one, would emphasize their small size, which would look sloppy. However, now the preferences and tastes of many women have changed - long nails do not always emphasize femininity and grooming, which is why some have deliberately cut off their free edge.
However, in any case, the original length of the nail bed must be taken into account before applying shellac, so that the work looks neat even a few weeks after it has partially grown out.
Features of performing manicure on short nails:
- Practicality. The small size of the nail plate is always convenient for girls in everyday life, since the risk of accidentally touching something, tearing or ruining it is reduced;
- If you do not want to emphasize the size of your nails, it is better to use light shades of shellac. This way you can visually increase the length of your nails, since they will partially merge with the periungual area;
- Versatility. The size is suitable, regardless of the woman’s age and status, since the manicure always looks neat and well-groomed;
- Increased wear time. Since they do not become very long as the nails grow, they do not bother the girl, which is why she can wear them for more than a month. In addition, the risk zone (where the plate can break) with a short length is minimal, which reduces the load on the matrix;
- You can design your nail bed yourself. If you learn how to use shellac, you can cover your nails yourself at home, evenly distributing the pigment over them;
- A large number of design options. When working with long nails, some design options may look rough and sloppy. With a short length there are no such features.
If you are susceptible to fashion and style trends, you can be sure to choose a medium or short hem length as it will always be common, at least among older women.
You should not cut your nails completely. The optimal length of the free edge is 1-2 mm, which depends on the size of the girl’s nail bed. This way the work will look feminine even if the surface grows a few millimeters.
When performing geometric manicure design, be careful in the patterns - horizontal lines will emphasize the size of the nails, making them visually square or round. Such work will look strange and out of place, regardless of the original shape of the plate.
Also keep in mind that the design is recommended to be done on 1 or 2 nails of each hand. Applying unusual inserts to the entire hand will make the manicure look tacky.
Shellac: French manicure
Perform French shellac using this method according to the following instructions:
- Initially, remove the cuticles, give the nails the desired shape, remove the oily layer.
- Apply primer.
- Next, cover your nails with a thin layer of base.
- Dry your nails under the lamp for approximately 3 minutes.
- Use a special cloth to remove the sticky layer that forms after drying.
- Paint your nails with the desired color.
- Carefully draw "smiles".
- Cover your nails with base coat.
French
Creating shellac at home is an easy procedure even for beginners. If you follow our instructions, you will definitely get a beautiful manicure.
You can find out more about manicure here:
- Manicure yourself at home, with or without varnish
- Hot manicure at home
- Designs and ideas for purple manicure
- Emerald manicure
- Beautiful knitted manicure
- Manicure with hearts
