Gel polish with spreading effect
- Unusual design
- Products Nika Nagel
- Possible errors during application
- Instructions for creating a manicure
Gel polish is very popular among many manicurists, as it has many advantages over conventional coating due to its consistency and strength of the material, which lasts on the nails for several weeks.
Unusual design
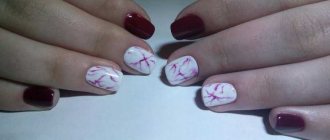
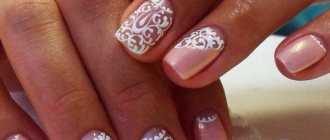
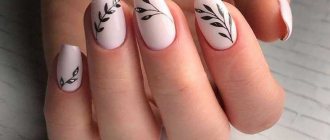
Technology with flowing patterns is a new trend, thanks to which the owner of such an exquisite manicure will definitely be the center of attention. A similar pattern can be applied to both a light and dark base, because in any case, the spreading design will bewitch and attract only interested glances.
The product is applied in the same way as applying regular gel polish.
When coated with an appropriate base and then with colored gel polish, we can say that a real miracle occurs when the effect of spreading varnish is achieved, which smoothly transforms into a pattern, literally spreading across the nail plate.
To create drawings you will need a dots or thin brush and flowing gel polishes. This technology is suitable even for beginners, because creating a design with blurred edges does not require any special skills.
Products Nika Nagel
The Nika Nagel company produces and offers appropriate products for nail extensions and design. The company's products are developed in Germany. The Nika Nagel brand of gel polishes is very popular among most nail designers and is also safe for natural nails. Gel polishes in this series dry quickly and stay on the nails for a long time. Also among the gel-based products in Nika Nagel there is the above-mentioned gel polish with a spreading effect. Shading the edges of the nail with varnish of this brand turns out to be mesmerizing, as one shade smoothly transitions into another, forming a chic play of colors.
You will learn more about gel polish with a spreading effect in the following video.
Possible errors during application
It is very important to have an idea about the correct application of gel polish, since there are several negative aspects that worry many girls. For example, the fact that often this type of varnish begins to crack, and during this time the nails can grow, thereby making the manicure not as perfect as we would initially like. But it’s worth considering that everyone makes mistakes, and even the most experienced manicurists are not immune to them.
There are many mistakes that can be made by both professionals in salons and beginners who perform manicures with gel polish at home.
Typical shortcomings when preparing a nail:
- No degreasing of the nail, which must be done right before applying gel polish. For this procedure, you should not use a cotton swab, as its fibers may remain on the nails, thereby ruining the entire manicure.
- You should not apply cuticle oil right before coloring as it leaves a layer of fat that will prevent the nail polish from taking on well.
- There is no need to treat your nails with a polisher, as this does not make sense; it would be better to use a buff. The purpose of such a product is to create roughness on the nail plate, which will ensure effective adhesion of the varnish and the nail itself.
Problems that arise during operation:
- You should not apply too large a layer of gel polish, because in this case you simply cannot avoid the appearance of waves and bubbles, moreover, the gel may lie unevenly, which will look extremely unsightly;
- One of the shortcomings of many girls is the use of an acid primer , which is intended for nail extensions, but it is not suitable for applying gel-based polish;
- Another oversight can be shaking the jar before use, although it is enough to slowly rotate the bottle from side to side to lift the gel pigment;
- You need to make it a rule not to throw away a bottle of gel polish in an open form, since if exposed to sunlight it can simply dry out;
- It is necessary to dry your nails well in an ultraviolet lamp, keeping in mind that over time, ultraviolet radiation loses its strength, so it is worth heating your nails longer. Ideally, you need to dry each nail separately, but since this takes a lot of time, most people do not take this nuance into account and complain about an unsuccessful manicure;
- When using the base coat, as well as the first layer of colored varnish, do not forget about sealing the end;
- It is important to apply the top coat with another brush so that no particles of colored gel remain on it;
- Many people remove the stickiness between layers, which also equates to a negative result of applying gel to the nail plate. This coating binds all layers together and you should never disturb the stickiness.
Based on the above, I would like to note that in order to get a chic manicure, you must definitely try to avoid these types of mistakes.
In addition, you must remember that you need to take care of your nails and take care of them - wear rubber gloves when washing dishes or floors, since getting water on the gel polish will undoubtedly shorten its stay on the nails.
Instructions for creating a manicure
In principle, the steps are the same as when applying a gel-based product without spreading, that is, you must first prepare your nails for coating with such varnish.
- The initial stage is processing the cuticle and giving the necessary shape to the nails.
- We remove the gloss from the nails and degrease their surface with lint-free wipes.
- Next, you need to apply a base coat and dry it in an ultraviolet lamp.
- Then the gel is applied in two or three layers and evenly distributed over the nail plate, while it is not necessary to take a colored one, since it all depends on your imagination and the desired final design.
- The next step is the most interesting, as it is at this stage that the magic base layer is applied, which makes the colored varnish spread.
- Next, you need to apply a sticky base layer with any color, which spreads over the nail, giving it charm and a beautiful look.
But applying the spreading varnish itself has its own characteristics:
- You need to apply it in a thin layer, otherwise the effect will be very weak;
- You should avoid applying varnish to the cuticle, as it may bleed onto it;
- You don't need to make a lot of movements with the brush;
- When a spreading effect is achieved, you need to remove the coating from the edges of the nail, thereby giving an edge to the design;
- To achieve the desired effect, you need to wait about thirty seconds and then dry it under ultraviolet light from a lamp.
The manicure turns out to be very beautiful and luxurious, but here it all depends on your imagination.
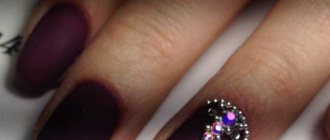
Stones can be used in a design like this, for example if you are painting flowers using stones for the core of the design. In general, the results of creating manicures with flowing patterns exceed all expectations, since their original patterns will fully delight all lovers of bright and unusual manicures.
Unusual design
Technology with flowing patterns is a new trend, thanks to which the owner of such an exquisite manicure will definitely be the center of attention. A similar pattern can be applied to both a light and dark base, because in any case, the spreading design will bewitch and attract only interested glances.
The product is applied in the same way as applying regular gel polish.
When coated with an appropriate base and then with colored gel polish, we can say that a real miracle occurs when the effect of spreading varnish is achieved, which smoothly transforms into a pattern, literally spreading across the nail plate.
To create drawings you will need a dots or thin brush and flowing gel polishes. This technology is suitable even for beginners, because creating a design with blurred edges does not require any special skills.
Gel polish with spreading effect Lianail
With this article I begin my acquaintance with the Lianail , which already has an impressive collection of colors and an assortment of gel polishes, among which you can find very interesting effects. And one of the ones that I liked was the spreading effect.
Gel polish with a spreading effect is still new, so with such a manicure you will not only fall into the trend, but also surprise everyone around you. Lianail has a whole collection of them called World of Illusions. Gel polish can be applied to a dark or light substrate, or you can do without it at all - in each option your design will look different. The only thing that is required is a magic base : without it, unfortunately, no spreading effect will work.
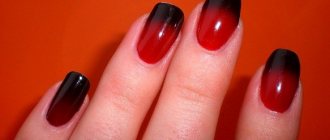
Lianail “Enchantment” gel polish with a spreading effect , I want to show that it can be used not just on one or two or even all nails to demonstrate the current action, but to do very interesting things in design. My copy of the gel polish is a dense ruby red color, without impurities in the form of mother-of-pearl or sparkles.
How to apply gel polish with a spreading effect
To get the same effect, you need to know the correct technology for applying gel polish and the drying time of the base and color. I demonstrated it on video:
The instructions here are simple:
- We carry out preliminary preparation of nails for applying a long-term coating: we process the cuticle, adjust the length and shape of the nails, remove the natural gloss from the surface and apply a degreaser.
- The next step is to cover the nails with a base for gel polish and dry it in a lamp. If required, we perform the procedure of leveling the nail plate under gel polish. The polymerization time of the base depends on its manufacturer and your lamp: for UV it is usually 2 minutes, for LED – 30 seconds.
- Next, apply colored gel polish in 2-3 layers so that it lays evenly and without gaps. Dry each layer for the required time. If you want to create a spreading effect without a colored base on “bare” nails, then you don’t need to do steps 2 and 3, go straight to step 4.
- And here the magic begins, namely, applying the magic base SOBS-03 from LIANAIL to obtain a gel polish that spreads on the nails. It is applied as a regular base to the entire surface of the nail or to part of it. I did both on different nails. To apply the base to part of the nail, it is convenient to use a thin brush. For my design, I covered the half nails and made a stripe down the center of my index finger. The base dries in an ultraviolet lamp for 1 minute, and in a LED lamp for 15 seconds.
- Now we apply any color from the World of Illusions collection to the sticky layer of the base (in no case do we remove the stickiness - this is the key to spreading the gel polish). There are several nuances here: It is necessary to apply a thin layer, otherwise the spreading effect will be very weak.
- We try not to apply gel polish close to the cuticle and side ridges, otherwise it may flow onto them.
- You should not make many movements with the brush in one place, smoothing the color evenly, otherwise the effect will also suffer. And from uneven application the smudges, on the contrary, are more interesting.
- When spreading, the color moves slightly away from the edges of the nail and a kind of edging is obtained. If you don’t like it, you can correct the smudges with a thin brush before drying, extending them to the right places.
- We are waiting for the effect to appear. Usually 30 seconds is enough for this. Now we send it to the lamp: the gel polish dries in ultraviolet light for 2 minutes, under LED rays - 30 seconds.
- On the index finger, where I painted only the central strip with the base, I applied the color to the entire surface of the nail, and it spread only in the center on the base - this way you can immediately get a very interesting design.
That's all - a lot of words, but the algorithm is simple: the magic base + color does all the work for you. I tried to describe all the nuances that may arise when working with this kind of gel polishes. Well, in the end, as usual, I wanted to experiment how this color looks on a dark base and whether it is possible to use regular gel polish on a magic base. Here are the results:
As you can see, on a black base this gel polish looks very pale and is barely noticeable in daylight. But the second result made me very happy: it turns out that it is not at all necessary to buy a set of gel polishes for this effect - it works with any other color on a magic base!
And here I have everything, thank you for your attention, I hope you found it interesting and informative. If this is the case, then subscribe to blog updates in any way convenient for you (Instagram, YouTube, VKontakte, Odnoklassniki or by e-mail) and stay up to date with all the fashionable news in nail design!
Materials provided by the online store krasotkapro.ru
If you found this page useful, please recommend it to your friends:
Wet gel polish design: patterns for experienced craftsmen
Design schemes for wet gel polish can be more complicated, but they can only be completed with the ability to draw and sufficient practice in nail art:
- roses and other flowers,
- several small butterflies or 1 large one covering the entire plate,
- imitation reptile skin,
- feathers,
- marble texture,
- the bride's bouquet.
Roses
Roses are painted on a damp surface with a thin brush. First, a dot is placed in the center of the future flower.
Short, arched strokes are made around it, moving further and further from the middle. For greater naturalness, these lines should be of different thicknesses and lengths. They become thinner towards the ends.
For roses, choose a background that is lighter or darker than the flowers themselves. You can draw several small ones or 1 large one on the entire nail plate. Here, 2 gel polishes are enough - for the main background and the flower itself. But you can also use 3.
One covers the entire nail, the other is used as the main color of the rose, and the third draws the edges of its petals. That is, a stain is made on the dried base shade with another gel polish. And while it is wet, the third color is used to outline the petals. The last shade should be darker than the previous two.
You can additionally decorate roses with rhinestones, sparkles or acrylic powder to get velvet flowers. In the latter case, the top is not applied to these areas.
Painting with butterflies
Painting with butterflies is performed in the following sequence:
- Draw 3 intersecting lines. The central (shorter) one will be the basis for the body of the insect. Through a point just below its middle, 2 other lines are drawn so that the entire structure resembles the letter Z.
- Using a thin brush, a stroke is made from the side strips to create the outlines of the wings. The top ones should be larger than the bottom ones.
- Inside the wings you can make another outline, but in a different color. The body, along with the tail and mustache, is drawn in black or dark gray.
- You can add dots and irregular multi-colored spots inside the wings. Or paint these parts with one color. And along it make thin black lines from the insect’s body to the edges of the wings.
You can draw several of these butterflies on 1 nail. To simplify the task, use a bright general background and only 1 gel polish to outline the image.
How to Draw Reptile Skin
Drawing snake or crocodile skin is quite simple, since the main thing here is maintaining the distance between the elements. Dots are placed on the nail so that when they spread, they do not merge. First, perform 1 vertical row in the middle of the nail. Then they make adjacent ones, but put points at the level of the spaces between the parts of the first line. Thin partitions should form between the spots.
Watch the video on how to paint reptile skin using wet gel polish:
To make “reptile skin” look as natural as possible and seem textured, choose similar colors of gel polish. For example, if the main shade is blue, the dots are made blue. You can also outline the lines separating the spots with gold or silver paint. But this is done after drying.
Technique for drawing a butterfly
To depict a large butterfly, a different technique than mentioned earlier can be used:
- Drawing a silhouette of an insect in profile, covering almost the entire nail. It looks like the number 9, but completely shaded. Use black gel polish over undried light gel polish. And on a dark background with a thin brush they draw colored narrow lines and spots.
- Drawing with five colors that smoothly flow into each other. The main shade depicts an insect with outstretched wings. It looks like the number 9 and its mirror image. The inside of the image is outlined with a different color, then with a third color. The remaining shades are used to draw small details - dots, spots, lines.
Feathers
There are two ways to depict a feather:
- Place dots at a certain distance from each other and circle each one with several colors of gel polish to create multicolor circles. They are connected to each other by making movements from one to another with a dry thin brush. It is also used to make short strokes from the edges of each circle. The result is a multi-colored peacock feather.
- Drops of gel polish are placed along the nail on a damp surface so that they form a curved line. The size of the spots spreading from them should gradually decrease. A thin dry brush is drawn along this row to depict the shaft of the feather. Use the same tool to stretch the edges of the spots. For this scheme, you can use several colors of gel polish or just one.
Marble
Marble coating is done as follows:
- Nails are painted with light gel polish in 2 layers and both are dried.
- Then a liquid finish is applied.
- Black gel polish and thick top coat are mixed on the palette.
- This product is applied to a thin brush and used to make uneven, winding lines along the wet finish on the nail.
- They are combined in some places, shaded in other areas.
- When the pattern looks like marble, it is dried, coated with topcoat and polymerized again.
For the desired effect, you always need a light main background and a darker color to draw the veins.
The bride's bouquet
The composition “bridal bouquet” is made in pastel colors:
- On a damp base coat (pink, beige or white) paint 3 abstract spots with outlines similar to flowers. They must lie on line 1.
- After polymerization, flower leaves are painted on with silver gel polish. You can also use light green.
- The coating is dried again. Then the edges of the petals are painted with white gel polish, as in the image of a rose, as well as the veins on the leaves.
- All that remains is to cover everything with topcoat and polymerize it. For flowers you can use a matte finish, for the rest of the surface of the nail - glossy.
Dona Jerdona / Spreading Base “illusion”, 10 ml
Article: Art: 6201901
Product does not ship to your region
Product out of stock Selected size is out of stock
Your savings 37 ₽
0 && (selectedNomenclature^selectedPrice && selectedNomenclature^selectedPrice.salePrice) 0 ? 'Min. amount to order this product ' + formattedMinOrderSum() : »>»>Min. amount to order this product?
- 0
All sizes
Added to favorites
Dona Jerdona / Spreading Base “illusion”, 10 ml
Article: Art: 6201901
The e-book will be available for download in your Personal Account immediately after purchase
- Free shipping
- Fitting
- 21 days for return
- Free lift to the floor
Wildberries does not sell or deliver alcoholic beverages. You can reserve the product you are interested in and pick it up at partner stores.
Reason for markdown
Compound
stearic acid, lauric acid, methacrylate
Description
A unique and easy-to-use spreading base does not require perfect technique, absolute precision and special tools; it gives any gel polish a spreading effect. Any beginner who does not yet have professional skills in the field of nail art can show off his skill by creating watercolor (spreading) designs (wet design), abstractions with a spreading effect, stone textures, floral and lace prints. The magic base can be used as a base coat for gel polish or applied to a colored base to create a design. Due to its very thick consistency, the base does not flow into the side rollers; it can easily be used to level the nail plate. Application: apply the base coat in a thin layer on any substrate, sealing the end of the nail. Do not polymerize! Apply the design with colored gel polish on an undried base, wait until the color spreads to the desired state, polymerize in a UV lamp for 2 minutes or 30 seconds in a hybrid or LED lamp.
Product characteristics
| Product weight with packaging (g) | 65 g |
| Product volume | 10 ml |
| Packing width | 4 cm |
| Packing height | 10 cm |
| Country of Origin | Russia |
| Equipment | box; base |
Information about technical characteristics, delivery set, country of manufacture and appearance of the product is for reference only and is based on the latest available information from the seller
Gel polishes with spreading effect
join the discussion
Share with your friends
- Peculiarities
- Types and shades of material
- Varnish volume
- Combinations with other materials
- What can you draw?
- The essence of technology
- How to use?
The steps of the modern nail industry are rapid. Every new season, fashion gives its fans new trends, offers fresh solutions, and introduces unusual new materials. One of these types of raw materials today is flowing gel polish. What is it, what is its difference from the usual “wet” technique of painting on nails, how to use such a product - read in detail below.
Peculiarities
Flowing varnish is a hybrid type of coating. Essentially, this is a gel polish with an accelerated spreading effect of the working mass. Another type of gel polish is called “blooming varnish” or “varnish with a blooming effect.” Such coatings differ from conventional varnishes, and the technique of working with them also has its own characteristics.
The technique itself resembles the principle of creating a pattern on a wet or undried base. However, the effect it produces is fundamentally different from that created by droplets of gel or gel polish. The method of applying the material also differs. Each design created using spreading varnish will be unique. It will not be possible to repeat it exactly, because the pigment will spread in a new way each time.
The design on the nail spreads until it is placed in the lamp and turned on. This feature allows you to vary the pattern until you get the desired result. When the artist begins to like the picture, you can dry your nails to preserve the design. After this, for greater effect, you can emphasize the contours in some places.
Due to the fact that the drop will spread in all directions at once, it will be more pigmented inside, and the pattern itself will have a unique gradient effect. At the edges of the design, the color of the varnish can be almost weightless and barely colored. It is worth noting that it takes a professional master from half a minute to two to create such beauty, which depends on the complexity of the chosen print. Instead of drawing this design, decorate it with rhinestones or contour strokes of individual elements.
Products Nika Nagel
The Nika Nagel company produces and offers appropriate products for nail extensions and design. The company's products are developed in Germany. The Nika Nagel brand of gel polishes is very popular among most nail designers and is also safe for natural nails. Gel polishes in this series dry quickly and stay on the nails for a long time. Also among the gel-based products in Nika Nagel there is the above-mentioned gel polish with a spreading effect. Shading the edges of the nail with varnish of this brand turns out to be mesmerizing, as one shade smoothly transitions into another, forming a chic play of colors.
You will learn more about gel polish with a spreading effect in the following video.
