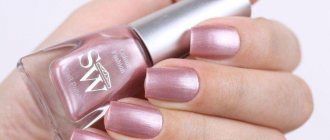
An original manicure is an important component of a stylish look. New nail design ideas may include a combination of styles, shades and decor, which allows you to create a unique masterpiece on your nails. An unusual manicure can be bright, delicate, luxurious, on nails of any length and shape. The main thing is that you like it and suit you.
Original manicure according to the shape and length of nails
We offer manicure ideas for the most fashionable nail lengths and shapes - types of designs for those who definitely want to experiment.
For long nails
It's no secret that recently fashionistas prefer to wear nails with a more pronounced length. This choice is explained not only by the desire to emphasize neatness and beautiful shape, but also by the desire to express one’s individuality with the help of creative manicure.
Not all types of nail decor are suitable for moderate lengths. For example, volumetric elements can only be placed on sufficient space on the nail surface. After all, only on a long nail will it be possible to attach a pendant, depict a chic bouquet of roses or intricate patterns with original outlines.
For short nails
Neat, small nails, even very short ones, are not difficult to decorate in an original way. There are a lot of elements that fit perfectly into a short shape. For nature lovers, painting with flowers, twigs is suitable, and even a black and white image of mountains can appear on your nails. What looks original, non-trivial and without additional elements.
And the most interesting nail solutions are obtained with hearts, emoticons, geometry, and stickers. Among the new products you can find spectacular floral, abstract and fruit patterns. They give short nails an original, bright look.
For oval nails
A spectacular manicure for oval-shaped nails is a French manicure with shiny tips. Iridescent thin edges of glitter on a nude or pink background look fabulously beautiful. With this manicure, any beauty will feel like a princess. The stamping elements look amazing, with thin stripes at the tips repeating the oval curve.
For sharp nails
An unusual manicure on sharp nails will help you create inscriptions. This design is undoubtedly good and will fit perfectly into the image of a stylish girl. But besides them, foil appliqué, animal print, stripes and gradient look beautiful.
For square nails
Geometric shapes look perfect on square-shaped nails. Thus, combinations of shiny and white stripes diagonally or at an angle will give your nails a bright, expressive look. A manicure with bright neon rhinestones will amaze everyone with its glow.
Lunar manicure with gel polish or shellac
The original moon manicure, which can be easily performed with both shellac and regular varnish, is becoming increasingly popular. Of course, if we talk about convenience, then it is best to do it with gel - it lasts longer and it is easier to draw holes with it. In appearance, lunar is the complete antipode of French. If in a French manicure only the tips of the nails are shaded with white (or another color), then in a lunar manicure the holes are shaded.
To make a professional lunar design, you need to prepare a manicure kit: these are accessories for trimming, tools for working with gel (removers, primers, etc.), and an ultraviolet lamp.
Fashionable manicure with gel polish with rhinestones at home step by step:
- Nails are cleaned and wiped with a degreaser. It should be noted that, unlike working with simple varnish, the usual tonic or alcohol will not work. Many masters use formulas enriched with various minerals and silicones, which fill the gaps in the nails, promoting stronger adhesion of the gel and the plate;
- Afterwards the nails are painted over and the holes are outlined. Please note that it is best to use a thin brush to create semicircles near the cuticle - then the work will turn out very neat and interesting. It is recommended to draw the moons first, and then paint over the plate;
- When everything is done, the nails are placed under an ultraviolet lamp for 2 minutes. Afterwards a second layer of gel polish is applied. It is needed for intense color. It is also dried for 2 minutes;
- When the main plane of the platinum is painted over, the holes are processed. They need to be painted with a thin brush so as not to smudge the contour. For this, masters work with acrylic brushes - they are thinner and stiffer than ordinary ones. Rhinestones or velvet sand for nails are inserted into the centers of the holes and pressed with a stick for better fixation;
- The painted holes are dried for 2 minutes;
- After finishing working with the biogel, you need to wipe the plate with a degreaser, which will remove the “stickiness” from the nails. This is how you do a moon manicure
In order for this unusual manicure to look interesting and stylish, you need to select varnishes very carefully. Experts advise using paints in contrasting colors, for example, black and white, green and yellow. But, if you work in pastel colors (pink and white, brown and beige), you will get a more delicate design.
Video: 4 ways to draw a hole for a moon manicure
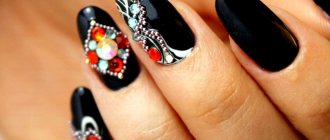
Original French manicure
What kind of original things do nail artists do with French manicure, surprising their clients! They cover the tips with glitter, making them bright, black, two or three colors. It happens that the smile is made obliquely. Some even manage to apply thin stripes and airy patterns on the free edge of the nail.
Interesting manicure with abstraction
Expressionism and impressionism, as well as catchy abstraction, are trending not only on the catwalk, but also in manicure fashion. Don’t be afraid to attract attention with a riot of colors, pretentious forms and bright decorative techniques. The combination of free-shaped color spots, white dots, cosmic stains of metallic varnishes and endless smooth lines - all this looks relevant and attractive!
Simple edged manicure with regular varnish
The easiest way to do a manicure on short nails at home is with your own hands. In addition, it will look most advantageous on small plates. All points are carried out in the same way as written in the section above. After giving the desired shape and degreasing, the plate is covered with a base - it will fill the cracks and become a strong and even base for the paint.
You can make different types of manicure with regular polish:
- On the water;
- Gradient;
- Art design and many others.
Edged
Let's focus on the most common coating - it is very easy to make yourself and does not require much time. After the base has dried, a layer of colored varnish is applied on top of it. It must also be completely dry. If the shade is not bright enough, the surface is repainted.
To make the manicure last longer, a professional fixer is used. It performs several functions: it gives neatness, strengthens the plate, helps remove delamination and prolongs the life of the varnish. The fixative is often enriched with various vitamin and mineral supplements.
Video: doing a trim manicure yourself
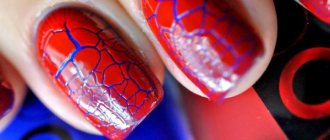
Original nail art “textures”
“Texture” nail design is an original version of nail coating. When an imitation of natural or abstract textures is created. Watching the careful execution of various techniques to create a “texture” effect on the surface of the nails is quite interesting. Such works demonstrate the level of professionalism of the master. If you see on your nails an incredible play of multi-colored substances flowing into each other, or “real” marble, or maybe the skin of a reptile, don’t be surprised. You just got an original aerobatics manicure.
Water manicure step by step
Despite its apparent simplicity, manicure on water or water design is quite difficult to perform. They can make the most unusual designs and patterns, but to do this you need to gain experience and purchase high-quality varnishes. To work, you will need a container with warm water (preferably disposable, because after nail art it will be spoiled), glue, a needle, and varnishes of the desired color.
Instructions on how to make a beautiful water manicure at home step by step:
- The nail is prepared and painted white - then all other colors will look bright on it. In order not to worry about erasing the varnish around the nail, the skin must be covered with either PVA glue or a special “fuse”;
- Varnishes drip into the water. You need to act quickly, because they harden, and it is difficult to work with a dry coating. When the desired range is obtained, it is necessary to draw patterns on them with a needle; Water drawing
- There are different schemes. The simplest one is to move the needle from the center to the outskirts of the circle. This painting will allow you to get an elegant web design;
- When everything is ready, the nail is blotted into the center of the pattern (or to the outskirts, depending on the chosen pattern). You don't need to hold it for long. During the process, excess varnish in the water is removed with a needle or stick; Water manicure
- All that remains is to remove your fingers from the water and wipe them with nail polish remover.
Drawings obtained using water manicure are very original and interesting, but require a lot of time. Therefore, it is often much faster and easier to make them with acrylic paints.
Video: making drawings on water for water manicure
Cool manicure with foil
Foil is applied to nails in different ways. Its use produces a slight shimmering effect, a feeling of “crumbling” paint, a marble or rainbow pattern. And also in original nail ideas, pieces of foil are used to decorate the jacket or cuticle. But, in any case, it all looks great and aesthetically pleasing.
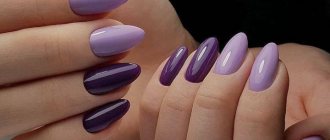
Features of a plain manicure
Covering with one color is considered a universal solution for everyday nail design. A well-chosen shade that matches the main image may turn out to be more interesting than elaborate design solutions.
The main advantage of a single-color manicure is that it looks perfect on both long and short nails.
On the one hand, such a design is laconic and simple, and on the other, thanks to modern varnishes and decorative possibilities, it is original and varied.
Non-trivial matte manicure with sparkles
How cute little sparkles shimmer on a matte surface, especially when the color of the sparkles matches the coating. This option is both a casual and a festive option. There is enough shine, but it is more delicate. If you prefer something from the “chic” series, then apply contrasting glitter to the matte surface. The accent will be double: between shiny and matte texture and shades of sparkles and coating.
Necessary tools for manicure at home
Good, high-quality tools are the key to high-quality cuticle care, prevention of nail splitting and high speed of the procedure. For a classic edged manicure you will need the following tools:
| Tool | Description |
| 1. Cuticle tweezers. Buy | It is best to purchase a Solinger brand tool, this is an old German brand of cutting tools. Tweezers have their own sizes. They determine the length of the blade. It’s good to take 0.5 cm. |
| 2. Pusher (translated as pusher) Buy | Double-sided cuticle spatula: on one side it resembles an oar, on the other it resembles a hatchet. Must be metal. |
| 3. Knipser Buy | Tool for cutting the length of the nail. It looks like a small guillotine, it can be used for fingernails and toenails. |
| 4. File 180 grit Buy | The grid should be imprinted on the file itself. |
| 5. Polisher 2000 grit Buy | There are double and triple polishers, then the grit for each side must be printed. |
| Related Items: | |
| 1. A large bowl, preferably ceramic - it holds the temperature well; | |
| 2. Towel or napkin; | |
| 3. Cotton pads; | |
| 4. Orange sticks; | |
| 5. Nail polish remover. | |
| Disinfectants: | |
| 1. Chlorhexidine; | |
| 2. Alcohol solution 70%. | |
| 3. You can purchase a professional product for treating hands and metal tools at the pharmacy. | |
Which manicure tools should you use and which should you not?
If you still have little experience in nail care, orange sticks will come in handy . They can move the skin near the cuticle and clean the eponychium.
nail scissors to trim cuticles This is acceptable, but the best quality manicure will be if you use tweezers . Scissors have straight blades, while tweezers have beveled blades. Therefore, it is the tweezers that cut the skin more and deeper , and after using them the manicure lasts longer.
Nail fork
| Caution: There are many manicure tools on the market. One of them is the “fork”. This is an unprofessional tool that has caused a lot of damage in its lifetime. It is assumed that this “fork” will cut off the excess skin around the nail. This tool, no matter how you take it, scratches and cuts through the delicate nail on the hole. In addition, it does not cut off the excess skin (eponychium), but the thin skin of the roller. Therefore, when using it, your hands bleed. |
Since we are talking about the cuticle area, no blade pressure is allowed. This can damage the matrix - the growth cells of the nail under the hole. As a result, the nail will grow crooked for the rest of its life.
Unusual manicure with a fingerprint on the nail
For those who like to make a lasting impression, we recommend a manicure design with a fingerprint. There is something mysterious and impressive about this decorative technique. This option evokes a little strange associations, but it is still beautiful. With such a manicure they will undoubtedly say that you are an original person.
Original drawing of a portrait of a woman on nails
A face without eyes, a portrait of a woman—this minimalist nail decoration looks very unusual and fashionable. Paint your nails with a light base and add a design on your thumb to create this custom design.
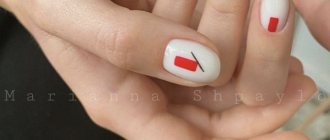
Interesting nail art with rectangles and dots
You can demonstrate your love for minimalism with the help of graphic patterns. Arrows, lines, dots, symbols are a wonderful design for nails. Choose a classic or subtle nail polish color. For example, pink or flesh-colored so that the designs stand out against the background of the coating. Add glitter to give your manicure a unique look. Geometric nail art looks great with many outfits, ideal for everyday manicure or for a holiday.
Newspaper and ombre
Color gradient designs are popular due to their simplicity. If it is done in salons with a special airbrush, then at home it can be done even with a simple sponge. This is ideal for New Year, birthday or any other holiday.
How to make a stylish ombre manicure at home:
- The nail is prepared and filed. A base and white varnish are applied to the plate;
- Afterwards, a small piece of sponge is cut out. Varnish is applied to it in strips. Thus, in the future you will get a gradient;
- To create an interesting winter design, you can combine red with white and gold, or blue with green and scarlet. Another secret to getting the perfect transition lies in choosing a sponge. It should be dense, without large pores;
- The nail is blotted with a sponge. Try not to press too hard, otherwise the transition will be too clear; Ombre step by step
- All that remains is to apply glitter and fixative. This will help hide sponge marks and give your manicure a salon look. Ombre sponge
Video: gradient or ombre on nails
A newspaper manicure is no more difficult to do at home. Newspapers often use ink that can be washed off with alcohol. But, if you turn the newspaper over and rub it with alcohol, the print will simply transfer to the surface underneath it.
How to do a newspaper manicure step by step:
- The nail is painted in any color contrasting with black. This is done because the letters are most often black;
- A small piece is cut from the newspaper. It is applied with the desired side to the nail;
- You need to run a sponge soaked in alcohol over the paper several times. If the newspaper is thick, then you even need to apply the swab to the plate for a few seconds;
- When the letters have passed, you need to cover the nail with a fixative.
Newspaper manicure
Original manicure with an unusual design, new items in the photo
So, if you like an extraordinary design and you are convinced that it should appear on your nails, we suggest moving on to photo ideas. From classic to crazy, from basic to dressy. We have studied the most interesting works for every taste and collected them in this collection.
- We recommend on the topic: White nails with designs - new items, manicure ideas in the photo.
- Original nail design: new items, photos with a beautiful manicure.
Nail preparation
The first step is to prepare the nail plate and cuticle for further processing. To get started you will need:
- Tweezers, trimmer;
- Scissors;
- File;
- Scrub, oils, cream;
- Degreaser (you can use alcohol or face lotion).
To learn how to do a cool European manicure, you need to remember that the most important part is preparation. In this step, the old coating is removed, the cuticle is trimmed, the nails are filed and their surface is leveled. To carry out the procedure, you can use a special apparatus or several files and hand tools (they must be sharpened before use).
Manicure at home
Step-by-step instructions on how to prepare your nails for a manicure at home:
- The old varnish is erased. Immediately after this, the marigolds are soaked in the bath. We recommend adding a little sea salt and iodine to the water - then the plate will become thicker and stronger;
- After 5 minutes of “soaking” the nails, you need to take out one finger at a time and check the cuticle. If it is easily deformed, then it can be cut. Using a file or a special stick, the peel is carefully brought to the hole itself, after which it is cut off. Depending on your experience, you can use a trimmer (for professionals) or tweezers (for beginners). The action is repeated with each nail;
- After trimming, you need to lubricate the cuticle with oil. Most often, spas use cocoa or shea for this purpose, which have excellent antimicrobial and regenerating properties;
- Next, the plate is leveled and the desired shape is given to the nails. For rough processing - shaping, hard tools are selected. For example, with diamond or mineral coating. For soft - cleansing the nail from growths and irregularities, more gentle - silicone or wooden;
- When the treatment is completely finished, all that remains is to degrease the surface and hole, remove any remaining oil from the cuticle;
- If everything is done, then the instruments must be sterilized. If a manicure is performed using a machine, that is, the main work is carried out with machines, then they are disassembled and washed in a special solution. Hand instruments are rinsed in Chlorhexidine.
Photo - Preparing for a manicure
In exactly the same way, trimmed pedicures are performed at home. After this you can start designing.
Unedged or European manicure is carried out without tools - it is easiest to do it yourself. The plate is cleaned of varnish and fat, then a special gel is applied to the cuticle. It is noteworthy that when using the unedged technique, you do not need to soak your nails.
After applying the softener, a few minutes should pass, then you simply move the skin closer to the hole. The cuticle is very pliable and soft. You do not need to use any trimmers or scissors to remove it. It can even be removed with an orange stick. All that remains is to wipe the plate with remover and cover it with a base for further coloring.
Read the material on the topic: pedicure at home: step by step for beginners + photos of results.