Manicure ideas in pastel colors
Delicate, neutral, airy, universal - all this is about a manicure in bed colors, which looks equally good on both long and short nails. It can be glamorous, festive or, on the contrary, calm.
Today there are a lot of interesting ideas that you can implement even on your own, without resorting to the services of a nail service specialist. Delicate shades can be safely combined with strict colors: black, dark blue, red, slate.
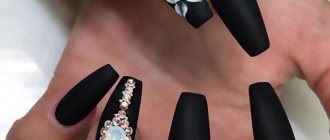
Matte pastel manicure
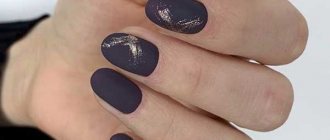
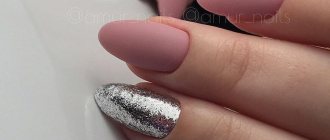
This option belongs to the popular nude style. It is concise and easy to implement. It will be interesting to look at the play of textures when a drawing of a similar shade, but with gloss, is drawn on a matte base. A more festive variation includes various rhinestones and shiny elements. Of course, it is not necessary to cover all your nails with them, especially since it will look tasteless. It is better to make such accents on 1-2 fingers. This way you will add a piquant touch to a neutral design without weighing it down.
Delicate nude manicure
Nude manicure involves the use of flesh-colored, beige shades. Porcelain and icy colors also look neutral. Coffee shades are no less popular. Having done a beautiful fashionable manicure in nude style, you don’t have to worry at all that someone will reproach you for lack of taste. After all, nails framed with a delicate design look very neat, elegant and feminine.
Ombre in pastel colors
This idea will definitely appeal to those who follow fashion trends. Ombre is a smooth transition from one shade to another. To create a beautiful effect, even two colors of gel polish will be enough. It will be a little more difficult to make transitions using several shades at once. But the result will be wonderful.
Pastel nail design with rhinestones
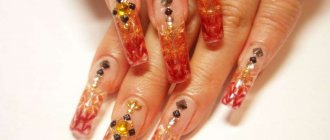
This option can be a great addition to an evening outfit. This manicure looks attractive, but at the same time there is some mystery, purity and tenderness in it. This type of nail design is not boring, but not pretentious. Rhinestones can be laid out in various ways. The combination of large and small rhinestones looks beautiful. With their help, you can focus on the nail hole or on the tips. You can also use rhinestones to highlight two nails on each hand, arrange them into flowers, hearts, or add them to the pattern as a final touch. There are a huge number of options, you can see this by looking at the photo of a pastel manicure with rhinestones.
Nail design in pastel colors with rubbing
He is winning more and more fans. This simple design is hard to miss. The nails acquire an incredible shine, shimmer with all the colors of the rainbow or have a mirror surface. Today, masters use rubbing, which allows you to achieve different results. This pastel nail design is in trend in wedding fashion. Brides look at the finished result with great delight.
Delicate manicure with sand
This is the fashion trend of 2022. Sand is actively used in nail art, allowing you to create real masterpieces. Using sand, you can depict three-dimensional elements that will become a beautiful accent, highlight an openwork pattern or monograms. Its peculiarity is that it creates a suede effect. In addition, a textured coating will be an ideal solution if the nails have any external defects, such as unevenness or lumpiness. The material can effectively disguise them.
Pastel manicure with a pattern
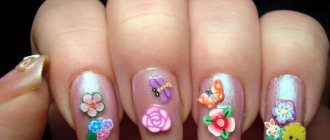
Another interesting option for nail design. With spring approaching, more and more girls are trying to create a warm, positive, joyful mood for themselves. And floral motifs will help with this. The drawings can be drawn by hand, but if you doubt your artistic talent, then feel free to use special stickers. Of course, in addition to flowers, there are many other equally interesting options - glass shards, geometry, abstraction, stripes, circles, twigs.
Photo of pastel manicure by color
If you are a lover of a modest, but at the same time elegant, noble manicure, then choose pastel colors. Despite its laconicism, a manicure in pastel colors can highlight your impeccable taste. You can see the new manicure designs in soft colors in the photo. As you can see, the pastel colors of gel polish are quite varied. Therefore, there are a huge number of design options. Always be in trend, choose only the best!
Sequins come in different varieties
To create a modern manicure made using a gradient technique, nail art masters mainly use the following types of glitter.
- Dust. Very small sparkles, more like powder in appearance, look very gentle and elegant on the nails. Therefore, they are often used in the design of a wedding jacket. The main advantage of this decor is that the contrast of the transitions can be adjusted. This is done by alternately layering this coating.
- Openwork. These are quite large sparkles, distinguished by their considerable size and shape, which can be not only round, but also square, rectangular, etc. You can also find options in the form of hearts and stars. Often, openwork glitter using the gradient technique is used in combination with smaller shimmer. Unfortunately, a manicure decorated with such sparkles is completely unsuitable for everyday wear. But for celebrating the New Year or celebrating a birthday, this design will be just right.
- Sand. Shimmering sand will help give your nails a velvety textured surface. Stretching in this case is created by alternately applying glitter of different colors to the surface of the nail. The result is a multi-colored ombre with contrasting transitions.
- Liquid. You can also create a shimmering stretch on your nails using gel polishes that contain glitter of different sizes. This is the simplest method that does not require special tools or skills.
Interesting: Spring manicure 2022: trends and new items
https://youtu.be/https://youtu.be/RsPWsrVY34Y
_
Coverage options
When applying a gradient to nails, a variety of types of coatings are used.
The most popular are gel polishes, which are essentially a hybrid of regular varnish and acrylic paint. The distinctive features of this composition are:
- high percentage of gel in the structure;
- much smaller amounts of harmful formaldehyde and toluene;
- when applying such a coating, the nail plate does not require preliminary grinding and filing, it is only cleaned and degreased, which means that the nails remain dense and healthy longer;
- To get rid of such a coating, you don’t need to destroy it at all, just apply a remover - in this case, the gel polish soaks in literally 10 minutes.
Vinylux is another popular coating when applying a gradient. Purely visually, it is similar to the varnish that everyone is familiar with, but it has its own characteristic features that cannot be seen at first glance. At its core, this varnish is a two-phase product, which includes a base - so you don’t have to apply a base to your nails.
Vinylux has a rather unique structure - its pigments are slightly larger than the size of the spaces between the keratin scales, so they are simply not able to color the nail plate. The coating hardens in 10 minutes, and only becomes stronger over time.
Some craftswomen try to use biogel for a gradient - this is a completely pointless exercise, since it is designed to lengthen the nail plate or give it the desired shape, but not paint it in any way.
Gel polish lasts on the nails for about 2-3 weeks, and it can withstand any, even the most unfavorable weather conditions.
Vinylux is called a “weekly” varnish - it is worn for 7 days, however, as practice shows, after 4-5 days the first chips quite often appear, in addition, such a coating looks rather unaesthetic if there are at least minimal defects on the nails and damage.
And, of course, to create a gradient you can use the most ordinary varnish, then you will have to renew it every 3-4 days, and most types of housework (cleaning and washing dishes) have the most adverse effect on it.
Types of Gradient Nail Art Techniques
As we figured out, a gradient manicure is a transition from shade to shade - but depending on how exactly to apply this approach, a considerable number of variations of ombre manicure can be demonstrated.
Horizontal and vertical transitions, as well as diagonally, make gradient manicure very diverse. A “transition” can also be used not only on one nail, but also from finger to finger with multi-colored nails on the entire hand.
Linear gradient ombre is trendy, which allows you to create a geometric style on your nails with stripes, diamonds, and diagonal ombre lines, which look very impressive.
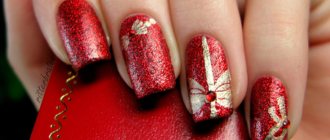
The mega-fashionable gradient manicure 2020-2021 with sparkles will be impressive, in which it is not a color “transition” that is used, but more or less pigmentation of the sparkles.
Ombre sand strips will help you create an unusually attractive ombre manicure 2020-2021, which will attract the enthusiastic and surprised glances of everyone without exception.
If desired, you can also perform abstract ombre “transitions”. But the hit of the season was ombre in the form of a colored “island” with a gradient on the bare nail, which exceeded all the expectations of nail artists and fashionistas all over the world.
We offer you the top new ombre manicure 2020-2021, which we will look at in more detail right now with a photo demonstration of an example of the ombre nail technique 2020-2021.
How to do it yourself
There are several ways to make a unique design at home. Depending on the desired result, you can choose the most suitable one for your case.
Sponge
Any manicure begins with nail treatment. The plate must be smooth, without obvious flaws or defects. Next comes a layer of base coat. Don't forget to degrease the nail plate so that the base fits perfectly.
Choose 2 shades of varnish and apply them to the foil. Using a toothpick, mix the colors a little together at the border. Next, take a sponge. It can be either regular or manicure. Dip the sponge into the prepared gradient on the foil. To prevent the polish from bubbling on your nails, make a preliminary impression on foil or paper. Next, gently apply the sponge to your nail. Your gradient will be imprinted on it. After this, you just need to cover the design with topcoat.
Flat brush
This option is ideal for a vertical gradient. A flat brush will do a great job of stretching the color vertically, without leaving any particularly noticeable streaks. Before manipulating your nail, practice on plain paper. This will allow you to make more confident and smooth movements when you work on the nail.
Fan
The brush has sparse bristles, spread out like a fan. Due to this arrangement, it is very convenient to create a gradient, since the desired blur area is immediately captured. You can also create a corner ombre using the same method.
Step-by-step instructions consist of several points.
- We do a regular manicure, preparing the nail for further manipulation. This can be either a trimmed or hardware version.
- Apply primer and let dry.
- Apply the base and wait until it dries completely. If you do a manicure with shellac, then dry it in a lamp.
- Apply the color (the one that will be at the base) and dry it.
- Paint the upper part with the second shade.
- We arm ourselves with a brush and draw it several times along the border of the colors.
- If the gradient turns out to be faint, then repeat steps four to six.
- We apply a top protective coating and dry it in a lamp.
Fine
This option is suitable for skilled craftsmen, especially if they work with regular varnish. It hardens quite quickly, and you need to act without delay. The technique is simple and complex at the same time. Two colors are applied to the nail, and then a blur is applied with a thin brush.
Using powder
Here you will need a fan brush and powder of various shades. We apply the base coat, but do not dry completely. We put powder on a fan brush (you can buy it in specialized stores). Using light tapping movements, shake the powder onto the nail. Next, select a different color and repeat the manipulation only over another area of the nail. Since small particles of one and the other color will still fall on the border, you will get a smooth transition.
Next, apply a thick layer of protective varnish (or top coat for shellac). This will prevent fraying and extend the life of the manicure.
Stretching using multiple colors
The two-color stretching technique described above is basic. Using the same principle, you can create a nail design using 2, 3, 4 colors. Then, horizontal lines of different colors are drawn on the nail plate, after which the color boundaries are stretched with a dry brush perpendicular to the lines of the varnish applied in the direction of nail growth, using dashed movements. At the same time, do not forget about periodically cleaning the working brush with a dry cloth, otherwise the manicure will turn out “dirty” and the shades will darken.
Return to contents
Execution technique
Stretching is a type of ombre manicure (gradient, degrade). If a gradient design implies a smooth transition of shades from one to another (or into each other), then in this option glitter is taken as the basis. They spread along the nail plate from bottom to top or top to bottom, which creates a soft transition. This technique is considered new in the modern nail industry, but has already won the love of fashionistas.
This nail design is performed in two ways (for beginners). In the first case, the emphasis is on the tip, and the glitter stretch goes smoothly up the nail. Visually, this technique is somewhat similar to a French jacket with glitter, it looks original and fresh. Suitable for short and long nails with a “soft” square shape, emphasizing their beauty.
And in the second case, the transition goes from the base of the nail (“hole”) to the tip. It looks even more unusual than the option described above. Suitable for nails of any shape and length, but keep in mind that in this case the cuticle must be perfectly processed.
What is a stretching manicure?
Stretching is a gradient manicure made with gel polishes. This is a special technique for coating the nail plate, which creates the effect of changing one shade to another. It is very important that one color transitions into another very smoothly, without visible strokes or sharp lines. This type of design requires a certain level of skill, precision and persistence. But the result is worth it! After all, the smooth transition of shades looks amazing. You can even play a game of sunset in the evening sky.
A very important point: despite the fact that the number of color schemes for such a manicure can be unlimited, you should still remember about harmony.
In order not to get confused in choosing colors, it makes sense to use a spectral hint image.
But this recommendation is for those who doubt it. Daredevils can easily combine contrasting shades and get a bright manicure. It is very nice to use one color, but in different shades - from pale to bright and vice versa. There are a lot of options, the main thing is not to be afraid of experiments. How are nail extensions created? The gradient effect is possible on both natural and long nails. But if such a design on natural nails is usually created with a sponge, then on gel nails such a technique is impossible. Therefore, the concept of “stretch manicure” is traditionally applied to nails extended with gel and decorated with a smooth transition of shades, which is created using the so-called color pulling technique.
We recommend:
Nail painting step by step “Stained glass”
Return to contents
What it is
Gradient manicure (aka stretching, aka Ombre style) is a smooth transition from one shade to another. It appeared in the world of nail design relatively recently, but has already won the hearts of many fashionistas. Now this type of coating is also in great demand and popularity.
Many ladies prefer this technology because it allows you to use several colors at once. Such nails will always look fashionable, creative and will successfully complement the stylish look of any fashionista. It is worth noting that the border between colors is smooth and not pronounced. The shades penetrate each other, complementing the previous color.
There are several types of gradient. You can choose the option that suits you, which will look fashionable and attractive:
- Vertical manicure. This option is a color transition from top to bottom. This design will look great on your nails, transforming them.
- Horizontal option. Accordingly, the shade will change from left to right. Medium-length nails will look especially attractive with this technique.
- Original manicure. This option represents a transition of shades from one finger to another. This nail design will look great even on short nails.
- French gradient. With this technique, a white color is applied to the edge of the nail, which will turn transparent towards the bottom of the nail. This option will look great on long and thin nails.
The main advantages of this technology include the following:
- Simplicity and ease. Of course, in order to masterfully create such a creative design, you should be patient, especially for beginners. With the help of practice, as well as high-quality reliable materials and tools, you will be able to achieve professionalism over time and pleasantly surprise your family and friends.
- Availability. You can purchase gel polish to create this technique at any professional store. All you need to do is choose a suitable color palette, choose your favorite brand and use the product with pleasure.
- Democratic price. You can purchase cosmetic products at a favorable price. All ladies will be pleasantly surprised by the optimal combination of price and quality. You can save your family savings.
- You can also save time. Now you won’t need to visit expensive beauty salons or wait for an appointment with the right specialist. You can create a creative design with your own hands at home. Again, this will require regular training and quality products. With experience, you will be able to make the gradient smooth, beautiful and graceful.
- Great mood. Ombre design is stylish and fashionable. It will fit perfectly with any of your style. Well-groomed and attractive hands will be the key to success in business and the attention of others. All this will lift your spirits and put you in a positive mood.
Gradient brush
To create this design option, take a flat synthetic brush with a semicircular or round end; the one with which the base is applied works well. You need to choose several colors of gel polish and cover half of the nail with each. The layers are made thin, so it will be easier to rub them. Now you need to take a flat brush and moisten it in clinser. Using light movements with a damp brush, move from the cuticle to the tip of the nail. The brush is held almost parallel to the plate. It should smooth out the coating. After the transition area becomes smooth, the nails can be dried in a lamp.
The second and third layers are applied in the same way, this will add saturation to the color. At the end, the manicure is secured with a top coat and dried.
Stretch nail design is distinguished by the fact that the shades penetrate each other, complementing the previous color. Another common stretch design method is geometric, which looks fresh, trendy and distinctive.
The design of gel stretch marks on nails is done with a thin brush. In order to create it, you need white and colored gel polish. It is necessary to consistently dilute colored shellac and create lighter variations. They are used to draw geometric shapes. You need to move from the lightest to the darkest shade. To prevent the gel polish from spreading, it is applied in a thin layer. There is no need to dry each one. The nails are dried in a lamp after the entire process is completed. One of the popular geometric stretch options is the rhombus.
Stretching options
Nail design can be done in a variety of variations, it all depends on the imagination of the artist and the client. Below are the most popular options for stretching nails.
Pastel colors. Ideal for a light and romantic look. This manicure does not stand out and at the same time serves as an addition to accessories and clothing. In addition, hands in such a frame look feminine and well-groomed.
Contrasting gamma. Stretching, made in bright and contrasting colors, is an excellent solution for young girls and eccentric people. This nail art is suitable for an evening and holiday look, but you should carefully select accessories so as not to overload your hands.
Muted colors involve the use of dark or dull shades. The nails look discreet, suitable for a daily look.
Black and white. This is a classic of the genre and goes well with both business and any other style. Combinations of black or white with nude, pink, beige, ocher and brown are acceptable.
Interesting manicure ideas with ombre effect
There are a lot of manicure design ideas using a gradient. You can dilute the gradient with patterns, stickers, and rhinestones. You can also use different gradient techniques (vertical, horizontal, diagonal, geometric) in one design. Improvise, show your imagination, but do not forget about a sense of proportion, then you will have no equal.
Rice. 1. Combination of ombre using an airbrush with French manicure and patterns. A very gentle winter option. Rice. 2. Ombre using colored acrylic powder. It looks interesting due to its “rough” texture. Rice. 3. A combination of vertical ombre with a rose pattern. Feminine and delicate design option. Rice. 4. Manicure for a romantic look using rhinestones. Perfect for a bride's wedding manicure. Rice. 5. A stylish and bright combination of a vertical gradient with a lunar manicure. A wonderful summer design.
A beautiful manicure is not difficult. A little patience, training, and every day you will be able to open new “horizons” of gradient manicure. Your beauty is in your hands!
https://youtube.com/watch?v=vBwZUVU0_Ps
Interesting ideas
In addition to the ombre itself, additional designs can be provided on the nails. After all, the gradient is an excellent base on which any drawing looks much more interesting. Here everything is limited only by your imagination. We will present universal options, among which you can find yours.
With rhinestones
Sparkling stones will only emphasize the play and color transitions. You shouldn't overdo it with them. They will look great as an accent design (or as a single design) on the ring finger.
Space
If you make a transition from black to blue or from light blue to blue, you can create an excellent base for a cosmic manicure. To prevent your manicure from looking overloaded, decorate only one or two nails in this style, and leave the rest using a gradient technique.
With an image
Depending on the chosen topic, you can choose the appropriate drawing. It could be a bright star, an abstract pattern or a floral motif. Just think in advance about how this design will fit with your image.
With stickers
The easiest way to add variety to any manicure is to buy interesting stickers. Their selection in specialized stores is very wide. Among them there are beautiful patterns that will suit any look, and thematic images.
With kamifubuki
The gradient can be varied with these small shiny circles. Their correct placement on the nail plate will create the effect of sun glare. Since they are presented in different colors, you can choose the optimal shade for various gradient combinations.
With glitter
They will look especially relevant in a festive setting, as they emphasize the solemnity of the moment. In addition to the classic arrangement of them on the nail as an accent, there are several other options. They can be used to tightly line the tip of the nail, and the transition will begin from this shiny line. Glitter comes in different shades, so you can choose your own for each combination.
Matte
A matte top will help add aristocratic restraint to your manicure. In this case, the application technique will remain the same. Simply replace your regular top coat with a matte finish and you'll get a completely different effect.
Rainbow
There are several design options here. The first of them is the horizontal classic gradient. In this case, there will be a real rainbow on each nail. Although it is not necessary to design all fingers in this way. The length of the nail plate should be sufficient to place all the color accents on one nail.
In the second option, the colors smoothly flow into one another, but in a vertical position and moving from finger to finger.
Method two
This method is easier for a beginner. However, it requires more material consumption. Performing a stretching manicure with them, as in the photo, will be faster, but it will take quite a lot of time to wipe the nail ridges off the gel.
- Repeat steps 1 - 5 from the first method;
- Pour some varnishes of both shades onto a plastic palette so that they are located close to each other. Stir them along the border with a needle or toothpick to make the transition smooth;
- Dip a sponge or fine-pored sponge into the gel. The smaller the pores, the more decorative the result will be;
- Apply the polish from the sponge onto the nail and wipe off the gel from the pre-nail ridges using a special product;
- Dry the gel under the lamp. If necessary, remove the dispersion layer with lint-free wipes;
- Apply top coat and dry everything under a lamp.
A manicure using this method is of high quality only if the coating gives a dense tone in one layer. If you are thinking about how to make stretch marks on your nails with a less dense gel, then it is better to choose the first method. Also, this method is not suitable for those whose gel is excessively thick, since the layer will turn out thick and wrinkle when drying.
Stretch nail design: photos of fashionable combinations
The smoothest transition can be achieved by using similar shades. This method will allow you to achieve ideal results at home. This is exactly what we advise beginners to do.
Contrasting shades in ombre look incredibly impressive! Unexpected combinations of rich varnishes will allow you to create an unusual, original design.
Use the trendy colors of the year for the gradient. Showcase your deep knowledge of the world of modern fashion trends. Buy mint, coral, emerald, aquamarine and marsala nail polish for the collection.
Stretching in a trendy gray-pink combination can be done in both pastel and rich shades. This ensemble of colors has been named one of the most fashionable this year.
- For romantic, soft souls, let us remind you of the classic pink and white design that will never go out of style. This option is suitable for women and girls who are required to adhere to a dress code. This design suits both business ladies and students equally well. And for a festive event, you can decorate your delicate nails with shiny stones.
- An unusual pink-blue gradient will lift your spirits every day! Be sure to try this stretch on your nails!
- Experts predict a rapid rise in the popularity of gray next year. Now he is no longer associated with gray mice and wet asphalt. Only with intelligence, mysterious restraint, high intelligence. Indeed, in ombre it takes on a completely different reflection.
- Velvet matte graduated coating looks royally luxurious! As you can see, ombre is excellent in both versions: matte and glossy. The purple color of the polish, which is used in the design in the photo, is included in the list of trendy manicure shades for 2017.
For celebrations and holidays, decorate your graduated manicure with rhinestones or other decorative elements.
It is not recommended to glue too many pebbles, so as not to shift all attention from the original coating to the shiny elements
- The gradient is such a beautiful and effective design that experts do not recommend decorating it with various kinds of images and decor, so as not to interfere with admiring the color. But as a base, a pastel gradient is well suited for stamping, turning the design into an even more original one.
- But if you want to captivate everyone, then use some voluminous details. This is only acceptable for a festive occasion, a casual setting, a holiday or a disco. For example, such a manicure with shells is well suited for a marine-themed party.
- A smooth transition of nude pastel shades forms an incredibly delicate design. You won't find anything better for a feminine, romantic look!
- If you are a fan of French manicure, then you will definitely like the following idea. The smooth transition of the pink base to the white tip looks great on nails of any length and shape.
- It's very easy to stretch using a fashionable rub. Use pigments of different colors, rubbing one into the base and the other into the tip. Secure everything with topcoat. A short step-by-step instruction for performing a design with mirror rubbing is already on the website.
We have already said that there is no need to decorate a beautiful smooth transition of colors with patterns, because they interfere with enjoying all the charm of ombre. But if you still want to embellish a laconic manicure a little, then paint only one finger with flowers, using paints of identical shades.
We offer you short videos from masters to perfectly master all the secrets of stretching nail polish.
Design selection
In 2022, the matte effect is replaced by a pearlescent and shiny coating, so feel free to choose the original ombre option for your design - stretched with sparkles. This manicure is based on the idea of reducing the density of the glitter from the nail hole to the tip (or in the opposite direction). If you want to diversify the usual monochromatic coating, then experiment with shiny stretching. This design will definitely not go unnoticed and will attract attention. For an everyday look, choose more muted sparkles, and for a festive event, bright, shining and sparkling ones are suitable. As a color base, any shade you like is acceptable, which will harmonize with sparkles or create a contrasting effect. The original solution is glitter on a transparent backing.
Gradient brush
To create this design option, take a flat synthetic brush with a semicircular or round end; the one with which the base is applied works well. You need to choose several colors of gel polish and cover half of the nail with each. The layers are made thin, so it will be easier to rub them. Now you need to take a flat brush and moisten it in clinser. Using light movements with a damp brush, move from the cuticle to the tip of the nail. The brush is held almost parallel to the plate. It should smooth out the coating. After the transition area becomes smooth, the nails can be dried in a lamp.
The second and third layers are applied in the same way, this will add saturation to the color. At the end, the manicure is secured with a top coat and dried.
Stretch nail design is distinguished by the fact that the shades penetrate each other, complementing the previous color. Another common stretch design method is geometric, which looks fresh, trendy and distinctive.
The design of gel stretch marks on nails is done with a thin brush. In order to create it, you need white and colored gel polish. It is necessary to consistently dilute colored shellac and create lighter variations. They are used to draw geometric shapes. You need to move from the lightest to the darkest shade. To prevent the gel polish from spreading, it is applied in a thin layer. There is no need to dry each one. The nails are dried in a lamp after the entire process is completed. One of the popular geometric stretch options is the rhombus.
How to stretch your nails
Stretching is a smooth transition between two or more colors. A soft transition of shades from dark to lighter is also called a gradient manicure or ombre. It is performed in horizontal and vertical directions or at an angle. A good specialist can use 9 different styles of color application for ombre.
Stretching manicure with glitter for short nails
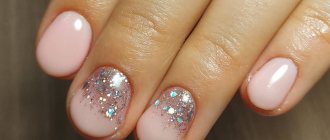
Stretch manicure with sparkles on short nails can be performed with different combinations of colors. Glitter is applied to the lunula area, which lengthens the nail plate. They also practice placement on the edge, which takes the form of a French manicure. To lengthen short nails, use light varnishes at the base, and paint a small area with two colors.
An option on how to do a stretch manicure on short nails can be seen by paying attention to the photo. This style does not depend on the length of the nail plate.
Stretching manicure for long nails
Not every woman is able to grow her own nails long. And those who boast a long nail plate have the opportunity to use different styles and ideas. Naturally, ombre looks gorgeous with shiny elements, both large and small. Glitter can be applied to the bottom or top. In this case, the shape can be almond-shaped or square.
Stretching on pointed nails
The tapered shape looks beautiful when transitioning from light to dark colors. Dark endings in this design look brighter and more expressive. The use of dark shades and sparkles enhances the beauty of the shape of the nail plate. Stylists recommend using holographic or pearl pigment.
Gradient with a sponge: how to make gel polish
A popular, simple and proven way to create a gradient. You can work either with a special sponge for ombre or use a regular kitchen sponge with small pores. An alternative is a car wash sponge. Usually these are finely porous large sponges; this supply will last for a long time.
A new sponge can be washed and dried, or taped over the work surface to remove fine dust and particles. They will definitely get stuck in the varnish layer and may cause bubbles.
- Apply a base or white base.
- Place 2 drops of varnish shades on a piece of foil and mix them with a stick to create a transition of shades.
- Dip the sponge into the colors and apply it to the nail so that the stripes are positioned horizontally. If desired, you can do this vertically or diagonally. To avoid “bubbles”, you can press the sponge against the foil once or twice, removing the air, and then move on to the nail.
- Using patting movements, transfer the design to the nail. You can’t pull the shades so as not to blur the transition. Make 2-3 layers.
- Dry in a lamp and cover with top.
- Remove the dispersion layer and process the cuticle.
Second method with a sponge:
- Cover your nails with a white base or base coat.
- Paint the nail with stripes of the varnish chosen for the gradient.
- Use a sponge to mix the layers on the nail using patting movements, without pulling.
- Repeat in 2 or three layers. It is recommended to take a few minutes break between them so that the varnish “settles down”. Remove the excess with a brush and wait for the bubbles to settle.
- Only then dry it in a lamp.
- Cover with top coat, dry, remove the sticky layer.
- We process the cuticle.
Stretching with gel polish: technique
Masters use two ways to create a gradient manicure. Let's consider a master class on stretching with gel polishes.
- Method 1
To work you will need a thin brush. This technique is quite labor-intensive, but the result will be neat and you won’t have to remove excess polish from the nail ridges.
Operating procedure:
- Preparing the nail plate for applying gel polish. To do this, we perform a manicure, remove or push back the cuticle, and also polish the nails with a buff. After this, degrease the surface.
- Apply a thin layer of primer, then base coat and dry under a UV lamp. Now your nails are ready to apply gel polish.
- We apply a plain gel polish (for example, black) to the nails that will not have a design. Dry under a UV lamp.
- On the nails where the gradient will be made, apply camouflage to two-thirds of the nail, moving from the base to the middle.
- Take a soft round brush and begin to stretch the camouflage to the edge of the nail. Hold the brush parallel to the nail to avoid streaking. Dry the coating under the lamp.
- Using the same algorithm, apply the second layer (there is no need to dry it).
- Mix the top with gel polish of a contrasting color (in our example it is white as a contrast to black). The consistency should be medium so that the resulting mixture is not too transparent, but also does not “strip” when applied.
- Apply the mixture with a clean brush to the free third of the nail. Now we stretch this layer with gentle movements in the direction from the junction of the gel polishes to the base of the nail, but without reaching it. We also hold the brush parallel to the nail.
- Using a clean brush with stronger pressure, we once again shade the junction of the camouflage and the mixture of gel polish and base. After this, dry the coating under the lamp.
- Apply the second layer to two-thirds of the nail, stepping back slightly from the base, and blend again. To avoid streaks while blending, do not forget to remove excess gel polish from the brush. If desired, you can apply a third layer of gel polish to obtain maximum color density at the tip of the nail and blend again.
- Dry your nails under the lamp and apply top coat. Remove the sticky layer with a cotton pad or lint-free cloth soaked in a special liquid.
General recommendations
Of course, every nail technician has his own ways of stretching nail polish, but there are a few general recommendations that can help create a smooth and harmonious color transition.
Among them:
- When creating a gradient on your nails, it is best to blur the edges with a fan brush. It makes the transition more natural and the process accelerated.
- When using a thin brush for stretching, you need to stock up on napkins and wipe the tool on it as often as possible. In this case, the ombre will turn out clean without color spots.
- Dots or an orange stick dipped in the finishing coat will help you create a glitter brocard.
- Regardless of the design of the stretch, it is recommended to lubricate the periungual ridges with a nourishing cream.
