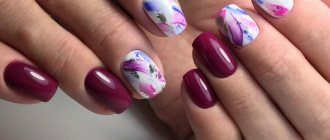
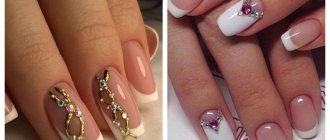
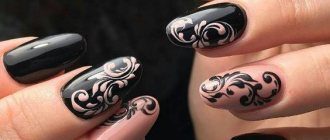
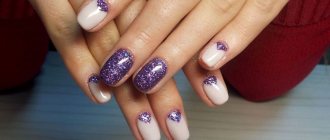
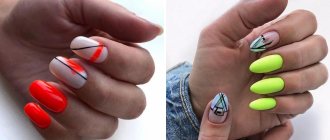
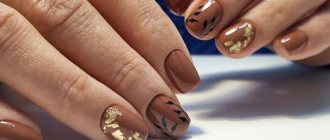
Watercolor painting has remained a popular nail design for many years now. Most often it is performed on a white matte substrate. They paint flowers, landscapes, some abstract patterns, experienced masters manage to create entire compositions on nails using ordinary watercolor paints. In this master class I will show you how to make a simple manicure with a flower pattern using watercolor paints on a nude background. Design using watercolor technique turns out to be quite light and airy. This drawing will take no more than 5-10 minutes.
Many beginners are hesitant to try watercolor designs because they think it is difficult, but this is not always the case. Watercolor is ideal for creating colorful floral prints on your nails. Therefore, we boldly arm ourselves with paints and a brush and begin to try.
What is watercolor painting in manicure
Watercolor painting on nails is done with acrylic, watercolor or gel paints, as well as watercolor pencils and gel polish.
The application technique depends on the chosen material. The basis of the design is predominantly white, but there may be others - nude, pale pink, pale blue, pale lilac. In addition to pastel shades, nail artists today also offer designs on black gel polish, made in white and light colors. But this design requires single-color or two-color painting (two colors.
A pattern is applied to the matte surface of the nail coated with gel polish. If the base is shiny, wipe it with a buff. This way the paint spreads better and does not roll off.
Attention! The peculiarity of watercolor manicure is the absence of clear boundaries in the drawing. The picture is light and airy.
Some masters often offer this style in the summer, when you want lightness and ease. Soft and calm tones go well with bright summer dresses.
Watercolor nail design offers many variations of different designs, suitable for both everyday manicure and for a special event or a romantic evening.
Acrylic paint
The main advantage of working with acrylic paints is their drying time. If paint for watercolor painting sets within 1 minute, then acrylic paint gives the master 3-7 minutes to maneuver, refine and correct flaws in the drawing.
Prepare for work:
- acrylic paints in the desired tones. You can buy them individually or as a whole set, like TNL or Runail;
- brushes for painting. Choose brushes based on the complexity and composition of the drawing. To draw small details, use the thinnest brush, and to fill a large area, use a flat one;
- base and top;
- water;
- gel polish for the background.
Step-by-step instruction:
- Before painting, cover your nails with base and color, drying each layer in a lamp;
- Drop a little water and 1-2 drops of acrylic paint of the desired shade onto the foil or palette. Try not to add too much water at once, test the dye on a tip and dilute gradually until you get the desired shade;
- With light movements, outline the design on the nail and gradually draw out all the details;
- To add volume, shade large elements of the pattern with highly diluted paint with a light color tint;
- After finishing the painting, wait for 3-7 minutes to dry and cover the pattern with the finish.
Painting on nails: materials, step-by-step instructions, design ideas
Techniques for painting nails with watercolors
To make a manicure look good on your hands, you need to master the correct techniques for creating a watercolor design.
These include:
- Wash. Thanks to this technique you can create bright and colorful flowers. A pastel shade is applied to the nails, which must be heavily diluted with water. After the first layer has dried, apply the second and third. Consequently, the midtones will become deeper. Attention! There is no need to apply a fourth coat.
- Wet. Stain is carefully applied to the paint layer that has not yet dried, which can be done several times. The main thing to note is the very smooth transitions for which this manicure was created. If you need to intensify the color in some areas, you should also use the brush on a "wet" layer.
- Monochrome staircase. In any situation, designs made in one color look advantageous on nails. This type of work is quick and easy to do, and the result will please you for a long time. First you need to draw the outlines and let them dry a little. Next, you need to moisten the brush in water and fill the internal spaces. At the end of the work, draw the outlines again for greater clarity. Abstract patterns look great in this technique.
- Colored glass. The principle of performing the technique is very similar to that mentioned above. The key difference is that stained glass is difficult to imitate, requiring mica and the use of a color palette in some works.
- Watercolor gel polishes on French nails. The typical French manicure, already loved by fashionistas, has been reworked by masters: now it is used as a canvas for watercolors. Moreover, the result is very interesting.
- White watercolor strokes. To perform this technique you will need a flat brush and white watercolor. Apply a little white polish to the edge of the nail. You can also use a medium sized brush and make small strokes to change the background of the image.
- Blur with a flat brush. Floral design can be complemented by the amazing property of watercolor to blur even with a small amount of water. To do this, you need to take the desired shade and shadows with a brush. This way you can achieve a color change.
- Double strike technique. Ideal for drawing three-dimensional flowers that combine different shades. The execution process is very simple: 2 colors are applied to the brush, which do not mix with each other. And with each contact with the nail, a double stroke is obtained, consisting of several highlights at the same time.
Drawing stages
Painting with watercolors can be difficult for beginners. You have to learn many nuances. What paint is suitable for this, how to paint with it, what step-by-step diagram will be necessary and useful.
To understand how to draw a picture, there are instructions with integral steps:
- The elements are applied in the thinnest layer. Spreading depends on the subtlety and delicacy of the work. The thinner it is, the better the visual effect it reproduces.
- The effect can be weakened by frequent movements of the brush. They should be minimized.
- The gradient needs to be controlled. If necessary, it can be stretched with a brush.
- After each completed stroke, it is advisable to send the nail to dry. Keep in the lamp for 15 to 30 seconds.
- It is imperative to polymerize the watercolor on your nails to make the design complete. An ice machine is used and exposed to ultraviolet radiation for 2 minutes.
- As a final step, the nail design is covered with a top coat or finish.
- Be sure to dry it at the end.
At this point, the process of applying watercolors to manicured nails is considered complete.
This is interesting and useful to know: - 100 ideas for unusual nail design, read the article: - https://uroki-manikura.ru/neobychnyj-dizajn-manikyura-novinki-modnye-trendy-i-foto-nogtej/
Materials for watercolor manicure
To create a watercolor manicure we may need:
- Watercolor gel polish: medium density, easy to apply to the nail plate. Additionally, once propagated, it maintains edge precision and richness.
- A special base for it facilitates easy application and better hardening of the composition. This is important if we want to create simulated drops and dots.
- Watercolors - can be used for both abstract and detailed patterns. Due to the fact that they are water-based, the paints dry in 1-2 minutes, and this is the optimal time. It is enough to create the desired image without waiting for the material to harden to continue working with the design. And the end result is simply covered on top.
- Acrylic paints: Still popular, especially among beginners who find it difficult to reproduce the perfect design in a couple of minutes. You can work with acrylic for much longer.
- Brushes of different thicknesses and hardness. You will need both manicure tools and art tools for working with watercolors.
Watercolor gel polish
These paints are regular gels in bottles with a brush. Their peculiarity is a chemical formula that allows the interaction of pigments of different shades. Spreading over the surface of the nail, they create patterns. A few drops are scattered throughout the composition, visually reminiscent of the skin of a flower or reptile. This depends on the size, location and volume of the drop.
The material polymerizes under the influence of ultraviolet rays.
Acrylic paint
This material is a pigment (usually available in tubes) for coloring. The paint is applied to a matte surface, dries in the open air, and dissolves in water. Acrylic paints diluted with water have the slowest drying speed. In practice, nail technicians rarely use acrylic paints for watercolor painting. Their density is best suited for Chinese painting using flat brushes with an angled angle.
Paint for painting “Watercolor drops”
This is a colored liquid in a bottle with a brush. The base is an alcohol solution. Thanks to this feature, they have a high drying rate on the surface and do not require polymerization. The liquid has a narrow palette (usually no more than 10-15 colors). However, mixing shades can produce new colors.
You can create chaotic designs and textures with a bottle brush without using additional tools.
Gel polish
This is a colored varnish that requires polymerization in a lamp. It can have varying degrees of pigment density depending on the manufacturer and the effect. The material has a wide range of shades and is often used for painting. Watercolor painting of nails using conventional gel polishes is performed in stages with intermediate drying of each applied layer. Otherwise, the pigment will mix and create a messy appearance.
This technique is considered the most difficult, since to create light and shade it is necessary to dilute the densely pigmented gel polish with a top coat or its other shades. You can simplify the task using special stencils.
Advice from professionals
Professional nail technicians believe that the most important part of the job is practice. Therefore, advice No. 1 is a permanent internship in some specific topic dedicated to the manicure industry. At first, this can be done on tips, and then gradually move on to clients’ nails.
Learning to design using tips takes place without much effort, since the tips can be rotated in the way that is most convenient for the master to draw. That is why it is equally important to place your hand on real nails.
The most difficult thing in watercolor painting is drawing contours in complex sketches. And in order for the contours to be clear, you need to learn to hold your hand steady. The fingers of the person drawing should be resting on the finger (or tip) on which the line is drawn, and the elbow or forearm should be firmly on the work table. This will help beginners draw thin, clear lines.
In addition to drawing the contours, a significant point is the correct coating of the nail plate with color. The second, but no less important piece of advice is to constantly improve your skills and learn something new. The modern beauty industry does not stand still and therefore it is important for workers in this field to constantly improve their level of knowledge.
Watercolor painting in manicure design is quickly gaining popularity. And this technique is becoming a leading trend in the modern nail service industry because it does not require any additional investments and is not time-consuming. That is why in 2019 you can increasingly see this decoration technique on the nails of girls who follow trends.
Pros and cons of coatings with a spreading effect
For ease of comparison, lists of the main pros and cons of watercolor gel paints are grouped in one table:
| pros | Minuses |
| Quick and easy to use | Inability to control the distribution of material |
| Similarity in chemical formula to other materials used for leveling and molding, therefore better adhesion and durability. | A short list of designs that can be created. It is not possible to create complex and realistic images. |
| Easy to store packaging | The material is only suitable for this technique |
| No water is used for dilution, which reduces the quality of adhesion between the model and the upper. | The shade cannot be changed, as when diluted the material may lose its properties. |
| After hardening, there is no risk of erasing (blurring) the design if it is covered with a top coat. | High cost compared to other materials, fast consumption. |
| Does not require activation or additional preparation. The material is ready for use immediately after opening the bottle. | Limited palette |
How to paint a landscape in watercolor?
After you've practiced drawing individual elements, try taking on something more complex.
Nature is the best inspiration for an artist. Why not capture nature on paper then?
To draw a simple landscape, follow these 5 simple steps:
Step 1. Select paper of the right size and brushes that will be comfortable for you to paint with. Choose the main colors that will be present in the landscape.
Step 2: At this point, create a pencil sketch. Do not draw out all the details, just indicate the location of the objects.
Step 3: Apply primary background colors: Paint the sky, ground, water or plants with primary colors.
Step 4: Add detail and shade to existing elements. Add clouds to the sky, draw foliage on the trees, make highlights on the water.
Step 5. Work on very small details, if necessary, and correct visible defects.
Voila! If you do everything step by step, no matter what you draw, you will end up with a masterpiece.
What could be more beautiful than a sunset in the mountains? Catch a detailed video with step-by-step drawing of a bright evening landscape:
Color combinations of manicure with stains
Black manicure with streaks
Black is another safe bet for a striped manicure. It pairs easily with any color and can be a great addition to any look. This design looks very unusual and attractive due to the effect of a slight haze formed on the dark surface.
White manicure with streaks
To create such a design, white gel polish is used as a basis, and any other shades are used for stains. One of the most popular options is black stripes on a white background.
A white manicure with spots will suit any look. Depending on the color, you can get both everyday manicure and holiday designs.
Sealing or securing
The final stages play a significant role in the final look of the manicure. They should be given no less attention than composing the composition.
Tips for consolidation that may be useful at the end of all stages:
- To seal, you can use a two-in-one top or a regular rubber top.
- If you used rubber, you will have to reapply a regular gel polish topcoat. This will maintain the durability of the coating and healthy shine.
- A top with a two-in-one effect does not require re-coating.
- Do not forget about removing the dispersion layer after drying in the lamp.
Manicure design with watercolors
Floral design
Roses painted in one color look perfect against a dark background. They can be decorated with rhinestones or bouillons. We draw the petals from a point in the center or in the reverse order, pulling out each petal with a thin brush. Poppies, daisies, dandelions, and irises look beautiful in this style.
Marine theme
The tones are predominantly blue-green. Drawing is simple: randomly apply dots on the substrate and let it spread unhindered. You can decorate with an applique: an anchor, a fish, a ship, a shell, a starfish or a horse.
Reptile skin
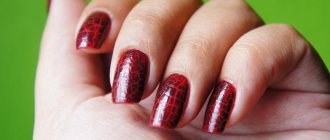
The color scheme here can be varied: shades of green, blue, pink, gray. They usually combine two colors that match the tone, creating the natural color of the reptile's skin: yellow and orange, gray and black. The design is applied in the same way as the marine theme, but in a checkerboard pattern.
Abstract pattern
Here the designer’s imagination has nowhere to go. You can depict curls, chaotic lines, circles of different diameters. The color range is as wide as possible. The photo below is full of ideas for creating an abstract design.
Marble image
As with the reptile skin patterns, two shades of watercolor are used. These can be contrasting or similar colors. The “stone” motif is made rough or veined.
Animals
Cats, dogs, birds and fish are especially popular among fashionistas. They complement your everyday look well and lift your mood on weekdays. You can get ideas for drawing from children's books. Such models require high artistic talent from the master.
There are many design variations, it all depends on the imagination and talent of the nail artist. The more painstaking the work, the more skills and time it will take to create a unique image.
Materials and tools
Watercolor design is called because it looks similar to artistic watercolors. These are the same halftones, lightness and translucency of paints, the use of a thin consistency and a slight spreading effect. But contrary to popular belief, they do not use children’s watercolors, but artistic watercolors. They differ in composition and release form, and also lie softly on the work surface.
However, not all such pigments lie on the nail so that another can be applied on top of one layer. Therefore, you need to approach the choice of materials for watercolor design thoroughly.
Watercolor paints are diluted with ordinary cold water, and therefore problems with consistency in the work usually do not arise. In the same way as when working with a paper sheet, they use a palette to dilute paints, obtain the necessary tones, and apply color. In addition, you can use acrylic paints, which also require dilution with water. However, they are distinguished by the nuance that after drying they cannot be removed from the brush, and therefore during the work you will have to ensure that the brush does not dry out.
If one tool is replaced by another when it is necessary to choose a tool of a different thickness, you will have to immediately rinse the used brush. In addition to watercolors and acrylic paints, some artists can also use diluted gel polish for this technique. It has to be diluted because the gel polish itself has a consistency that is a bit thick for painting. You can use a top coat or a cleanser as a thinning agent.
Watercolor manicure ideas: a few tips when working with watercolor paints
First of all, it is worth remembering that in order to turn one dark shade into several lighter ones, you should dilute it with white watercolor paints. Thus, all elements of the ornament will have their softness in transitions. But don’t get too carried away, otherwise the drawing will become too whitish and turn into a brightened landscape.
By applying the desired tone, you can work with the color scheme directly on the nail plate. A brush will be a great help for this. It is this that will add vagueness and help achieve the desired result. The thickness of the brushes may vary. It depends on the size of the image. If the design must fill almost all the nails, it is worth paying tribute to thicker brushes.
After finishing work on the ornament, you should not emphasize all the contours and elements of the ornament. This will give your work translucency and lightness. To get a watercolor effect, do not make the outline too thick and outline the entire ornament.
It is also worth choosing high-quality and professional brushes designed specifically for working with manicure watercolor paints. When creating a drawing, not all masters manage to draw straight lines. Therefore, it is necessary to take into account the main advice: the brush should be held perpendicular to the nail plate.
Watercolor painting of women's marigolds is simply mesmerizing in its appearance. After all, real masters are able to convey in a meager drawing the entire character and mood of the future owner of the manicure. It is this technology of decorating with marigolds that occupies a leading position in modern fashion. But, unfortunately, only a real professional is able to create a real landscape in the hands of women.
How to prepare the background
Before watercolor painting appears on your nails, you need to create a kind of base using gel polish.
When creating a background, you must follow the standard instructions for applying gel polish. It will become the very sheet of paper on which you will draw your masterpiece. In this process, a UV lamp plays an indispensable role, without which the applied compositions will not dry properly.
First, a manicure is done, the cuticle is removed, the nails are shaped, and everything unnecessary is removed. Then the greasy layer is removed, followed by the base, color, and top coat, each of which is dried under a lamp. After the top layer has dried, the surface of the plate is ground, achieving a slight roughness. Now you can start manicure with watercolor paints.
