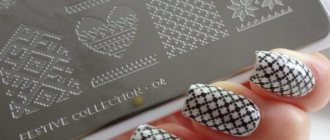
Drawings on nails are no longer a rarity. Now every girl can print any pattern on her nails using the stamping technique. Even the thinnest and most graceful lines. The principle of creating a design is very simple: special paint is applied to a plate with a fragment of the design, the excess is removed with a scraper and the imprint is put on a stamp, after which the imprint is placed on the nail, previously coated with varnish.
There are inexpensive stamping kits on sale. They can rather be called probes than serious tools. When trying to decorate their nails with a beautiful pattern, many experience difficulties: some part of the design is not printed, the print turns out rough, and its lines are thick. Maybe it's all about the paint? It dries poorly and unevenly. What if you try to replace it with varnish? And what varnishes are suitable for stamping?
You may be interested in:What is nail liquid?
Classic stamping: review of companies
El Corazon brand stamping varnishes are very opaque: they contain five times more pigment than regular varnishes! It's no wonder their fans love them so much.
Gold and silver varnishes of the Rio Pro brand harden slowly, so you need to adapt to them.
The following also give good prints: “Bourne Petty Top” and “Bluesky”.
You might be interested in: Why does gel crack?
– a recognized leader in quality stamping materials. They are more expensive than others, but they amaze with the number of drawings. The print made from the Konad plate turns out smooth, even the thinnest lines are clearly printed. The pattern is elegant and delicate.
The manufacturer recommends using a special varnish for printing. It has a quick-drying formula and transfers beautifully onto the nail. Konad warns against using non-professional varnishes, explaining that it will not be able to create a print. Is it so? Many practicing nail design masters are sure of the opposite. You should consider their advice on which varnishes are suitable for stamping.
Nail design ideas using stamping
Stamping design can be combined with other types of design. For example, on small lace you can paint romantic monograms with a brush.
Design “Veil”
Stamping design “Veil”
- Apply beige decorative coating in two layers. Dry it.
- Select a fine mesh pattern. Using a stamping kit, transfer it onto your nails using black paint.
- Cover your nails with top coat. Remove the sticky layer.
- Using black textured gel paint, draw a “smile” near the cuticle. The line should go to the end of the side bolsters. The line is thicker near the cuticle; closer to the free edge, make it thinner.
- Use the same paint to paint monograms on your nails. Dry in a lamp.
Design “Flowers”
Design “Flowers” using stamping technique
- Apply a decorative blue coating in 2-3 layers.
- Remove the sticky layer.
- Choose a stencil with flowers that have large petals. Use black polish to stamp flowers on each nail.
- Paint the flower petals with a tint - turquoise towards the middle, purple around the edges.
- When the flowers are dry, apply topcoat and dry in a lamp.
How to replace professional stamping varnishes: acrylic paints
Nail design masters can safely be called pioneers of techniques. They love experiments, learning in practice the compatibility of materials and technologies and sometimes making useful discoveries.
A manicurist involved in design has acrylic paints in his arsenal. These are quick-drying paints with finely ground pigment. They are successfully used for painting. The advantage of using these paints for stamping is that there is no need to act quickly until the varnish has dried. You can easily draw a design onto a transfer pad, clean up the uneven lines with a brush moistened with water, dry the paint and slowly transfer it onto the nail. Such prints are covered with a varnish top coat.
You may be interested in: How to soften a toenail
If something is not printed as you would like, you can correct the design with a damp brush. Experience shows that acrylic paints are no worse than varnishes and are suitable for stamping. No matter what high-quality varnishes are, when applying a design with them, in the event of an unsuccessful print, you have to start all over again: remove the coating with liquid and acetone, repaint the substrate and print the design.
Stamping with pigments
This stamping technique will allow you to diversify the design by covering the paint used to apply the design with colored powder. To complete the design, you will need black stamping paint and a pigment for manicure (neon or rubbing).
The sequence of action is as follows:
- Perform a hygienic manicure.
- Cover your nails with primer, base and decorative layers, each of which needs to be dried under a lamp twice as long as usual.
- On the last layer you need to remove the stickiness.
- Select a design, apply paint to the stencil, spread it with a scraper or plastic card, transfer it to the stamp, then from the stamp to the nail.
- While the pattern paint has not yet dried, you need to dip a soft brush into the pigmented powder and apply the powder over the paint with light tapping movements.
- After one or two minutes, when the paint with the powder on top has dried, excess pigments can be swept off the nails with a clean, soft brush or paper napkin.
- Apply top coat to your nails and dry the last layer in a lamp for twice as long as usual.
Stamping with gel polish (for professionals)
Many people are interested in which gel polish is suitable for stamping. The right transfer pads expand the possibilities of stamping and allow you to carefully transfer the gel to the nail. There are subtleties here. Without knowing the features of this technique, many consider imprinting gel polish impossible. Firstly, the stamping pad should be buffed for better adhesion. Secondly, it should not be hollow inside.
Before application, gel polish should be placed on a palette and held in the light. It will evaporate the transparent component a little and become more opaque. Only after this can it be used to print a pattern. Apply gel polish to the plate with a brush, remove excess with a scraper. Roll the stamp without any effort. The drawing should go clearly and without crushed lines. If some details do not look very nice on the stamp, you can correct them with a brush dipped in an alcohol-containing liquid (klinser).
Now it is important to dry the gel polish a little in the lamp so that its top layer polymerizes. This is approximately ten seconds of UV drying. The time will be slightly different for each lamp, and for each gel polish too. You can first make several test prints, establishing which varnishes are suitable for stamping in this technique, and determining the optimal time for their exposure in the lamp. Of course, the master will not experiment in front of the client; he will prepare the design in advance and will already know all the subtleties.
To apply a design to a nail, it is first coated with colored gel polish and, without removing the dispersion, the design is carefully transferred from the stamp. At this point, you can again correct the drawing with a brush moistened with a clinser. If everything is satisfactory, the nail is sent to the lamp. Dry a full cycle.
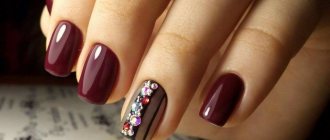
Before applying the top (it must have a sticky layer), you can add rhinestones.
First method: painted stamping
Painted stamping is performed in the same way as ordinary stamping, the difference is that after applying the image to the nails, it must be painted. To achieve the desired result, it is important to follow all step-by-step recommendations:
- At the very beginning of the transfer procedure, apply a base and a colored coating, such as polish or gel polish, to your nails.
- Next, you need to proceed according to the standard scheme: we re-read the pattern from the disk onto the nail itself, and do not forget to degrease the stamp pad and the plate. If this is not done, the drawing may turn out to be of poor quality or smeared.
- After you have transferred the drawing, you can start coloring it. Here you will need colored varnishes and a thin brush. This is the most important part of the procedure as it requires patience and attention. Try to carefully paint over the drawing without going beyond the lines.
- The last step is to remove excess polish from the nail or cuticle and apply a top coat of clear polish.
Don't forget that color stamping requires patience, attention to detail and precision. Otherwise, you risk ruining the entire manicure and then the whole procedure will have to start all over again. However, the time spent on such a design is worth it. Look at the amazing result that will be impossible not to notice.
Stamping with gel and gel paint (for professionals)
The experiments of masters (in particular, Yulia Biley, a leading figure in nail design) have proven the possibility of creating a gel polish imprint on gel polish. What other gels are suitable for stamping on gel polish? All that are sufficiently pigmented.
To apply gels, the dispersion layer of the background substrate is not removed. If it creates excess volume, it is dried again so that very little stickiness remains.
Similar to gel polish, you can use gel paint for design. It is usually used to draw a Frenchman's smile. If you use a sufficiently soft transfer pad, such material does not need to be pre-dried in a lamp. It transfers well to the nail. Polymerize for a standard time, cover with a top coat with a sticky layer.
The gel for laying out the white tip when modeling a French jacket can also be used in stamping. It is not pre-dried like gel polish. Roll the pad over the nail with a slight movement and polymerize for the required time.
Gel paint for casting can also be applied using stamping. Some black gel polishes are suitable for the same purpose. After complete polymerization of the design, foil is printed onto its dispersion. If necessary, correct with a brush soaked in clinser and polymerize.
Second method: reprint the color pattern
This stamping method is no less interesting. Here the finished color design is already transferred to the nail. We’ll tell you how best to do this right now.
- As with the first method, a layer of base and varnish should already be applied to the nails, which should be thoroughly dried.
- Next, prepare a colored coating, carefully transfer it to the design, which is on the stamping plate. Be extremely careful here; colors and shades should not mix with each other.
- If you have already applied a design, then you need to remove all excess from the engraving and carefully transfer the image onto the nail.
- Now you can remove the excess and apply a layer of clear varnish.
The design procedure is not complicated, and the result will please you for a long time. In addition, this manicure looks stylish and bright. Third method: stamping design on multi-colored nails
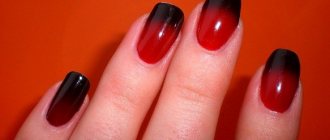
Another option for nail design is stamping on a colored basis, i.e. applying an image to colored nails. Note that the base can be different, from classic amber to a gradient of all the colors of the rainbow. The basic rule of this design is thoughtfulness and the right combination of shades. Therefore, you should decide on a color combination in advance. So, we attach step-by-step instructions.
- First, apply the base coat to your nails and be sure to dry it well.
- Next, we take colored varnishes, there can be 2-3 or more of them, and create the basis for our design. We apply varnishes to the nail one by one, thereby creating the effect of random colored spots.
- The third step is to create a design using a stamp. Choose it in such a way that it looks harmonious with the multi-colored base of your nails. Black or white varnishes, as well as classic gray, are very often used, as they are suitable for all occasions. Now we transfer the selected design to the stamp and decorate the nails.
- The last step is to apply a sealer, a clear varnish.
The result of this procedure will definitely surprise you. The design is colorful, unusual and at the same time stylish and tasteful.
Reverse stamping
Imprinting technology is evolving and now there is a new use for a transfer pad - creating a homemade slider on it. The technology was called “reverse stamping”. An additional flat platform was produced especially for it, onto which the drawing is transferred.
Many people are interested in which varnishes are suitable for stamping using the reverse technique. It is easiest to make an impression with highly pigmented materials that have a homogeneous structure. Spangles, glitter, crumbs - all these inclusions are contraindications for creating a print. But they can be used in the next layer, even with large decorations - stones or kamifubuki.
How to choose a quality stamp for nail stamping and prepare it for work
A good stamping stamp is not easy to find. Most of them, presented in the assortment of nail art stores, are difficult, if not completely impossible, to use. In the reviews of women who tried to do stamping on their own, you can find many complaints about the quality of the stamps. It often happens that the design on the rubber/silicone surface is not imprinted at all, and the device turns out to be inoperative.
To begin with, let us indicate that stamps, like engraved plates, can be original (branded) and non-original (the same “noname” ). Also, all possible options for such products can be classified as follows:
:
- Depending on how many “working surfaces” the stamp has. An accessory may have one working side - the one that is soft and plastic. There are also stamping devices that have a stamp of one size and degree of plasticity on one end, and a second stamp of a different size on the other end. The head itself for copying a print of a design can even be removable. In this case, the set with the stamp base includes several heads of different colors. Such accessories are convenient to use if you need to print a shade of paint that matches the color of the main stamp head. For example, white paint on a white surface is difficult to see, and it is difficult to understand how well the pattern was printed.
- Depending on what material the die head is made of. In modern production, rubber and silicone are used. The first option is not very successful, since rubber is characterized by increased cruelty. This material is not always able to repeat the shape of the nail plate when rolling the pattern. Therefore, applying a continuous pattern causes certain difficulties. In addition, rubber heads, as a rule, are very small in size, which does not allow for continuous coating. Silicone material is more convenient in this regard - it is softer, more flexible, picks up and holds pigments well, and allows you to apply a design to the entire nail plate in one go.
A brief overview of not very successful stamps for stamping nails - which options are better not to purchase:
- Miniature stamp made by Konad. This is an original high quality accessory that will last you a long time. But it has too small a working surface. It is thin and flat, and is difficult to deform when placing a print on a curved nail. Therefore, experts recommend using this option only for printing individual fragments of a design or for performing a French manicure. It is not suitable for large stamping patterns covering the entire nail plate.
- A small stamp from an unknown manufacturer, which differs in that there is a scraper on the second side of the handle. Many women purchase such a product in the hope of saving money; after all, there is both a stamp and a scraper for the same price. The advantage of this product is that the scraper will not get lost, which happens quite often. But the main working surface is small, which makes the tool not very convenient to use and certainly not universal for performing different stamping patterns.
- Non-original stamp with a rectangular surface and a replaceable head. Accessories with rectangular working surfaces, as practice has shown, turn out to be the most effective for stamping. But the fact that the die head is removable has absolutely no meaning if the set does not include other replaceable silicone pads. As a rule, such pads are not only absent from the stamp set, but also generally not available for sale. However, given the low cost of such devices, they can be regularly updated without much damage to the budget.
- Stamps for stamping are double-sided with white pads of different sizes. This tool is positioned as a universal tool. One surface is small and elastic, which allows you to leave small, clear imprints of individual decorative elements. The other pad is large and plastic, adapts well to the shape of the nail, allowing you to apply full-fledged designs on large and long nails. But there is one “but” - such accessories can poorly capture the pattern from the stamping tile.
In order not to disappoint you at all with the quality of stamping dies, we will give an example of a successfully executed accessory. For example, the Born Pretty brand tool does its job well. This is a clear silicone stamp with a hollow clear handle. The manufacturer tried to take into account all the needs of customers and brought to life a very interesting and practical idea:
- When transferring a pattern or ornament from a tile to a stamp, from the stamp to the nail plate, you can see through the pad how the design is laid out. That is, you have the opportunity to timely assess whether all elements fall into their intended place.
- On the transparent pad, any colors of the contours of the patterns are clearly visible - from white to black.
- The density of the pad and its size are optimal for making designs and ornaments of any size on any surface, even a strongly curved one.
- In general, if you experiment with different stamping dies, you can quickly choose the best option for yourself. They are not very expensive, so such purchases will not make a significant dent in the family budget.
- In order for the stamping process to be successful, it is important not only to choose the right accessories, but also to prepare them for work. To begin with, the silicone or rubber surface of the stamp needs to be made not as smooth as it was initially. This is necessary so that the rougher surface will better adhere to the varnish applied to the engraving of the plate. To increase the roughness of the material, it can be lightly treated with a nail polishing buff. There is no need to be zealous in this matter, since you can easily damage the stamp head, as a result of which the lines of the drawing or pattern will no longer be clear enough.
- Also, before starting to work with the stamp, its working surface needs to be wiped with NDL (nail polish remover). Flint sticks to silicone very quickly, so additional cleaning will not be superfluous even if the stamp appears relatively clean.
Technique for imprinting translucent varnishes
What about those varnish colors that have a translucent structure? Among them are very impressive neon, delicate pastel and berry colors of red and pink. Designs such as the Venetian lattice are not complete without stained glass paints. Surprisingly, the craftsmen claim that these varnishes are suitable for stamping. What's the secret to applying them?
Two conditions must be met: you will need a transparent transfer pad made of silicone. It allows you to control the penetration of colored varnish into an already printed design. The second condition is to apply a translucent varnish on a white substrate.
Painting with such varnishes is possible only with a silicone stamp. How the master does this is shown in the video.
Now the masters answer the question: “What varnishes are suitable for nail stamping?” confidently answer: “Any!”
Stamping technique
The procedure should begin with the basic steps - cleaning and preparing the nail plate for applying a decorative coating. First of all, you need to remove the old gel polish using a cutter or softening liquid. Then you should perform a hygienic manicure - classic edged, European unedged or hardware. The choice depends on the client’s preferences, but in any case, you need to get rid of the rough skin of the pterygium - remove or push back the cuticle as much as possible.
Next, you need to adjust the length and shape of the nails, taking into account their individual characteristics. Pay due attention to architecture, because the beauty of a manicure largely depends on it. It is also important to degrease the plate using a liquid degreaser or dehydrator, and remove the natural gloss with a soft file. Before applying the coating, treat the side rollers and cuticles with a special oil that will protect the delicate skin from drying out. Only after this can you proceed to applying color and creating a design.
The stamping technique is performed in several stages. Experienced craftsmen will not find them difficult, but beginners should carefully follow the recommendations to avoid unpleasant surprises.
- Apply primer to the nail plate and let it dry for 10-30 seconds. For normal and strong nails, you can use acid-free formulations; for damaged or extended nails, an acid-based product is ideal.
- Cover your nails with a base coat - clear or camouflage. You can use a liquid or rubber base. Distribute it evenly and dry in a UV/LED lamp for about 60 seconds (time depends on the power of the device).
- Almost the same manipulations should be performed with a colored coating - the “background” for further design. Gel polish can be any shade - from pastel to bright neon. You don’t have to use it at all and limit yourself to the base - it all depends on your preferences and artistic idea.
- Select the desired pattern on the disk with patterns. If it is new and has not been used before, remove the protective film first.
- The next step is to apply the pattern with varnish or gel paint. Select a disk and cover the design with paint so that it completely covers it. Excess material is carefully removed using a plastic scraper. This should be done as quickly as possible, especially if you are using regular varnish, holding the scraper at an angle of 70 degrees.
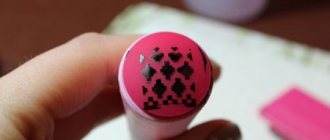
- Take the stamp and press it onto the shaded design. Then lift and inspect the pattern - it should be copied onto it without bald spots or irregularities. If everything is fine, carefully transfer the resulting decor to the nail plate.
- Stamping should be done in one motion - press and remove. You cannot twist the stamp and hold it on the plate for a long time, otherwise the pattern will be damaged. All these manipulations must be repeated with the remaining nails.
- Dry the design in air (if it is made with regular varnish) or in a lamp (if polymer materials were used). Fix the result with a glossy or matte topcoat.
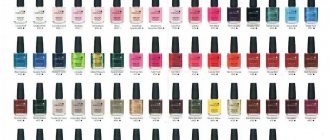
Brands of suitable varnishes
To make a print, it is not at all necessary to use expensive varnishes. All the ingredients that the manufacturer adds to them increase the cost of the bottle. The master uses, in fact, only pigment and a volatile solvent. No plasticizers or preservatives are needed - the list of ingredients sometimes amounts to an impressive list. The nail is protected by a backing; the cheapest varnish will not harm it.
All this is taken into account when deciding which varnishes (not gels!) are suitable for stamping. The names of companies producing good highly pigmented varnish are very different. It’s safe to say that budget varnishes “Golden Rose” for design or “Selenium”, which have a small bottle volume, cope well with the task.
Stamping for nails - tips for beginners from professionals
To ensure that stamping is not accompanied by mistakes and brings only pleasure from a beautifully executed manicure, consider the advice of experienced nail art masters:
- Save acrylic paint or special gel for painting the outlines of drawings. Do not apply pigments to the entire engraved plate if you see that it is much larger in size than the surface of the nail plate, even on the thumb. Since stamping is a technique that requires a lot of materials, you can learn to save them. To do this, apply a strip of paint at the very beginning of the drawing and distribute it so that it is enough to cover the nail, but no more.
- Use a plastic scraper with smooth edges rather than a metal one. If necessary, you can even use any unnecessary plastic card. If you have a metal scraper, keep in mind that sooner or later it will begin to scratch the engraved plate, rendering it unusable.
- Clean the engraved plate, scraper and stamp surface immediately after performing a manicure, before the paint has had time to dry too much. This can be easily done with nail polish remover if the gel is still fresh.
- It is not recommended to clean the surface of the stamp with cotton pads, swabs or napkins, which may leave tiny lint on the rubber or silicone. Such particles can ruin your manicure next time. Therefore, it is better to use the sticky side of the tape to clean the stamp. If you use one side of double-sided tape, which has a stickier surface, the cleaning will be better and faster.
- As we already mentioned, when transferring a design to the surface of the nail plate, the paint often gets on the skin around the nails. To protect your skin and make cleansing easier, apply a thin layer of rich cream to your skin. A more reliable way to protect the skin around the nail is to use a specialized “liquid tape”. This liquid substance of a bright shade, which is clearly visible on the skin, is easily removed along with the adhering pattern - just pick it up by the edge with tweezers. This product is produced by many brands - MASURA, Kiesque Liquid Palisade, EL CORAZON Kaleidoscope Cuticle Defender, Pure Manicure Dance Legend, Skin Defender, Fire Star. Moreover, you can choose how it is more convenient for you to apply the product - with a brush or a sponge, like with lip gloss.
We hope that these tips will help you do stamping quickly, easily and without mistakes!
Comparison of reviews of Konad and Golden Rose varnishes
If you compare reviews of stamping varnishes and reviews of cheap varnishes, you can see the following pattern:
- Konad varnishes are less bright in print than similar Golden Rose varnishes.
- Konad varnishes are not designed for the use of translucent varnish transfer techniques.
To create masterpieces, you can purchase several basic professional varnishes and supplement your palette with the entire range of cheap varnishes.
Selecting the right palette of varnishes for stamping manicure
As you already understand, we will need varnishes of contrasting colors so that the design is clearly visible against the background.
The ideal varnish for stamping is quite thick and even viscous. This consistency is perfect for a pattern. Matte patterns on the glossy surface of the nail look good. It is matte varnishes for stamping that will make the design clearer, because glossy options shimmer.
Secret: if you are not sure whether your regular varnishes are suitable for manicure using the stamping technique, it is better to purchase special stamping varnishes, then the result of your efforts will certainly please you.
Another secret: if you have a favorite, well-pigmented polish, but it is too liquid for stamping, leave the jar open for 15-20 minutes. It will thicken a little, that is, you will get the ideal consistency for this nail design.
Manicure sets
On the Internet you can find a lot of photos of fashionable new nail stamping products. And what will craftswomen need who want to get their hands on such beauty? The standard stamping kit includes:
- Tools for shaping nails (scissors, nippers, glass or ceramic files, buff).
- Basic nail polish, top.
- Several types of varnish of different colors for the base and printing of the design.
- Special product for protecting cuticles.
- Nail polish remover.
- Scotch.
- Lint-free wipes.
- A scraper, or scraper, designed to level the varnish layer and remove its excess from the stencil.
- A stamp with which the selected pattern is imprinted on the nails.
- Plate with engraved prints. A standard rectangular stencil usually holds at least 10 images made in the same style. This allows you to create a huge number of different images even with one plate in the set. You can also purchase small round stencils called discs. They, like the plates, can be secured in special holders during work so that the stencil does not move at the wrong moment and does not smear the ornament on the stamp.
Figuring out how to use stamping discs is quite simple: working with them follows the same principle as with plates, and they are made from the same materials. But due to the smaller size of the working surface, the disks usually contain no more than 5 images, and, as a rule, these are not ornaments, but separate full-fledged figures.
Why does stamping fail?
- Unsaturated and loose varnish. Remember that the polish should not spill beyond the stencil patterns and should not spread across the surface of the nail. In addition, the print must come out right the first time.
IMPORTANT: At the same time, an excessively thick varnish will not be able to obediently fill the stencil on the plate.
Stamping varnish should not be liquid, but not thick either.
- Scraper operation is too slow. As a rule, the varnish has time to dry by then, but it still needs to be printed on the stamp and nail!
You need to work on stamping quickly
- Incorrect application technology. Make sure that the stamp is perpendicular to the nail when applying the design. But do not forget to make several pendulum-like movements when it is on the nail - this way the image will be printed as clearly as possible.
- Poor quality stamp . Its rubber should not be too soft or too hard.
- The plate does not clean well. This is often due to a bent scraper.
- Neglecting the preparatory stage. Nothing will work if you don’t put the nail in order - remove the cuticle, polish and degrease the surface.
IMPORTANT: However, you should not neglect the varnish fixer either.
Be sure to degrease your nails before stamping.
All about stamps
What is needed for quality stamping? One of the prerequisites for a beautiful, original manicure is a correctly selected stamp that leaves distinct imprints on the nails. The shape of the frame in this case does not play a decisive role - the main thing is what material the imprint pad is made of.
There are 2 main types of stamps:
Rubber. They are equipped with a hard pad, so even a little pressure is enough to get a clear pattern. They are recommended for beginners, as they ensure accurate transfer of the design without defects, even from low-quality stencils. Easy to clean with nail polish remover or tape. Among the disadvantages: they require a special approach when working with varnishes in a metallic or mother-of-pearl texture (they don’t tolerate patterns as well) and are characterized by a small pad size, which is why they are more convenient to use for those with short nails. Silicone. They are softer, therefore, when transferring a pattern with their help, you need to be especially careful. They cope with any varnishes, paints and stamping markers, are ideal for long manicures and are gentle on brittle and thin nails. But in order for the silicone stamp to last for a long time, it needs to be cleaned only with adhesive tape - due to the aggressive effects of acetone and nail polish remover, the pads become unusable over time.
In addition, there are several subtypes of silicone stamps:
Transparent with viewing window. They differ favorably from traditional models by the presence of a hole on the body - a kind of window. This makes them as convenient as possible when, when applying an image, you need to aim absolutely precisely, centering the design or part of it on the nail plate. Another significant advantage of transparent stamps is the ideal level of elasticity and rigidity of the pad, which allows you to transfer the pattern to the nail without distortion or change in size. Sticky with a soft pad. The designs are transferred well to the nail plate, but the pad itself is even more soft, thanks to which the nail practically sinks into it. They are easy to clean with tape, do not require buffing and are ideal for those with fragile, thin and injured nails. However, working with them has certain nuances. Thus, you can transfer the pattern only by applying pressure, avoiding the stamp rolling over the surface of the nail plate, and be sure to control the pressure so that the pad does not fall out of the body. In addition, due to the special sticky surface, such silicone stamps require regular cleaning to remove dirt that can make image transfer difficult.
The necessary tools can be purchased individually or as a set. The main thing is that they are of high quality, from reputable and time-tested manufacturers. Such sets are not cheap, but quickly pay for themselves, allowing you to save on the services of professional manicurists.
Stamping on nails: ideas, design
Sea buckthorn stamping
Stamping with pink lace
Geometric stamping gradient
Butterfly stamping
Stamping in the form of lilac lace on a black background
Stamping in the form of bright letters
Stamping in the form of the finest floral lace on a red background
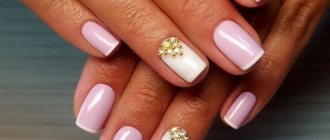
Stamping with pink and white combinations is quite popular
Autumn stamping
Bright summer stamping
Black and white classics are always in fashion, including stamping
Stamping can look very cute on short nails
Stamping with flirty bows
Stamping in warm colors is an ideal autumn option
Very feminine accent stamping with lace
Stamping for Valentine's Day