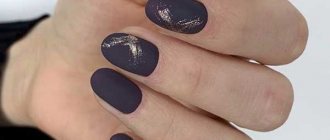
Step-by-step instructions for nail art with dandelions
A stylish, cute and original design with dandelions is not at all difficult to make. Every girl can draw simple flowers. To do this you will need light gray varnish, topcoat, black and white acrylic paint.
- Start by tidying up your nails. Remove the old varnish coating from them, give them the desired shape and apply the base for the manicure.
- Cover your nails with the polish you chose as your base color. You can use any neutral shade. In our case, it is light gray.
- After the background has dried, you can begin to draw with dandelions. First, take black paint and, using a thin brush, paint the stem and base of a flower on one of your nails. You can easily paint fluff with white paint. Draw several already detached “umbrellas” nearby. Decorate the adjacent nail with light umbrella fluffs.
- On the nail of your thumb, draw the largest dandelion, the fluffs of which have already begun to fly away.
- To make your manicure last longer, do not forget to cover it with a fixer.
This design is quite simple, but looks very dignified and interesting. The stylized image of dandelions on the nails is revealed in a new way, making the manicure stylish, memorable and effective. To make the instructions more clear to you, we suggest watching a video that captures the entire process of creating this wonderful manicure with dandelions.
There are no banners due to the fact that they are disabled or not provided for this location!
Step by step drawing of a dandelion.
painted tip
We paint the tip white (if you wish, you can paint the nail in any color that suits your manicure).
shading drops
We put a small black drop on the nail,
dip a thin brush into the top or base and blend the black dot into the sides with straight movements.
draw a dandelion Using
black gel polish, we place small dots of different sizes in a chaotic order around the middle of the dandelion.
dandelion stem
Then we need to draw the stem and petal of the dandelion.
If you wish, you can draw one stem without petals or several leaves.
also draw two dandelions
, but their sizes should be smaller.
dandelion decoration
After you have drawn everything, cover the nail with the finishing coat.
If you wish, you can
attach a small rhinestone to the middle of the dandelion.
The rhinestones must be coated well on all sides with the base coat. This concludes our design)))
Step-by-step execution of the image
Any decor will look good and last for a long time only if the nails are well prepared and the hygienic manicure is fresh and extremely neat. A woman’s hands are always visible, so being careless, especially when using nail design, is simply unacceptable.
Don’t have time to carefully draw a pattern or just don’t know how to do it? No problem! You can always use modern stickers or sliders. Not only are they available in a wide range, but they are also extremely easy to apply, look good and last a long time.
To complete your own drawing, you can follow these steps:
- Hygienic manicure.
- Alignment of the nail plate.
- Applying base coat. It will protect your nails from harmful substances and prevent them from yellowing.
- Apply background varnish and dry well. If gel polish is used, apply polymerization in a special lamp. If necessary, the procedure can be repeated.
- Use a toothpick or a thin hair brush to draw the stem and petals.
- Fix in a lamp.
- Apply top coat.
Step by step guide to create
The original design with dandelions will not leave any fashionista indifferent. This cute manicure is suitable for both everyday use and work. You can match your nails to any clothing. It is important to learn how to correctly create a creative design. You can do this at home. Thus, you will no longer need to visit expensive beauty salons. This way you can save a decent amount.
Let's take a step-by-step look at how to create such a design:
- The first thing to do is treat your nails. Beautiful hands, first of all, should be well-groomed and attractive. You need to remove the old coating using special cosmetics, and also give your nails the desired shape.
- When the nail plate is well prepared, you can begin to work. You should degrease the plate (if you decide to use gel polish), then cover the surface with a base coat. Dry your fingers thoroughly under a UV lamp. Accordingly, if you choose a regular varnish, then you should air dry it.
- Then we choose the color that will serve as the main color for our composition. Experts advise using a neutral shade, such as light gray. However, you can choose the option that suits you.
- Dry the background coating also under a UV lamp. After this, you can proceed to drawing. It is worth noting that dandelions are quite simple to make. It is important to get used to it and practice well. Take black paint. Using a thin brush, draw the stem and base of the flower on one nail. Now take white paint and use light movements to draw the feathers. Nearby you can draw several detached umbrellas. Adjacent marigolds can be decorated with light umbrella fluffs.
- It is worth remembering that moderation should be observed in everything. Therefore, you should not paint every nail. It won't look very attractive. For example, it is better to draw the largest dandelion on the nail of your thumb. Let the fluff fly away and land on the next nail.
- At the end of your creativity, you should cover everything with a fixative and also dry it thoroughly in a lamp.
This design is quite simple, but it looks very stylish and fashionable. The most interesting thing is that you can do a similar manicure in a new way every time, embodying your most creative ideas.
Peculiarities
Every lady dreams of standing out, revealing her individuality, and attracting the attention of the opposite sex. Non-trivial nail art with dandelions will help you achieve your goals. Let's look at the main features of this manicure:
- Simplicity and ease. You can make this pattern yourself. Of course, if you are new to the beauty industry, you will have to practice for a while. After regular practice, you will be fluent with a brush and draw similar designs.
- Saving . You can carry out the design yourself at home. To do this, you will only need to stock up on all the necessary cosmetics and products. Be sure to ensure that they are of high quality, then you will be able to achieve your goal. This eliminates the need to visit expensive beauty salons. You can save your savings and cheer yourself up.
- High quality coverage . In order for your manicure to last a long time, it is worth purchasing cosmetic products in professional specialized stores. This way you will have less chance of running into a fake and you will purchase a quality product.
- The opportunity to realize your creative potential . Among a variety of images, you can create or choose exactly the one that suits your taste. You can also choose the color you want to help express your personality.
- Great mood. The perfect manicure will contribute to a good mood. You will feel confident, stylish and everything will be much easier.
Citrus manicure ideas
Drawings from the category “Citrus manicure” are different, and they include not only images of lemons or oranges. Despite the obvious name, this decorative gloss on nails includes images of kiwi, watermelons, and many other fruits or berries. The essence of this manicure lies precisely in the image of juicy and beautiful fruits, because it is quite unusual and creative.
For example, what is good about having lemon slices on your nail plates? Firstly, this fruit is universal. His image is suitable for both festive occasions and daily work or even a business meeting. The fact is that the shade of lemon is still somewhat cooler than its relative, orange, and therefore does not draw as much attention to itself, but at the same time gives a shade of lightness and freshness. Secondly, yellow goes well with colors such as blue, red, and green. Therefore, you can safely wear clothes with such inserts for a lemon manicure. Thirdly, yellow color improves mood.
Even the famous artist Eugene Delacroix spoke about warm colors: “Everyone knows that yellow, orange, and red colors evoke and represent the idea of joy and abundance.” And since the shape of a triangle, which is a symbol of swiftness, enhances the emotional impact, triangular lemon slices double the level of joy when contemplating them.
You also cannot ignore the orange citrus, the image of which can be safely applied to your nails - orange. Since ancient times, the orange was considered the center of fertility, abundance, and was associated with wealth and fire.
So, in Ancient Greece, this fruit was considered the emblem of the goddess of hunting and the moon Artemis. That is why the presence of an orange in the form of decorative design of nails will perfectly emphasize the bright, creative and purposeful character of the owner.
Another interesting design, which, oddly enough, also relates to this type of manicure, is the image of kiwi slices on the nail plate. Slices of this fruit are a bright accent in the entire summer look. Kiwi itself is a juicy and tasty fruit, therefore, during the burning summer sun, it is doubly pleasant to look at the image of this fruit in the form of decorative design for nails.
In addition, the green color inherent in this fruit is a symbol of youth and energy. Even the artist Wassily Kandinsky, about a century ago, emphasized that the green color has its own movement and at the same time peace. Green is considered a neutral color: neither cold nor warm. Therefore, the image of a green kiwi is suitable both in any weather and again for any event: be it an underground party, a romantic dinner, or, especially, a trip to the beach. Juicy kiwi seems to scream: “Eat me!” " And this is exactly what you need in the summer.
Interesting design
Creating nail art like this is quite simple. You can create a drawing with a flying dandelion or embody a whole flower. Everything will depend on your desire and skills. Let's consider one of the options for how to draw a stylish dandelion. Step-by-step instructions will make the task easier for those who are just learning the basics of nail art.
First, let's treat your nails well. They should look well-groomed in any situation. Now you can degrease the nail plate. After this, we cover the surface with a white coating. Find the center of the nail and put a dot there. This will be the middle of your flower. Now from the point you should draw rays that diverge in different directions. Make about ten of them.
Then you should draw a thin line from the middle of the flower. It will become a stem. Now attach the fluffs to the head of the dandelion. Decorate the panicles by drawing the tips of the fluffs. Add small rays. Let the final touch be a flying fluff that accidentally broke away from a dandelion.
It is worth noting that decor with dandelions can be very different. You can use the color you like, use different background tones, or create smooth transitional shades.
Combination of colors and decor with a dandelion pattern on the nails
The thought of the first spring flower conjures up a bright yellow image surrounded by lush greenery. Nail art is not limited to two colors. This is a unique way to realize your own idea, realize your bold fantasies, without limiting yourself to colors.
To complete the design, you need to determine the tone you like. Most popular colors:
- white;
- black;
- grey;
- silver;
- turquoise;
- pink;
- yellow;
- blue.
Choose the color of varnish that you like most. The main thing is that it matches the image and is not too bright or pretentious. This spring flower is the personification of purity and openness of the soul.
How else can you draw a dandelion?
This simple flower can be drawn not only as explained in the video. There are other options for its implementation. Let's take a step-by-step look at creating another drawing, which at first glance seems a little more complicated, but is applied in a matter of seconds.
- Paint your nails with white polish.
- Approximately in the center of the nail, use black polish to place a dot - this is the middle of the flower.
- From the point, draw rays diverging in different directions. There should be about ten of them.
- Draw a thin line down from the center - a stem.
- Decorate the head of the flower to which the feathers are attached.
- Draw the ends of the fluffs, forming small “panicles”.
- Add smaller rays with fluff.
- As a final touch, you can add one flying fluff torn from a dandelion.
As you can see, there is nothing complicated in this drawing. The photo below shows the entire process of creating this simple airy nail art.
Types of French manicure
Manicure with palm trees 27 photos fashionable summer design with leaves and sunset, new designs on nails, beautiful examples Manicure with palm trees
Depending on the design features, today there are several varieties of this style:
Classic white jacket
This option is considered the most restrained and modest, but this does not prevent it from remaining the most popular among many representatives of the fair sex. When creating it, the nails are covered with a colorless varnish, or a varnish of a pale pink or flesh-colored beige translucent shade, and the edge is decorated with a simple white color. This design looks impressive both in combination with everyday outfits (jeans, sundresses, trousers or a formal suit for the office), and is suitable for a formal appearance. Looks great on both long and short nails. Now it is important to introduce additional decor. One or two fingers are decorated with rhinestones, designs, stickers or paintings.
Color
Unlike a classic French manicure, a colored manicure can feature a variety of colors and shades, depending on the preferences and tastes of the owner. There are no strict rules in the design of the plate and edge; it is possible to use bright, restrained, acidic, and metallic tones. Red, pink, and black colors are often used for the smile line. The turquoise color scheme is at the peak of popularity.
Decorative jacket with design
This type of nail care can be called a real work of manicure art. For decorative purposes, various designs, monograms and prints can be applied to the plates. It is possible to use luxurious stucco molding, beads and even lace compositions. Popular various rubbings, crystal chips, velvet and rhinestones. At the same time, color, theme and technique can be completely different, each time impressing with its exclusivity and individuality.
Matte
In French manicure, a combination of gloss and matte finish is allowed, which looks very aesthetically pleasing and original. As a rule, the tip of the nail is coated with matte varnish, while the plate itself is decorated in the traditional glossy version. Also, in the last couple of years, a completely matte finish has become popular. It gives the manicure softness and velvety.
Lunar
A hot trend is the “reverse” French manicure, when the “smile” is located not at the tip of the nail, but at its base. In this case, it is recommended to paint the plate itself in dark, rich colors, most often black. “Crescent” can have any shade (contrasting light, silver, white colors are desirable). This manicure is also called lunar or Hollywood.
Smile shape design
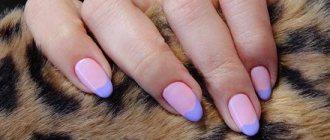
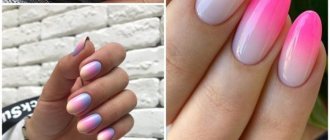
The colorful tip of the nail, which is a real “highlight”, is usually called a “smile” or “crescent”. Traditionally, the “smile” runs parallel to the tip of the nail, however, for those who want to add more chic to the image, experts recommend other, non-standard forms of the “smile”. The line can be wavy, beveled, zigzag. Today, the “ombre” option is very popular, when there is no clear “smile”, but there is a very smooth, gradient transition from the color of the plate to the shade of the edge.
Step-by-step manicure technique
To have an idea of what goes into making a design with dandelions, it’s worth briefly identifying the basic techniques of work, using the design of a classic type manicure as a basis. In general, the step-by-step technique will consist of preliminary preparation of nails and their further decoration. It is easiest to create designs on plain nails painted with the chosen pigment.
Sources
- https://HomeManicure.ru/nail-drawings/manikyur-s-oduvanchikami.html
- https://zen.yandex.ru/media/id/5d865a7fe882c300ac2f8c6f/5e0dd7e198930900b3abae6b
- https://stylish-lady.ru/moda_stil/manikyur-s-oduvanchikami.html
- https://wlooks.ru/lak/dlya-nogtej/manikyur-s-oduvanchikami/
- https://vplate.ru/manikyur/risunki/s-oduvanchikami/
- https://MakeUp.ru/article/kak-sdelat-manikjur-s-oduvanchikom
- https://ivynbee.com/style/manikyur-s-tsvetami-35-potryasayushhih-novyh-dizajna.html
- https://manikyres.ru/manikyur-s-oduvanchikami-foto/
- https://info-design-nail.ru/vesennij-manikyur-oduvanchiki-na-nogtyax/
Benefits of beige manicure
- The secret of beige manicure is its versatility; it suits all occasions, both for a business meeting and a romantic date.
- This is a recognized classic that will help out at any time, because this type of nail design can be combined with almost all shades of clothing.
- It is ideal for a representative of the fair sex of any age, and will look relevant both under a light dress in the summer and in combination with a drape coat in the winter.
- In addition, there are no restrictions in relation to beige manicure; it always fits harmoniously on nails of any length, and complements the image of its owner as beneficially as possible.
The history of French manicure
This type of manicure is a true classic of femininity. In 1976, all the fashionistas of the world were captivated when they saw a luxurious manicure on the nails of famous Hollywood actresses: a pale pink plate was effectively combined with a white rim, making the hands very feminine. The original idea belonged to the American Jeff Pink, who once heard costume designers and screenwriters complain that for each scene and for each costume, the models had to re-paint their nails so that they would harmonize with the new image. The talented young man had an epiphany: he figured out how to make a universal manicure, and with his help, “French” took root in the world of fashion and cinema for a long time, gradually “migrating” to the general public.
Jeff PinkFounder and President
Today, French manicure impresses with its variety of designs, but the basis of each technique remains the same: the natural color of the nail plate and a spectacular edge along the edge. An important advantage is that it can be applied to nails of any shape and length, professionally hiding hand imperfections and emphasizing their advantages.
A properly done manicure can become the main accent in any look, attracting attention with a stylish, fashionable, and up-to-date design. It can be performed both on natural nails and extensions, and can also be done with shellac or gel polish
Designs are also often used in pedicures.
