Beginners can purchase a gel polish kit ready-made or assemble it themselves, because it can only include a drying lamp, base/top and colored gel polish, file and buffer, degreaser, liquid for removing the sticky layer and gel polish, orange stick, scissors, cotton pads.
If the manicure is successful, then the set can be expanded with additional components - decor, pastes and rubs, different coating colors, a more powerful lamp, a manicure machine.
The cost of a ready-made kit for beginners ranges from 2500-8000 rubles, which depends on its configuration, the manufacturer of the materials and the type of drying lamp.
What is the minimum included in a gel polish kit for extensions at home?
The minimum set for performing a gel polish manicure at home consists of only the most necessary elements:
- lamp for drying decorative coatings - LED or ultraviolet;
- colored varnishes – you can choose one or several at once (upon request);
- a degreaser, which simultaneously acts as a disinfection solution;
- gel polish remover;
- base for gel polish (base);
- liquid for removing the sticky layer from the nail plate;
- finishing coat (top).
But this is not a complete list, because even a beginner in coating nails with gel polish must have several files with different levels of abrasiveness, tongs or manicure scissors for removing cuticles, a pusher, orange sticks and other devices.
There are ready-made kits for sale for beginners to work with gel polish, which are divided into three types:
- Mini. It does not include a lamp for drying the coating, and the quantities of all other materials and tools are given in minimum quantities.
- Maxi. The kit includes a lamp and the maximum possible number of materials and tools.
- Base + top. Apart from them, there is nothing in the set.
We recommend reading about how to choose the best nail base. From the article you will learn why you need a nail base, the technique of applying gel polish, the main types of nail bases and recommendations for choosing. And here is more information about how to apply rubbing on gel polish.
We reveal the secrets: how to cover your nails with gel polish without mistakes
Unfortunately, for one reason or another, applying gel polish at home may not work, and even an instructional video watched on the World Wide Web cannot help correct mistakes. Let's look at the common problems of beginners to answer the question “how to properly coat your nails with gel polish.”
- Problem No. 1: gel polish chips off the free edge of the nail already on the second or third day after application. This is one of the most popular problems, which can be solved quite simply: it is imperative to “seal” the end of the nail plate. You can also additionally cover your nails from the inside, that is, turn your hand over with your palm up, carefully coat the inside of the nail near the fingertip with the finishing topcoat and put it in the lamp.
- Problem No. 2: during polymerization, the gel polish wrinkles on the surface of the nails. To prevent this from happening, you should not apply too thick layers of varnish. You also need to know how to paint your nails correctly with gel polish. The thicker the coating layer, the worse it polymerizes in the lamp, while several thin layers will lie flat on the surface of the nail and harden completely.
- Problem No. 3: the gel polish peels off from the cuticle side. This happens if during the first 24 hours after a manicure your hands are constantly in contact with water. Refrain from visiting the pool, sauna or bathhouse, as well as general cleaning and frequent washing of dishes (gloves can be used for these tasks).
There is a misconception that you can only get a high-quality manicure with a long-lasting finish in a professional nail design studio. This is not true, since you can cover your nails with gel polish at home. It is important not to neglect the list of required materials, try to choose high-quality products from well-known brands and follow coating technology.
9840
Manicure set with lamp and gel: how to assemble a basic one for beginners
In order not to make a mistake when choosing the components of a basic manicure set with a lamp and gel for beginners, you need to know what you will definitely need:
- gel polish – beginners should choose a material in the mid-price category: the cost is reasonable, the quality is decent;
- remover - carefully removes cuticle and pterygium, as they will not allow the gel polish to firmly fix on the plate;
- files/buffs – several with different surface grains, needed for processing the free edge of the nail and polishing its surface;
- dehydrator-degreaser – cleans the plate and quickly dries it;
- primer or ultrabond - it is better to choose the second option, since it is acid-free and makes the adhesion of the gel polish to the nail as strong as possible;
- base and top - the first is the basis for the decorative coating, the second secures the manicure, the strength and durability of the manicure depends on these layers;
- liquid for removing the sticky layer - necessary for removing the dispersion layer that forms after drying the coating in the lamp;
- lint-free wipes;
- drying lamp;
- gel polish remover;
- foil - necessary for removing decorative coating;
- orange sticks;
- cuticle oil.
Watch this video about what products are included in a gel polish manicure kit for beginners:
How many polishes will be enough to cover your nails at first?
To cover your nails for the first time, one gel polish is enough - by choosing a neutral shade (nude), you can learn how to apply layers flawlessly and perform a really high-quality manicure. But you need to know that gel polish can be:
- Single phase . Its main advantage is quick application, because you will not need to apply the base and topcoat separately, because they are components of the gel polish. This coating can be worn for 2 weeks without chipping or damage, but it is not suitable for all nails, and this point can only be clarified through practice.
- Three-phase . All three components of the coating are in different bottles; this type of gel polish is considered more reliable, and the finishing coating allows you to use rhinestones, stickers and other decorations in manicure. It is impossible to exclude at least one of the components; you will need to purchase three bottles at the same time.
- Two-phase . In this material, the base and top are combined in one bottle, and the varnish itself with the colored pigment is in another.
Three-phase gel polish coating
How to do the perfect manicure
7 secrets
When decorating their nails and applying the coating with their own hands, girls often make mistakes that are easy to avoid. How?
Here are the secrets:
| Image | Recommendations |
Trimmed manicure causes cuticle growth | Secret 1 Forget about cutting cuticles – so it will only grow even more and faster. Gradually switch to the European type of manicure with preliminary softening of the keratinized skin and moving it to the base of the nail with a special wooden stick. Over time, you will notice that your fingers remain neat for much longer. |
Choose the optimal shape and length of your nails | Secret 2 The beauty of the entire manicure will depend on the correctly chosen nail shape. Make sure that the outline of the free edge of the nails follows the shape of the periungual space, and is also in harmony with the shape and length of your fingers.
|
Professional instruments minimize the risk of injury to the periungual space, as they are sharpened at a certain angle | Secret 3 Don't let the high price of quality manicure tools scare you away. Using accessories made of stainless medical steel with good sharpening, you will provide yourself with an even and atraumatic manicure for many years. |
The bright color of the manicure distracts attention from minor flaws | Secret 4 A bright, rich color of varnish will distract attention from imperfections - an irregular shape of the nail plate, slightly dry cuticle or hand skin will fade into the background. |
Two coats of polish will last longer on your nails than one or three. | Secret 5 Varnish applied in two layers lasts longer - this point is especially important in the absence of a special base and coating fixer. |
To prevent nails from splitting, the direction of the file should be set in one direction. | Secret 6 To avoid delamination of the nail plate, use the nail file correctly. The direction of movement of this accessory should be set only in one direction, and not left-right. |
Gel polish lasts on nails for at least two weeks | Secret 7 If you are very busy, give preference to long-term coverage. Gel polish does not require special care and its original appearance remains for several weeks, so this manicure does not require frequent correction. |
Remember, the quality of your nails and hair largely depends on your diet and lifestyle, so regularly maintain their condition by taking a vitamin complex 2 times a year.
How to apply long-term coating correctly
Photo instructions for correct application of gel coating
Long-term coating allows you to resort to manipulation with your hands much less often, which significantly saves time. In addition, if handled carefully, it looks fresh for at least a couple of weeks, unlike regular varnish, which for most people does not last even 3-4 days.
Now everyone has the opportunity to carry out the procedure with their own hands thanks to affordable starter kits. But it is also important to follow the application technique.
The secrets of a perfect manicure with gel polish will help you achieve the best results:
- Thorough polishing of the nail plate will improve the adhesion of the nail to the coating and prevent it from becoming brittle and peeling.
Polishing the nail plate increases the durability of the gel coating
- To stretch out the nail bed and apply manicure correction , apply the gel immediately under the cuticle or as close as possible to the base of the nail.
- Apply the gel in a moderate layer , not too thin, but not too thick, otherwise this will lead to deformation of the coating - swelling or cracking.
- Instructions for the correct application of gel and regular varnish look like this:
| Illustration | Sequencing | |
| Step 1 | Draw a straight line with a brush , slightly retreating from the base of the nail towards its free edge. | |
| Step 2 | Then use a brush to stretch the gel to the base of the nail. | |
| Step 3 | Using a brush, carefully draw two lines along the side ridges to paint the nail completely. Try not to touch the skin. | |
| Step 4 | We seal the end of the nail with varnish , carefully brushing along its edge. | |
If the nail bed is quite wide, then when applying the coating you should step back slightly from the side ridges.
- Give preference to a simple and concise design - it is less hassle when applying it yourself and the result will always be predictable, especially if you are just a beginner.
The simpler the design, the longer the manicure lasts.
- Eliminate any defects before drying the gel in a UV lamp - carefully inspect the applied coating for uniformity and the absence of streaks or lint.
- Try to avoid rough mechanical impact on the painted nail plate to avoid abrasion, scratches and dents on the coating.
The ideal manicure is one that is done carefully and efficiently!
With nail lamp
If you are choosing to purchase a set for covering nails with gel polish with a lamp, then you should pay attention to the following nuances of such equipment:
- lamps can be ultraviolet or LED, there are also hybrid ones;
- The power of an ultraviolet lamp ranges from 9 to 36 W, depending on the number of light bulbs in it (from 1 to 4, respectively);
- Almost all lamp models are equipped with a timer;
- LED lamps (LED) have high power and dry any coating in less than 60 seconds;
- ultraviolet light dries gel polish, base and top for 2 minutes;
- LED equipment costs many times more;
- The UV lamp dries out the skin and nail plates and has a negative effect on the eyes.
LED and UV lamp for nails with gel polish
Experts recommend that beginners purchase lamps with ultraviolet light - they are perfect for acquiring skills in performing complex manicures with gel polish.
Set of manicure tools
The set of required manicure tools includes:
- Scissors and forceps . There should be several varieties of these tools - for treating nails and cuticles. When choosing them, you need to pay attention to the configuration of the tips - they should be rounded, as well as the ease of finding the tool in your hand.
The material from which the scissors and pliers are made is also important - it must be sharpenable, because the sharpness of the tool must be impeccable, which will help avoid trauma to the skin, nail plate and cuticle.
- Pushers . This tool is visually identified as a small flat spatula, which is necessary to prepare the cuticle for trimming/removal. Previously, it was made of metal, but now the pusher is successfully replaced by an orange stick, which has obvious advantages - it is disposable (no need to be sterilized), has a very thin end (reduces the risk of injury to the cuticle), does not rust, and does not need sharpening.
- Files and buffs . To correct the shape of the nail plate, a file with an abrasiveness of No. 60 or 80 is suitable. It is better to choose a buff, which is used for polishing the surface, with an abrasiveness of No. 500 or higher.
- Brushes . For a beginner, it is better to choose brushes made from artificial materials - the finest acrylic or nylon bristles. They have an almost endless service life and allow you to apply artistic painting of even complex shapes.
- Cotton pads, lint-free wipes . The first ones are constantly needed - both to remove the sticky layer and to use a degreaser. But lint-free wipes are necessary for removing an unsuccessful design from the sticky layer of the decorative coating - you can do this manipulation many times without fear of damaging your own work.
Recently, silicone clips for removing gel polish have appeared on the nail industry market, which slightly facilitate this process. You won't need to use foil; you just need to apply a cotton pad soaked in gel polish remover to the nail plate and put on the clip.
Coating nails with gel polish: subtleties and secrets
Also, mothers who cannot leave their children are sometimes forced to give up such pleasure as seeing their nails neat, well-groomed and shiny. If you are thinking about applying gel polish to your nails yourself, you will find some useful tips in this article. First of all, it should be said about several advantages of gel polish:
- Gel polish compacts the nail plate , but at the same time allows the nail to remain flexible (unlike extended artificial nails).
- In addition, thanks to the multi-component application, this type of varnish lasts from two to four weeks.
- The invariable advantage of gel polish is its shine, which does not fade throughout the entire wear cycle. But you should be careful with acetone-containing substances and household chemicals. Some components can lead, at best, to tarnishing, at worst, to chipping and even complete peeling of the coating.
There are several more advantages, which we will discuss below. By the way, a large review of gel polish designs can be found here.
So, what do you need to apply gel polish to your nails at home?
Here is a list of necessary things:
- Ultraviolet or LED lamp. The differences between these two lamps are the type of lamps used, drying time and price. LED lamps polymerize the coating more intensively, reducing drying time to 30 seconds. But the cost of such a lamp is usually twice as expensive as an ultraviolet lamp. A 36-watt ultraviolet lamp polymerizes the layers for about 2 minutes. When purchasing, pay attention to the number of watts. 18 watt lamps increase drying time. Many people ask this question: “Is it necessary to buy a lamp for gel polish?” The answer is clear: “Yes!” From the name of gel polish, we can conclude that such a coating consists of a gel and a coloring pigment. And for the gel to harden, it needs to be polymerized under the influence of ultraviolet light. Without special lamps, such varnish will not harden even in a day.
- Buff to roughen the nail before applying other components. You should not be overzealous with filing the nail and thinning the nail plate. A few light movements will do the job. This is the first stage in gel polish coating.
- Acid-free primer and degreaser. You can order lint-free wipes here, which do not leave lint on your nails and, therefore, make the task easier. The second stage is degreasing the nail and eliminating microorganisms and pathogenic bacteria. This is very important for nail health and hygiene. If your nail plate is not naturally smooth and contains some grooves or stripes, it is recommended that you use an acid-free primer. This substance eliminates all germs, dries the nail and you can be sure that under the gel polish coating your nails will not be exposed to harmful bacteria. You can purchase a special degreaser or replace it with regular medical alcohol purchased at a pharmacy. This will save you money. The primer has a consistency similar to water. But when applied to the nail, it becomes clear that this is a slightly sticky layer, which also increases the wear time of the gel polish. But there is one drawback: to remove the coating you will have to slightly increase the exposure time of the gel polish remover.
- Base and top coat. These are transparent layers that secure the colored gel polish. Now a new product has gone on sale - a universal product that combines the properties of a base and top coat. Which option to use - classic or universal? It depends on personal preference. The texture of the base coat is slightly thicker than the top coat and has less bleeding. The top coat secures the result, adds gloss and protects against fading. Both coatings have a sticky layer that must be removed with a degreaser or a special product - Cleanser. For convenience, you can fix it under the lamp for a few seconds so that when working with another nail, the layer does not spread. This little secret makes coating much easier. This way you can be sure that your layer will not leak into the cuticle. It should be noted that this trick will not work with some colored gel polishes; the coating may form a film if it is not dried enough. You can experiment, if you fail, just remove the film with degreaser and continue working. To maximize time optimization, you should do 4 nails, first on the right hand, then the nails on the thumbs and 4 nails on the left hand.
- The third step is to apply a base layer to adhere the pigmented gel polish to the nail plate. Any base coat, colored gel polish or top coat has a specific technique that you can quickly master. The brush with the varnish gel should be lightly wiped on the neck of the bottle. Under no circumstances should the gel flow or drip. Touching the middle of the nail with the brush, push the polish as close to the cuticle as possible. Repeat the same brush movements on the sides of the nail. Do not touch the cuticle, otherwise after the layer hardens you will not be able to get the excess out of the cuticle. As they say, you can’t even bite it off with your teeth. Therefore, you should monitor the process as closely as possible. To do this, do the procedure in good lighting. After covering with the base coat, place your nails under the lamp for 2 minutes or 30 seconds (depending on the type of lamp). It is better to use the recommendations of the gel polish manufacturer. Don't forget to remove the sticky layer! Dry each subsequent layer under a lamp for the above time.
- The next stage is applying color. It should be coated with a thin layer 2 times. It is not recommended to apply a thick layer of gel polish, as it may dry poorly and be soft or wrinkled. Which is fraught with a complete redoing of the work. Dry each layer under a lamp.
- The last stage involves fixing the result with a top layer, drying and removing the sticky layer.
- If desired, the cuticle can be lubricated with oil.
A few tips and rules after the procedure
- First: you should not wet your nails for two to three hours after coating.
- Second: do not take a hot bath for the first couple of days , as this may cause the polish to peel off. The longer you wear the coating, the stronger it adheres to your nail.
- And third: when working with household chemicals at home, whether washing dishes, laundry or cleaning, use rubber gloves . From experience we can say that washing dishes without gloves does not always affect the wear time of the coating. It depends on the quality of the materials.
Removing gel polish
Once your nails have grown long enough you need to remove the coating. To do this, you will need foil, cotton pads (which need to be cut into several pieces large enough to wrap the nail) and gel polish remover. Regular acetone will not cope with this quickly, and long-term effects on the nail and fingers will cause harm, so use only a special product.
Cut the foil into rectangles approximately 5 x 12 cm. Cut the cotton pads and soak them with enough remover. The product should not drip from the cotton pad. Place the cotton pieces on your nail and carefully wrap it with foil. Please note that the glossy side of the foil should be on the inside, this will ensure the right temperature for a good removal. For convenience, it is better to remove gel polish from each hand separately. Because wrapping the nails on the opposite hand with the foil already wrapped on the other hand is quite problematic and this can lead to the displacement of the cotton pad or rupture of the foil. After everything, do not forget to wash your hands with soap to remove any remaining remover from the skin.
If you follow all the recommendations, the gel polish coating will last you a long time and you will even get tired of it and want to try a new color! Unlike regular polish, which fades and peels off quite quickly, gel polish remains fresh and attractive in appearance, even after several weeks of wear!
Photo: examples of work
Video: procedure sequence
You can order high-quality gel polishes in Orenburg with delivery here.
If you liked the article, don’t forget to share it on social networks)
Starter kit for gel polish for the master
For the master, the list of components for the gel polish starter kit will be supplemented:
- pastes and paints for painting;
- decorative elements - stickers, printers, rhinestones, ribbons, sequins;
- protective equipment – gloves, goggles, mask;
- files and buffs of different abrasiveness - in a large assortment, so that you can comfortably work with nails of different types (soft, hard).
Decorative decorations for nails
In addition, you will need to purchase a table for serving customers and it is highly advisable to choose options with a built-in mini-hood. A table fluorescent lamp and a manicure machine will come in handy - they can easily remove the decorative coating (and this will be healthier for the nails), give the desired shape to the plate, and make it exactly the size requested by the client.
How many varnishes are needed for a complete set?
For a complete set, you definitely need a base and a top in different bottles, but no one can give a definite answer about colored gel polish - it all depends on the requests and number of clients. To get started, you should purchase:
- varnishes for making a classic French jacket;
- Red and black;
- several nude shades (powdery, peach, café au lait).
1 of 3
If it’s spring outside, then you will need shades of turquoise, yellow, orange, winter options - blue, rich green, silver (“metallic”). If a master is just starting out, it is better to start with a minimum number of shades, and then expand the range, focusing on the wishes of clients.
At the same time, it is worth monitoring trends in the nail industry in order to be able to make interesting offers to women - for example, matte decorative coating is now in fashion.
With lamp
The master’s kit must include a lamp, and when servicing several clients, you should give preference to LED equipment:
- dries any coating as quickly as possible – no more than 60 seconds;
- does not harm the skin of the hands (does not dry it);
- does not have a negative effect on the eyes.
If you plan to use only classic gel polish in your work, then an LED lamp will be enough. In the case of using acrylic coating or bio-gels, it is better to purchase hybrid equipment that polymerizes any materials.
Watch this video about which lamp to choose for gel polish:
Accessories for nail polish manicure
A novice master should also take care of other accessories for performing varnish manicure:
- lint-free napkins, cotton pads - they are used to remove both the sticky layer after drying in the lamp and the decorative coating;
- an autoclave or a small dry-heat oven for sterilizing instruments;
- means for disinfecting work surfaces - for example, Bacillol AF or analogues;
- equipment - an apron or cape that can be removed after work;
- protective equipment – gloves, a mask and goggles that will protect the specialist’s skin from toxic substances, the respiratory tract from dust and “chemical” odors;
- stand for tools - this will allow you to quickly get them if necessary;
- palette for demonstrating the available shades of colored gel polish.
It is highly desirable to have cuticle oil or hand cream in your arsenal - literally 1 minute of massage at the end of the manicure, and the client’s pleasure is guaranteed. This “trick” often becomes a guarantee that the client will return to the specialist.
Procedure for applying gel polish
How should you apply gel polish to ensure it lasts long?
The technique of creating a manicure should be divided into several stages.
- Filing and degreasing of nails. It is recommended to use a buff as a polishing tool.
- Applying a primer to protect the nails and better attach the artificial coating to the nail plate.
- Applying the base product. It levels the surface and removes grooves.
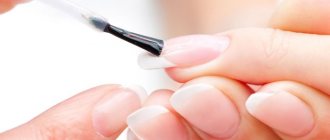
Applying the base
- Using colored gel polish. To obtain a rich color, it is applied in several thin layers. Each layer must be dried under a lamp.
- Securing the coating with a topcoat. This product protects gel polish from external negative influences and allows you to preserve your manicure for as long as possible.
Securing the manicure
How much does a gel polish manicure kit cost?
On average, a set for a manicure with gel polish (full) costs around 2,500 rubles, but there is a set for 4 thousand and 8 thousand. The price depends on which brand of varnishes is included in it, the number of color coating options, which drying lamp is included (LED or ultraviolet, hybrid).
But even the high, at first glance, cost of the set is a profitable purchase, because every month you have to spend a considerable amount on a trip to the master. And if you master manicure with gel polish perfectly, then you can gradually increase your client base - perhaps a simple hobby will develop into a good and, most importantly, stable income.
We recommend reading about cutter options for removing gel polish. From the article you will learn about what a cutter for gel polish is, what are the advantages of removing gel polish with a machine, types of cutters and their use. And here is more information about how to choose a lamp for gel polish.
You can buy a gel polish kit already assembled, or you can assemble it yourself - you just need to know what exactly you need to perform a manicure at home. The simplest equipment will already make it possible to do without visiting beauty salons every month, and a hobby can develop into income.
Useful tips
Experts advise practicing on artificial nails first before experimenting with your own hands. In addition, preparing your nails for the shellac application procedure is very important. The fact is that a poorly processed cuticle or insufficient nail preparation can lead to peeling of the finished manicure.
You should also monitor the thinness of the applied coating. A layer that is too thick may not dry out in the required time under the lamp. This will lead to damage to the coating and its fragility.