The new season is not complete without stylish new items. This time, the veil manicure came under the close attention of the girls. The design is a translucent design with a subtle haze that looks like the texture of tights or tulle.
A veil manicure, as a continuation of the stylish design using the negative space technique, looks feminine and gentle on nails of any length. Translucent manicure looks especially attractive on short square nails.
Stylish manicure veil: features of translucent design
The attractive look of a veil manicure is achieved through the play of an openwork or lace pattern and a translucent background. Essentially, the design is a delicate, almost weightless pattern applied to a barely noticeable background. Unlike the negative space technique in a veil manicure, the entire nail plate is covered with gel polish.
The design of the veil suits the looks of women of any age, regardless of preferences in clothing, accessories and makeup. Translucent manicure can be done with almost any pattern: floral, geometric, openwork.
It is worth noting that not all types of gel polishes are suitable for creating a veil manicure. For example, pearlescent or jelly varnishes with thick textures and pigments are not suitable for design. Mirror or magnetic gel polishes can only be used to complement a translucent background. To make your veil manicure expressive and beautiful, choose high-quality matte or glossy finishes.
Tips for implementation
To make your “Veil” nail design perfect, you need to take into account some subtleties when creating it.
- You can choose any color as a background coating, but light shades or a clear coating look best.
- All lines in the manicure should be the same thickness - then it will look organic.
- You need to make the base for the “veil” before the manicure itself, because it thickens and dries quickly.
- If you want to make your design with a beautiful matte texture, then use not an ordinary topcoat, but one with a matte effect.
- This design is best done on one or a pair of nails - then the design will look elegant and stylish.
Various variants of the “Veil” manicure have appeared. Now you can experiment with different color combinations, decorate the design with rhinestones or do it in combination with other techniques. You get interesting versions of this exquisite, sophisticated manicure.
Manicure veil with gel polish: what shades to use
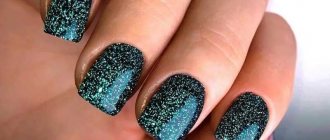
The veil design looks attractive in a variety of shades. But among the extensive color palette there are favorites that are most often used for nail design. First of all, it is black. It is the black veil on the nails that attracts admiring glances and looks incredibly mysterious and aristocratic.
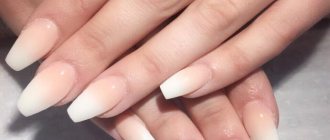
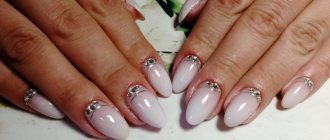
A veil manicure in white looks gentle and feminine. White openwork patterns on a translucent background are ideal for a wedding celebration. Such nail art cannot be excluded in everyday looks.
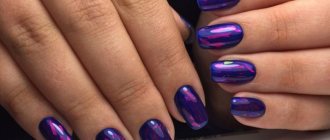
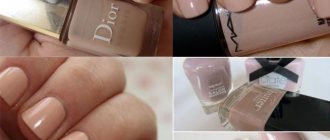
You should not use pastel shades to match your skin tone for a veil manicure. This design simply will not be noticeable on the nail plate. Use pastel colors as a contrast to darker shades. In general, a dark color palette is more suitable for creating a veil manicure: black, dark purple, chocolate, coffee, bronze, rich blue.
Ways to create a veil on nails
Stencils
As a rule, nail stencils are an adhesive film with designs cut into it. After the background layer of varnish has dried, the stencil is fixed on the nails in order to apply a different shade on top. The surface layer is allowed to dry, after which the film is removed, leaving a neat pattern on the nails without blots or irregularities.
These stickers are usually intended for a single use, but there are also reusable stencils that can last for a long time.
Stickers
Manicure stickers are very similar to transfer tattoos. There is a ready-made design on the thin film, which just needs to be carefully transferred to the nails - on top of the varnish applied as a background. Please note: it is important that the base coat of varnish is thoroughly dried.
Stickers, as well as stencils, will serve well for beginners who do not have much experience in creating nail art. They will also help you create a manicure with designs quickly and easily if you don’t have time for painstaking manual work.
Hand painted
This is the most labor-intensive and time-consuming option. It can be done by those who draw well. However, skill in nail design is also needed. Painting with a thin brush on your nails and on paper is not the same thing.
If you practice, over time you will be able to decorate your nails with the finest lace.
How to create a manicure veil yourself
There are two ways to perform a translucent veil manicure. In the first case, a design is first applied to the nail, which is then covered with a layer of translucent varnish. The second method involves covering the nail plate with a smoky base and then decorating and fixing the design. What the two options have in common is a basic set of tools:
- LED or UV lamp
- top, preferably matte, coating
- base coat
- dehydrator
- acrylic or gel paint
- manicure brush for creating a pattern
- dots with several attachments
- foil for creating a palette
First you need to prepare a smoky layer. To do this, use a transparent top coat and a few drops of gel polish of the selected shade. The components are mixed on a piece of foil or any convenient surface. The transparency of the smoky layer is controlled by the amount of gel polish.
Veil manicure techniques include:
- preliminary preparation of nail plates for design: trimmed or untrimmed manicure, removal of cuticles, treatment of nails with a dehydrator
- decorating nails - for this, use a manicure brush to draw a mesh, openwork patterns, dots using dots
After this, cover your nails with the resulting translucent mixture and dry your nails in a lamp.
Professional artists create a veil directly on the nail. To do this, the nail is covered with a transparent top, then a small amount of gel polish is dripped onto it and thoroughly shaded with a brush.
How to tint
Translucent tinting is the highlight of the stylish tights design. In order to create a background, black gel polish (or any other color) needs to be mixed with one component:
- base;
- finish;
- sculpting gel.
Technique:
- Place a drop of top on a makeshift palette (foil or plastic).
- Mix colored gel polish into it little by little, tinting the top.
- Mix the liquids until the color is uniform.
Manicure black veil
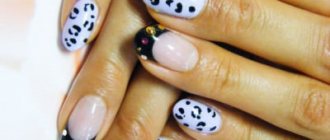
Black openwork patterns on nails look noble and very feminine. They give the whole image a touch of mystery and inaccessibility. To make the design look stylish and well-groomed, use an openwork pattern on 1-2 fingers, and cover the rest of the nails with plain black varnish. As for the design itself, it can be classic lace patterns, dots using dots, geometric shapes, flowers.
The combination of black and white in one design looks great. This manicure is ideal for celebrations or business style. At the same time, it is worth deciding in advance which shade will be dominant in your nail art and based on this, build the entire nail art.
Manicure red veil
The method of creating a red veil manicure is practically no different from previous nail art. Lace, dots, flowers, geometry - all this looks great in rich red color. As for contrasts, the best complement to a red veil will be black elements. Black and red manicure looks truly chic and charming.
Use burgundy, cherry, garnet colors for manicure, that is, deep, not flashy shades. If you still prefer scarlet tones, then use matte gel polishes to create your design. They will smooth out an overly catchy design and make the manicure more casual.
What will you need?
In order to do a “Veil” manicure, you will need:
- black or dark shade of gel polish;
- top;
- base coat;
- palette;
- if necessary, then color coating;
- two brushes - one wide and the other thin - for drawing small details.
You can make this design yourself, and this design looks luxurious and impressive.
Veil manicure using sliders and stamping
Not every girl can create beautiful patterns on her nails, which can significantly complicate the creation of a translucent manicure. In this case, use ready-made sliders or a stamping kit. For a design with sliders, choose stickers with a transparent background, through which the smoky layer will be visible.
Stamping helps out many girls who want to see complex and original patterns on their nails. Use plates with openwork, floral or abstract decor. Using a roller, transfer the pattern onto the nail plate, covered with a translucent layer, and secure the result with a topcoat.
Translucent veil manicure is a new product of the season, which has already gained unprecedented popularity among women of all ages. Even if you don’t know how to draw beautiful patterns, ready-made sliders or stamping come to the rescue. With this set of tools, you can easily create an effective and stunning veil design.
Beautiful white lace
This version of the “Veil” manicure looks very gentle and airy. White lace on your nails makes your hands even more graceful and beautiful. The haze should be made using white varnish.
- Apply a thin layer of base coat to prepared nail plates.
- Apply the veil base.
- Make a neat thin white outline around the nail plate.
- Apply a matte topcoat.
- Draw beautiful patterns with a thin brush.
- While the coating is still wet, sprinkle white glitter or “velvet sand” onto the lace.
- Dry in a UV lamp.
A gentle romantic and airy manicure is ready. The sparkling “White Veil” makes your look fabulous and beautiful.