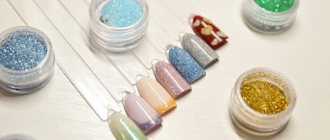
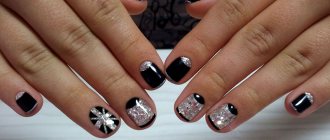
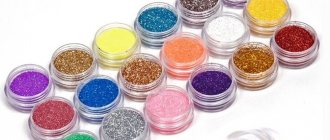
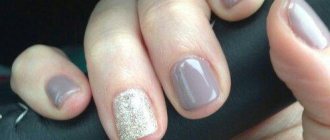
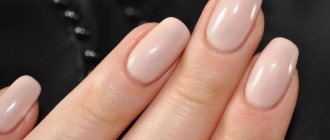
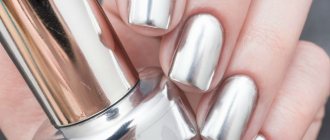
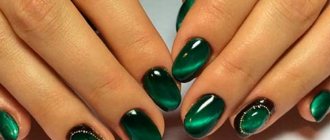
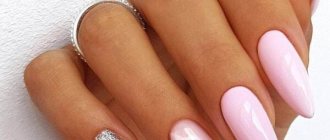
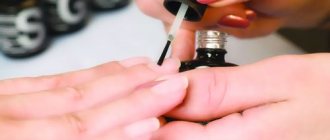
You should apply glitter to the gel polish along its sticky surface after drying or use a damp top coat for decoration. This is how the finest shimmering powder, loose glitter, and kamifubuki are fixed. The first two products are applied with a brush or spread with a spatula. For kamifubuki, an orange stick, tweezers or a magnetic pencil are more convenient.
Liquid glitter is fixed onto dried gel polish using a brush from a bottle or a thinner tool. The decor must be secured with a top; it should not stick out or get in the way.
How to properly apply glitter to gel polish
You can correctly apply glitter to gel polish in the following order:
- After performing a manicure, wipe the nails and the skin around them with a degreaser.
- Then the plates are coated with primer and wait until it dries.
- Apply the base, first in a thin layer, then leveling.
- The coating must be dried in a UV lamp or LED.
- Nails are painted with gel polish, if necessary, 2-3 times.
- Each time the hand is placed in a lamp for polymerization.
- Apply a topcoat to the flower bed, do not dry it.
- The decor is transferred to the damp surface and waited a few seconds until it “settles down”.
- The hand is placed in a drying lamp.
- Fan the surface of the plate with a fan brush.
- The end should be filed so that rough particles do not stick out from the edge.
- The nails are covered with top coat and the finishing agent is dried.
What type of manicure is this?
Shellac, or gel polish, is a special coating for nails that can last 2-3 weeks. Thanks to the special formula, which significantly distinguishes this product from standard varnish, it does not scratch or break. It gives natural nails strength and flexibility at the same time. In turn, the gel coating protects the nail plate from the harmful effects of the environment, which has a beneficial effect on its condition. Every girl can learn the art of how to apply shellac on nails. To do this, you only need to purchase a number of inexpensive products, which we will discuss below, and tune in to the positive result of your work.
How to make glitter on gel polish
You should apply liquid glitter to gel polish differently than powder or glitter:
- Remove dust and grease from treated nails using a napkin and a special product.
- They are coated with primer and allowed to dry.
- Then follow 2 layers of base and dry each of them in turn.
- Nails are painted with gel polish of the desired shade and polymerized.
- Using a thin brush, take a portion of glitter from the jar and place it on the plate.
- You should try to distribute it so that the product lays down in an even layer.
- Next comes another drying.
- The ends of the nails must be slightly filed to remove small particles of glitter.
- Top coat is applied to the plates.
- And it should be polymerized.
Liquid glitter can be applied in 2 layers if there are bald spots left after the first one. Instead of using a base at the 3rd stage, you can use acrygel to strengthen your nails.
Benefits of manicure using shellac
The main advantage of shellac is that it does not damage nails, unlike many other manicure procedures. Even the popular coating of nails with gel polish involves removing the top layer, which makes the plate thinner and softer. Shellac strengthens the nail plate, allows nails to grow strong and not split. Therefore, even after removing it, girls can enjoy grown and strengthened nails.
Other advantages of this manicure include:
Duration of wearing - shellac will have to be removed or renewed only when the nail has grown back;- durable nail design, shellac does not deteriorate from exposure to water, household chemicals, or garden work;
- absolute harmlessness - even pregnant women and young mothers who constantly care for a newborn can do shellac;
- a wide palette of colors and shades to suit any customer wishes;
- absence of allergens;
- long-term preservation of the original shine of the manicure.
This number of advantages influences the fact that the popularity of shellac is growing.
Additional Information. Among the disadvantages, there is only one significant one - the high cost in nail salons. That is why girls purchase special equipment and materials to make shellac at home.
How to glue glitter onto gel polish
Gluing large glitter onto gel polish is also easy if you know how to do it:
- Once tidied up, the surfaces of the nails are treated with a buff.
- Now they need to be wiped with a degreaser.
- Next, apply the base using rubbing movements.
- It is polymerized in a lamp.
- A flower bed of the chosen shade is applied to the base, preferably in 2 layers.
- Both times the hand is placed in the lamp.
- The next layer is the top, it is applied very thinly.
- Using a dot or orange stick, large glitter is placed onto the wet finish on the nails.
- The hand is placed in the lamp.
- The nails are covered with the last layer of top coat and polymerized.
As an adhesive base for kamifubuki and other types of large glitter, you can use a transparent base rather than a finishing agent.
Watch the video on how to glue glitter onto gel polish:
What is needed for the procedure
Before you start applying glitter, you need to know what they are and what you will need to do such a chic manicure.
Depending on their size, you will also need certain tools:
- If you have chosen a small size of such decor, or dust as they are also called, then to apply this beauty you will need a special spatula and a flat, fan-like brush.
- To apply the medium ones, you will need a container to mix them and a brush to make it convenient to apply the decor to the nails.
- If your choice fell on large sparkles or sequins, then you simply need a special design tool - a dots or a magnetic pencil.
How to use glitter for gel polish
It is more convenient to use sparkles for medium-sized gel polish, which are also called sequins, as follows:
- Prepared nails are painted with a flower bed over a dried base.
- The coating is dried in a lamp.
- Then a topcoat is used on the nails.
- Shiny sequins are transferred to a damp surface with a brush and placed in random order.
- Use an orange stick to remove shiny particles from the skin around the nails.
- The coating is dried under a lamp.
- To secure the decor, another layer of finishing agent is applied.
- It is also polymerized.
- It is necessary to remove the sticky layer by moistening the napkin with a cleanser.
- The surfaces of the nails and ends are treated with a buff.
- Now they should be wiped with a degreaser.
- Then use the last layer of topcoat and dry it in a lamp.
Sparkling moon design
The lunar design is based on the principle of highlighting the nail hole:
- the hole remains transparent, and the nail is covered with colored varnish;
- the hole is painted one color, and the nail itself is painted another;
- the line of the hole and the smile line of the French manicure are drawn;
- an empty space remains between the hole and the covering of the entire nail, or a duplicate contrast line is drawn.
The lunar design uses fine dry glitter to create a dense coverage and allow for easy line correction if necessary.
New Year's decor
On the eve of the New Year holidays, the choice of nail design is approached most scrupulously, because there is a belief that how you greet the year is how you will spend it. And it is the sparkles that help add uniqueness to the overall look.
New Year's decor most often contains themes of winter nature, snow, a New Year tree and Christmas tree decorations, therefore, depending on the chosen direction, different types of sparkles are used.
The article provides examples of manicures with glitter gel polish.
- You can add shimmer to snowy landscapes with acrylic powder, shimmer and dust.
- You can create ice-shaped nails using pieces of mica or foil covered with a glossy topcoat.
- Confetti, Christmas tree decorations and fireworks can be imagined as large kamifubuki.
- Glitter will add volume to any New Year-themed picture.
Glitter French manicure
French manicure is a timeless classic, constantly updated.
- for special occasions, you can dilute this classic with shiny splashes in the finishing background;
- Another option for updating your French manicure is to replace the traditional white smile with brightly colored sparkles;
- A smile in a mirror style looks trendy: a smile is drawn with black gel polish and metallic shimmer is rubbed in.
Silver nails with glitter sand
Glitter sand is a type of acrylic powder containing shiny and reflective particles. The combination of silver gel polish and glitter sand can create a holographic effect.
If the sand contains more metallized particles, then rubbing it into the surface of the nail can result in shimmers and streaks. Coarse sand can add volume to the applied design elements.
Such a spectacular manicure requires a thoughtful look and is more suitable for a special event than for everyday wear. Moreover, it will look great on nails of any shape and length.
Glitter on the tips of the nails
Long almond-shaped nails look neat and festive when applied with glitter scatterings on the sharp tips. You can add glitter to one nail, or you can decorate all your fingers with glitter.
For everyday manicure, lighter shades of glitter are suitable; for special occasions, you can choose rich colors. When highlighting the tips of your nails, it is important to stretch the glitter so that it creates the impression of a gradual transition from a more saturated color to a pale one.
Accent nail
A manicure with glitter gel polish does not have to be saturated with a variety of colors, textures and patterns. Sometimes focusing on one nail gives the desired effect without overloading the overall look.
The most common way of accenting is to highlight one nail with a contrasting color or glitter.
Types of nail accentuation:
- completely painted over with shiny gel polish in 2-3 layers;
- sprinkled with small sparkles of different colors, creating a rainbow effect;
- kamifubuki is applied using the color gradation technique;
- rubbing creates a mirror image;
- rhinestones and small stones are laid out over the entire nail, close to each other.
Lace festive nail design with rhinestones
Lace designs include abstract designs with monograms, nets, dots, swirls and floral designs. For a long time, lace manicure was considered a wedding manicure and was not particularly popular for everyday wear. Currently, this nail art is actively used both in holiday manicure and in everyday manicure.
Usually lace is painted on one nail, while the rest are painted in a single color. Another option: a complex lace pattern is applied to one nail, and small lace elements are placed on the rest. Rhinestones and small stones add a special flavor to the lace pattern.
You can place them in different ways:
- lay out a composition of stones at the base of the hole;
- lay out a pattern of stones and rhinestones on the adjacent nail;
- play with lace elements with single rhinestones of different sizes.
How to Apply Glitter to Shellac
Applying glitter to shellac is no more difficult than applying glitter to gel coating, but you need to be careful when shaking off excess decor. To do this, it is better to use a fan brush rather than a brush or buff. Shellac is a more delicate coating than gel. And it is easy to scratch it with hard tools.
Here's how to use glitter nails with shellac:
- Apply a base to the treated plates and polymerize the layer.
- Paint your nails with a flower garden, also dry, but shortening the time your hand spends in the lamp by 2 times.
- Take a small brush, pick up glitter with it and place it on the plate.
- Use the same tool to distribute the decor more evenly.
- Dry the coating completely.
- Apply a buff to the ends of the nails and fan the surfaces with a fan brush.
- Use finishing agent.
- Dry it.
How to sprinkle glitter on gel polish
You can sprinkle glitter on the gel polish if they are dry, that is, powder or glitter are suitable for this method:
- A coated manicure is done on the nails.
- A layer of top coat is applied to the dried gel polish.
- Using a pusher or a plastic spatula, take portions of glitter and pour the product onto the wet surface of the nail until it is completely covered.
- You need to wait a few seconds until the glitter penetrates the top and “sits.”
- You need to lower your finger and tap on it so that the excess glitter falls off.
- The coating is dried in a lamp.
- The surface of the nail is treated with a brush to remove excess glitter.
- All that remains is to apply the top coat and cure it.
While sprinkling the plate with sparkles, your finger should be held over the container in which they are stored. And you should put a large napkin under it, as the decor easily scatters around.
Shimmer effect on nails for weekdays and holidays
If you think that shiny nails are only suitable for special occasions, then this is not so. Although for the most part, of course, rhinestones, sequins, and sparkling sand are used for the holidays. But you can come up with various glitter manicure ideas that will be appropriate even in the office.
For everyday life you need to choose nude, pastel, calm colors of varnishes, and do not overdo it with the decor. A very successful example of a sparkling design is moon manicure and French manicure. This is a universal solution for business style. And by diluting the French and anti-French with bright decor, you will get an interesting, unusual manicure with a twist. At the same time, please note that glitter does not need to be applied completely to the entire plate; you can use it to make a smile line or lunula, decorate a design or geometric shapes with it, or rub glitter sand into the nail.
For a holiday option, an evening look, or special occasions, there are no restrictions on the use of sparkles. Here you can choose both the boldest, brightest glitter colors and calm ones. The main thing is that the glitter nail design is in harmony with accessories and clothes.
Any girl can make a bright, shiny, sparkling manicure at home. All you need to do is stock up on dry or liquid glitter and use them correctly in nail decoration. Here you don’t need to sit on your nails for a long time, draw out complex patterns, make drawings, or glue stickers. Glitter saves any manicure; shimmering particles instantly attract the admiring glances of people. They complement both festive and everyday nail styles, so be inspired by our photo ideas and create brilliant masterpieces on your nails!
How to apply dust to gel polish
There are several ways to apply dust to gel polish, the first one should be:
- Prepare your nails, apply primer, apply base, and dry.
- Paint your nails with a flower garden and polymerize the coating.
- Apply another layer of base or top, do not dry.
- Dip your finger into the jar of glitter powder several times.
- Remove it, lower it down and knock so that the excess powder falls off.
- After a few seconds of waiting, the finger is placed in the lamp.
- Fan the nail with a fan brush or brush to get rid of any remaining excess powder.
In the second method, shining dust is sprinkled onto the wet coating several times until it completely covers the nail. Excess amount of product should be shaken off by lowering your finger and tapping it with the applicator. Then the coating is dried, after which the nail is lightly brushed. And a top coat is applied on top, which is also polymerized.
The third method involves mixing glitter powder with a finish or transparent base. The proportions are chosen independently. And the product is applied like a gel polish, that is, on a dried base, possibly in 2-3 layers. This method is more convenient than others if you need to highlight a design with sparkles or draw patterns.
Preparing nails for work
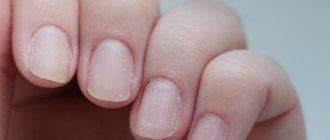
No coating, even the most miraculous one, can hide uneven nail shapes, overgrown cuticles and other imperfections. Therefore, before applying shellac at home, you need to give your nails a shape and also make sure that they are all the same length. Then, using a wooden stick, we move the cuticle to the base of the nail and trim it with a hatchet. Please note that all these operations must be performed on a dry nail. Do not use water, oils, or any creams or moisturizers. Now we polish the nail plate with a regular nail file. As a result, it should become rough - this way the gel will adhere better and last longer. Now we remove the dust formed during polishing and treat the nails with antibacterial liquid.
How to mix gel polish with glitter
To mix gel polish with glitter, you need to place a few drops of it on the palette. A pinch of decor is poured nearby. And mix both components with a thin brush or spatula. After this, the varnish must be applied to the nails so that the glitter does not sink to the bottom of the liquid. But you should prepare such a quantity of the mixture that there is enough for everything, otherwise it will be difficult to achieve uniform coating on each plate. This method is suitable for powder and glitter.
You should not pour glitter directly into a bottle of gel polish. They will quickly settle to the bottom. And in order to distribute the decor evenly, you will have to shake the bottle before use. And this will lead to bubbles on the nails when applying gel polish.
It is best to add sparkles not to the flower bed, but to the top. Finishing agents have greater adhesion than gel polish. And the decor will not prevent the top from adhering tightly to the previous coating. And gel polish with glitter can fly off your nails faster than they grow back.
The essence and features of applying shellac
Nail extensions are gradually losing their popularity as there are other ways to get a neat and beautiful manicure on your nails so that they look natural and attractive. Shellac is a combination of gel and nail polish and, after application, is dried using ultraviolet rays to ensure the reliability and longevity of wearing this design. At the same time, the color palette of shellac allows you to choose any color and shade depending on the client’s wishes.
The procedure for applying shellac is carried out in a certain sequence and includes the following steps:
- First of all, the master does a regular manicure, gives the nails a certain shape, removes the cuticle and polishes the surface.
- Polishing the nail is a careful leveling of the plate for high-quality coating. To get a neat and long-lasting nail design, the gel must adhere firmly to the surface of the nail.
- The first layer of gel polish is applied to the nails, which is dried under ultraviolet light.
- Then the master uses regular colored varnish, and after it dries, shellac is applied. Instead of a colored coat, you can paint your nails with glitter polish to get the sparkling result you want. Drying in a UV lamp is an important stage of the procedure, on which the strength of the coating depends.
- At the end of the process, the master must moisturize the cuticle with a special oil so that the skin does not become dry and irritable from UV rays.
A shiny shellac nail design looks unusual and attracts attention, so it is considered the best option for a celebration or a special occasion. This design will effectively complement any look.
How to apply dry glitter to gel polish
There are several ways to apply dry glitter to gel polish:
- Mix them on the palette with a transparent top or base. The resulting product is applied to the dried colored coating, polymerized, then the ends are treated with a buffer. And on top the nails are protected with a finish.
- On the sticky layer of the flower bed. Nails are painted with gel polish; after drying in a lamp, the surface is not wiped. A portion of dry glitter is poured onto it and carefully distributed over the plate with a flat brush. After a couple of seconds, you need to work on the surface with a clean fan brush so that the excess particles fly off. Then you need to apply topcoat and dry.
- For a wet finish. The product is applied over dried polymerizing varnish. Decor is poured onto it, controlling the density of the layer. The hand is placed under the lamp. Then the excess shimmering particles are brushed off, and the ends of the nails are treated with a file for the same purpose. You need to cover everything with one more layer of finish, dry it, and the design is ready.
Step-by-step instructions for applying glitter
It’s easy to create a feeling of celebration if you follow a certain sequence of actions. Before starting the manipulation you must:
- Prepare your nail plates - you need to apply shiny polish to a well-done manicure. Otherwise, on shaggy cuticles or nails of different lengths, the sparkling coating will look ridiculous and careless.
- Prepare tools - everything you need should be at hand.
- The nail plate must be degreased, primer and base applied, and painted with gel polish. All operations alternate with drying under an ultraviolet lamp.
- Cover your nails with top coat and, while the surface is still wet, apply shimmering decor. Shiny shellac requires more careful handling - the delicate coating can be damaged by metal tools. Brush off excess glitter with a soft brush.
- After applying the shimmering particles, they are covered with a top coat. Otherwise, the surface will remain uneven and will cling to clothes. In addition, the topcoat will preserve your manicure for a long time and give it a finished look.
A shellac manicure with glitter looks great on both short and long nails.
What tools are used to apply glitter?
To create the sparkling beauty of well-groomed hands, you must first do a neat manicure. For this you will need:
- various scissors;
- files;
- buff;
- cuticle nippers.
Then apply the coating using:
- degreaser;
- primer;
- clinser;
- base, gel polish or shellac and top coat.
In this case, you cannot do without an LED lamp. The shiny particles themselves are applied with an orange stick, dots, tweezers, or brush. The choice of tool depends on the size of the glitter. If this is a powder version, then you can’t do without a brush to shake off excess coating. Perhaps the master will suggest dipping your sticky nail into sparkling dust.
Options for combining sparkles
A hot new product for the coming season will be nail designs that are simultaneously coated with shellac with glitter of various sizes. You can apply large glitter particles on one nail, microshimmer on the other two, and sprinkle dry medium-sized glitter particles on the other two. A manicure will certainly attract the attention of others.
How to rub glitter into gel polish
You can also rub glitter into gel polish if you use finely ground decor:
- The nails are painted over a dried base with a flower bed with a sticky layer.
- It needs to be dried in a lamp.
- The shiny powder is scooped up with a brush and applied to the plate with patting movements.
- The same tool is used to distribute the decor more evenly.
- You need to wait a few seconds for the shining particles to connect more tightly with the sticky layer of varnish.
- Use a soft fan brush to fan your nails to remove excess shiny particles.
- The next layer is the top.
- It needs to be polymerized.
Glitter powder, glitter or kamifubuki, as well as liquid shining compositions, make the design catchy and original. The decor looks good with bright lacquer colors and pastels. Just don’t use it in abundance so that your nails don’t look like Christmas tree decorations. However, if you want just such an effect, a manicure will not cost you much. After all, a jar of glitter costs only 25-60 rubles.
Types of glitter
Glitter (sparkles) are small particles of material with reflective properties. They are usually made from metallized film, foil, synthetic mica or thermoplastic. Glitter comes in different sizes, colors and shapes - from the smallest sparkling dust to individual shiny stars, hearts and other elements (pictured).
Glitter (sparkles)
Glitter is sold in dry and liquid form. In the first case, they are applied to wet gel polish, then dried in a lamp and secured with a topcoat. Liquid glitter is already mixed with the base coat and is applied in the same way as regular gel polish. Liquid glitter is more convenient to use, but the density of the glitter in the finished varnish is difficult to regulate. For a more intense shine, you will have to apply a shiny coating in several layers, and if, on the contrary, you want to make the shimmer less intense, the gel can be diluted.
Multi-colored glitter design
