What comes to mind when it comes to winter, cold and frost? Well, of course: snow, snowflakes, New Year, etc. So in manicure, nail art masters try to convey all the subtleties of the winter mood. The most popular option to depict a piece of winter on your nails is to draw a snowflake on them. Or maybe not draw? How about an applique or unusual snowflake shape? The more interesting and unusual you can make a snowflake on your nails, the more original the manicure will be. The envy of all your girlfriends!
Winter design drawing techniques
A simple snowflake with six blades with white varnish is not the limit of possibilities for nail art. Snowflake images can be made in various ways, but the result also depends on the basis of such a manicure: matte finish, French, etc.
French with snowflakes
For a beautiful winter manicure, which could easily be a New Year's manicure, it is important to make a French base. The color scheme for the tip of the nail can be anything; it directly depends on the intended design. The background can also be made of any shade or simply use a transparent coating.
Example of a jacket with snowflakes
Snowflakes can be present as independent design elements or as part of it. They can be located on the nail in different ways: along the entire nail plate, at the tip, in the center of the nail (or on the left/right side).
Ice ombre
A soft play of shades as a background is a great idea for a winter manicure. To make a design that looks like ice, use the ombre technique using cool colors: blue, purple, green in tandem with white, gray. In ombre, you can add sparkles, which should be chosen lighter or darker than the main chosen colors. A smooth transition from one shade to another is best done with an airbrush, but with sufficient skill it can also be done with a brush.
Ombre with snowflakes
After creating the base of the ombre manicure, you can start decorating. For example, draw a snowflake and decorate it with rhinestones. On ombre nails, small snowflakes in large quantities in a contrasting color look impressive.
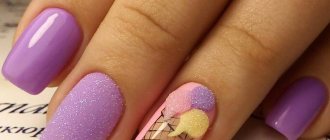
Large and small snowflakes with velvet sand
Such an unusual material as velvet sand helps create interesting effects on nails. The technique using this material is useful in making snowflakes more voluminous and attractive.
Snowflakes with velvet sand
The size of the snowflake created does not matter when using velvet sand. It is enough to follow a few steps to get a snowflake with acrylic sand:
- Use gel polish to paint a snowflake of the desired size using a thin brush;
- Apply powder/sand to the area where the snowflake was drawn;
- Dry the nail under the lamp;
- Use a dry wide brush to remove excess material.
There is no need to use nail topcoat after using powder/sand, otherwise the velvety effect will disappear.
Matte design
Manicure with a matte finish is a fashion trend that cannot be ignored in winter nail design. Hit colors for manicure: dark burgundy, green, brown. Light colors include turquoise, blue, gray, and lilac.
Matte manicure with snowflakes
The trend is to combine matte with a glossy finish, and also use acrylic powder. Therefore, to create a beautiful snowflake on a matte background, acrylic powder, contrasting varnish, glitter, etc. are suitable.
Scandinavian snowflakes
This unusual snowflake shape is often found on warm winter sweaters, but it looks no less beautiful on nails. It is important to complement a knitted manicure (both drawn and voluminous) with Scandinavian snowflakes. It is better to choose contrasting colors and use decorative elements to a minimum.
Scandinavian snowflakes in manicure
For a harmonious arrangement of the Scandinavian snowflake on the nail, it should be complemented with a stylistic pattern: a knitted pattern, stripes.
Volumetric snowflakes with acrylic paint and powder
A slight bulge for a snowflake can be created using gel polish or gel paint, and for greater highlight, use powder.
Volumetric snowflakes
You can create volume for a snowflake using gel paint like this:
- Cover your nails with a layer of gel polish of the desired color, after going through all the standard steps before application, and dry;
- Paint the required number of snowflakes with gel paint and dry;
- Apply another layer of gel paint on top of the dried snowflakes, dust with powder and dry;
- Remove excess material with a dry brush.
To cover snowflakes, you can choose matte powder, as well as shiny powder, to give them a shimmering effect.
How to draw a snowflake on your nails?
You can apply a snowflake image to your nail in different ways and the effect will vary in any case. Which drawing technique you ultimately choose depends on the personal skills of the manicurist. You can paint with anything: gel polish, gel paint, acrylic paint, regular varnish, etc., but not all of these materials are easy to use because they dry quickly.
Brush
For manicure painting, choose the thinnest brushes that hold any pigment well between the fibers and ensure uniform drawing of lines, which is necessary to depict a standard snowflake.
Drawing snowflakes with a brush (5 steps)
Step-by-step drawing of snowflakes with a brush
For a good result when painting with a brush, you should not apply a large amount of dye to it so that it does not drip and form blunders.
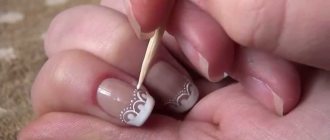
With a needle or toothpick
These “folk” drawing tools are convenient for drawing straight lines and dots, but their use is fraught with its own nuances:
- on the slippery surface of a thin needle, the coloring matter (for example, ordinary varnish) quickly flows down to the tip, which makes it difficult to beautifully draw the intended patterns, especially complex ones;
- It’s inconvenient to draw thin lines with a toothpick, but dots and monograms come out great.
Nail art professionals do not use such tools for painting nails, but at home they can completely replace dots.
Snowflake drawings made with a needle and toothpick
But you may not be able to draw with a needle and toothpick the first time, so before drawing snowflakes on your nails you should practice on any other surface.
Dots
In skillful hands, dots become a universal drawing tool. For ease of application of the dye, different sizes of the ball at the tip of the dot can be used. This tool is convenient to use to create patterns of any complexity, as well as to use the dot pattern technique.
Snowflakes drawn with dots
To avoid accumulation of varnish/paint in one place of the design, you need to dip only the tip of the dot into the coloring substance, and also dry the snowflake well before fixing it with a transparent coating.
Stamping technique
This design idea as stamping looks incredibly impressive in manicure, while making life much easier for masters who do not have drawing skills. In order to make this design on your nails, you need to purchase special templates (plates) and a stamp.
Plate with snowflakes for stamping
After the main color has been applied to the nails (background), you can start stamping:
- Wipe the disc and design stamp with nail polish remover;
- Apply gel paint (or acrylic) to the selected design. The stamping plates have small recesses that hold the required amount of paint. Excess from the plate must be removed with a scraper, and as an analogue, use an unnecessary bank card, which will remove excess paint from the surface;
- Attach the stamp to the design on the plate, then from one side nail fold to the other, use the stamp to transfer the image onto the nail.
If gel paint or varnish was used for stamping, then they need to be dried after application to the nail. To consolidate the result, it is worth covering the drawing with a colorless varnish (or top coat).
An example of a manicure using stamping
Stepping can be done effectively against a gradient or ombre background, but a plain base will also work perfectly. At the same time, it is permissible to decorate the drawings with sparkles, rhinestones, etc.
Snowflakes stencil
What could be easier than drawing an openwork snowflake through a stencil? Having made the base coat and the colored layer, remove the stickiness with a clinser and press a special stencil (usually paper) tightly against the nail. After covering it with a layer of varnish of a different color, dry the nail and remove the stencil. All that remains is to decorate and secure with a top if necessary. The same actions are carried out with regular varnish.
Snowflakes made using a stencil
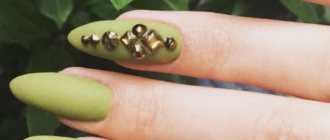
Decorating nails with rhinestones and sparkles
Snowflakes decorated with sparkles or rhinestones look organic and stylish in winter. Festive or everyday design can contain either a large number of shiny elements or a small part of them. For example, with glitter you can only embellish the design of a snowflake or even cover the entire nail with it as a background. Rhinestones can also become part of a snowflake (in the center of the snowflake, on the blades) or a moon manicure.
Glitter in winter manicure with snowflakes.
Rhinestones with snowflakes on nails
Gel pens
Painting on your nails with manicure gel pens is as easy as shelling pears. The process of applying an image is no different from that on paper. Having drawn a snowflake of the chosen color, the drawing is dried in a lamp and covered with a top coat.
Special gel pens for manicure
For the “folk” version of this nail painting, ordinary stationery gel pens are also used, but they do not give the desired effect on the nails, they take a long time to dry and can smudge when covered with a fixing transparent layer.
Manicure with snowflakes made with gel pens
Stickers and foil
If you really don’t want to do “painting” on your nails, you can simply glue snowflakes on. You just need to choose a sticker (you can take a ready-made one, with an adhesive side), soak its film in water and place it on the nail. Making an applique from foil tape (strips) is a spectacular idea, but foil for the imprint will add a special shine to the snowflake. Foil is also used for the background, and then the nail is painted.
Foil manicure with snowflakes
Manicure stickers with snowflakes
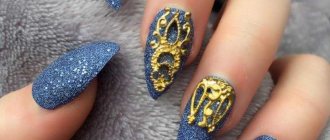
Red gold manicure
The use of gold decor makes the red manicure design elegant and rich. Thanks to him, it is possible to embody a refined and aristocratic style, which is typical for special occasions, but not for everyday life. In 2022, the trend will be gold glitter on the ring finger or little finger. It looks discreet but at the same time elegant and can be used in everyday life. The French style with elements of gold decor applied to the edge of the plates is popular. The design idea is to use glitter stretch marks, as well as moon manicure.
Background colors for nail art with snowflakes
The current shade for the background of the manicure is selected taking into account some features:
- outfit color;
- fashion trends;
- intended design.
But there are also background colors that remain beyond competition and do not depend on trends.
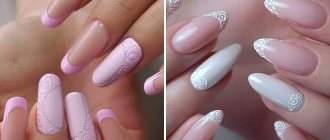
White varnish
White is one of the “winter shades” that can fit perfectly into any look. This tone can be used with different techniques, and the color of the snowflake can be any color. For long and short nails, a matte finish is in trend.
White polish as a background for a manicure with snowflakes
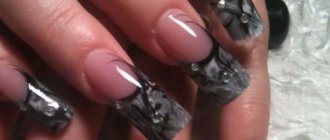
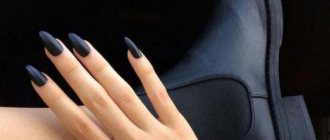
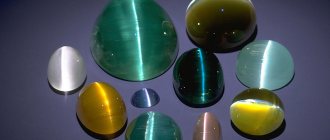
Black varnish
A black polish for the background will help you recreate a dark winter night on your nails. On such a coating it is effective to draw snowflakes in blue and blue shades, as well as depict them in silver and white. Black varnish can be chosen in any interpretation: matte, glossy, cat-eye or with glitter in the composition.
Black polish as a background for a manicure with snowflakes
Red and purple background
Bright and bold winter-themed designs are created by using rich shades of red or purple as the background. To create a calm design, choose dark shades of these colors. Against a background of red and purple, it is effective to paint with white varnish, as well as use gold and silver glitter.
Purple nail polish with snowflakes
Blue and light blue shades
These tones look very “winter”, so they harmonize perfectly with designs in the form of snowflakes and patterns. It is important to combine blue and cyan with white, black or gray and make a gradient transition. For the design of light blue and cyan shades, it is better to choose silver materials; for dark ones, it is optimal to select golden tones of jewelry.
Blue background in manicure with snowflakes
Silver background
The nail design turns out to be incredibly elegant if you use a silver color for the base coat, and the trend is to use both varnishes with a metallic effect, as well as glitter, shiny varnish, rubbing, and foil. “Silver” can be combined with other colors, making the ombre technique: with black, blue, etc.
Silver background in manicure with snowflakes
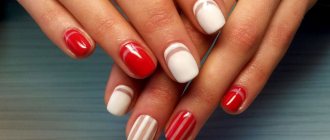
Manicure red and white
To create a beautiful manicure, experts recommend using ruby and crimson tones. It can be a red and white jacket or a scarlet background with a snow-colored design. White flowers, matte finish and varied decor are actively used. Graphic patterns and negative space style can be used.
Photos with snowflakes on short nails
A winter design with snowflakes on short nails can be done in different ways: cover the entire nail with small snowflakes, draw half a snowflake on the nail, decorate only a few nails with snowflakes, etc. Short nails should not be decorated with large snowflakes over the entire nail, much less place them on each nail.
New Year's design idea for long nails
Whatever method you choose to draw a snowflake, you can create a New Year’s or winter mood only with a harmonious combination of the background color, the shape of the nail and the style of the drawn snowflake. For everyday winter manicure, it is better to choose a convenient long nail shape - an oval, a rounded square, for a festive design - any one you like.
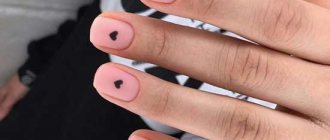
Red matte manicure
Matte colors add a different texture without making the manicure visually complicated. Trends are becoming simpler and a matte top coat makes any color more interesting. Try an opaque nude. It looks like a matte stone. He is already precious.