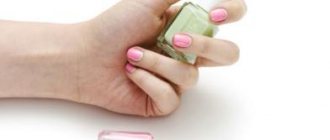
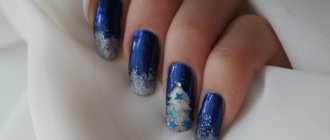
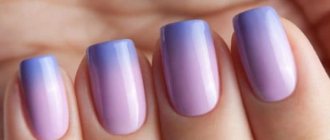
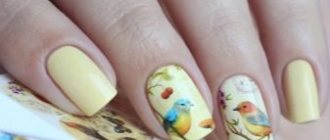
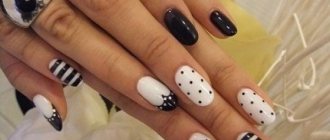
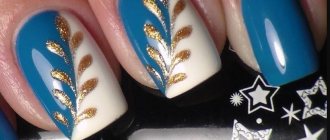
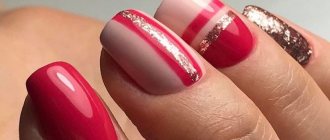
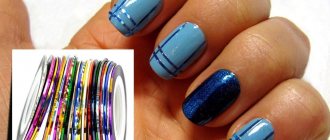
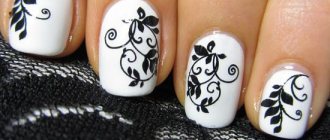
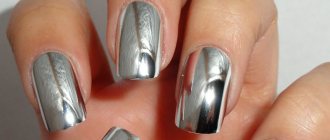
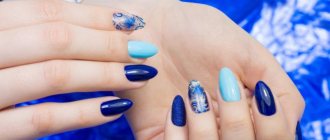
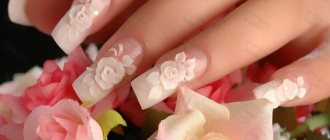
Nail sliders are thin, transparent stickers with patterns. The design of such patterns can be very diverse, which explains the extraordinary popularity of this type of manicure. Films with patterns are on a paper backing. Before application, they are moistened with water and then applied to the nail.
There is another way to decorate your nails with stickers with patterns - using photo design, but unlike sliders, such stickers do not need to be moistened in water before application. They have an adhesive base with which the patterned plates are attached to the nails.
Advantages of slider design
Ornaments, patterns, designs on nails are the trend of recent years. There was a time when there was only one way - hand painting using special brushes and varnish. But this method is only available to professionals who are specially trained in this technique.
Nail sliders, the design of which can be very diverse, are a real find not only for girls who want to apply such a manicure to themselves. But for people who work with nails professionally, this technique will be a real godsend.
The advantages of the slider technique over others are as follows:
- as a result of using aqua stickers, a guaranteed clear, bright design is obtained, with the absence of any defects;
- a huge selection of patterns, drawings, ornaments, currently there are a large number of selections of design solutions on sale, there is no need to think through how everything will look, it’s enough to choose what you like from the ones offered;
- the technique itself is easy to use, you don’t need to have any special skills or undergo special training, sliders are available to any beginner;
- a small price, which is several times less than what will be offered if the pattern is applied using hand painting;
- sliders glued on top of gel polish are quite durable and can last on the nail for up to three weeks;
- they look very bright in appearance, so it’s impossible not to notice such a manicure;
- The material is completely safe for nails.
Slider-type stickers require much less time to apply than all other methods of this type for decorating nails with designs.
Manicure with sliders: step-by-step instructions for use
If we compare manicure with sliders and nail design with photographs, the first one wins in terms of ease and simplicity. This effect is achieved due to the fact that the manufacturers of stickers have taken care of the convenience of working with them: the film does not curl after you peel it off from the base, does not stick to your fingers, and can be quickly smoothed out on the nail plate.
Thanks to these properties, sliders are perfect for beginners in this nail design technique.
The set of tools for applying slider to nails may vary depending on what kind of manicure you want to do. But the basic tools remain the same for all cases: a base for the varnish, the main color of the decorative varnish, sliders, a stick or toothpick for smoothing the sticker, a fixer.
Applying water-based decals involves using warm water to simply separate the slider from the base and activate the adhesive that will firmly bond the decal to your nail plate. The convenience of such water decals is that the glue does not immediately stick the slider, you will have time to smooth the element.
| Step 1 Get your nails in order, remove the cuticle, give them the desired shape, and polish the nail plate. |
| Step 2 Apply a clear base to protect your nails from the harmful effects of decorative varnish. |
| Step 3 Apply the selected color of varnish under the slider. |
| Step 4 Cut out the desired slider element, take it with tweezers and dip it in warm water for literally 20 seconds. |
| Step 5 Place the slider where you want it with the base facing down and then slide it, remove the base and start smoothing the sticker with a stick or toothpick. When you have precisely determined the location of the slider, press it with a cotton swab and hold it for 5 seconds so that the glue sticks the sticker firmly. |
| Step 6 Apply protective varnish. |
The whole procedure will not take you much time, and when you have already filled your hand, you will be able to do a manicure in a matter of minutes.
When using an adhesive-based slider, the procedure will last even less, because You don't need warm water.
Difficulty may arise if you do not press the sticker tightly and air bubbles form between the nail plate and the slider. To prevent this from happening, carefully smooth the slider from the middle to the ends of the picture and then press the film tightly.
The neat appearance of the design with an adhesive picture also largely depends on how well you polished your nails and if there are any unevenness left, the picture will lie unevenly and the manicure will not look beautiful.
The beauty of the manicure also depends on how accurately you cut out the slider.
If you want to apply a sticker to the entire surface of the nail plate, you can do this in two ways:
- Cut a piece out of soft paper (napkin), attach it to your nail and outline the outline of the shape, along which you can cut it to the desired size. Now take the slider and cut the desired shape of the sticker.
- You can apply the slider itself to the surface of the nail, outline the shape of the plate and carefully cut the sticker along the contour.
We recommend: Lunar manicure with shellac: popular trends
Modern technology has gone so far that you can even make your own slider at home.
To begin with, buy a special film from a cosmetic store on which you will apply an image or a pattern you have come up with.
Also, you will need a printer, with which you will create your own sticker designs.
You will also need a special fixer for the image - a transparent varnish that will protect the image from water. This varnish can be purchased at a stationery or art supply store.
Using a graphics application on your computer or laptop will simplify the task of creating a picture. Remember that nails are not perfectly straight, they have a convex shape, so the size of the pictures should be slightly larger than the nail.
Once you have “drawn” your design, print it out on plain paper and try the pictures on your nails. If you did everything correctly, the size of the sticker and its shape fit perfectly on your nails, you can print it on film. This is how easy it is for you to create a manicure with a variety of different and unusual sliders. You can add stickers to any type of manicure: French, delicate classic, which combines rhinestones and sliders.
In some cases, the slider does not adhere well to the nails and there are many reasons for this:
- The nails peel off very badly, and the slider lags behind along with the upper part of the nail plate. Nails should be brought back to normal condition, strengthened, and made healthier.
- You yourself did not apply the sticker carefully; air bubbles formed under it, due to which the slider is in motion.
- You exposed your nails to sudden temperature changes and used aggressive detergents.
- It is quite possible that you were in a bit of a hurry and the base layer of varnish under the sticker did not dry properly.
- Forgot to apply topcoat.
- Your hands are constantly in contact with hot water, which harms your manicure and not only sliders.
Try to follow all the recommendations of the masters for protecting your nail design, and then the manicure with sliders will last on your nails for up to three weeks.
Kinds
It’s impossible to say that aqua stickers are a new product. Their history goes back at least more than ten years.
During this time, several types of sliders were developed:
- The entire surface of the nail is covered with a sticker. Apply either on a transparent base or on white varnish. There are variations in which two or three nails on each hand are covered with a slider, the rest of the manicure is performed using traditional techniques.
- Application. In this case, only part of the nail plate is covered with a film, and the rest goes under varnish; as a rule, these are bright colors and against their background the slider is a kind of contrast, emphasizing the originality of the manicure.
- Aqua stickers with 3D effect. Most often, they occupy the entire surface of the nail and, thanks to their unique ornamentation, create the desired volume effect. Another option for this design is a special slider ornament, and gel polish is applied on top of it.
The design of a nail slider can be an imitation of metal, occupying either the entire surface of the nail or only part of it. In the last option, the best thing is the French one. One of the types of sliders includes the recently appeared thermal stickers.
In order to apply them to the surface of the nail, they are preheated, for example, using a hair dryer. The glue melts and the sticker is ready for use. Unlike water sliders, thermal stickers do not require drying and can be coated with a protective layer immediately after application.
How to glue a sticker on gel polish
Before you start gluing, you need to prepare your nails. Thoroughly clean the nail plate from old varnish and file the edges to make your nails look neat and beautiful. Before applying the varnish, the nail is thoroughly degreased with a cotton swab dipped in alcohol.
Step-by-step manicure with nail sliders.
Apply two layers of gel polish to the nail in advance. It should dry well and have no flaws.
It is easy to stick a slider onto such a surface, following the following instructions:
- Before separating the sticker from the backing, you need to attach it to the nail and cut off the excess parts of the slider with scissors;
- take the sticker with tweezers and immerse it in a jar of water for 30 seconds;
- carefully transfer the moistened sticker to the surface of the nail;
- carefully smooth it out with a cotton swab so that there are no unevenness or bubbles.
After carrying out all these procedures, making sure that the sticker lies absolutely flat, the fixing layer is applied.
How to glue on regular varnish
Nail sliders, the design of which in this technique looks the simplest, are applied almost similarly to the method used when the base is gel polish. Except that regular varnish is applied to the nail in two layers, with the obligatory condition of thoroughly drying it.
When this condition is met, you must follow these steps to apply the sticker to your nail:
- Using tweezers, place a sticker soaked in water on the nail plate, placing it in the desired position;
- the surface is carefully smoothed with a cotton swab.
When the applied layer dries over it, a fixing varnish is applied to secure it.
Instructions for use
The technique of using sliders is quite simple. At the same time, there are different possibilities for gluing pictures to nail plates. The choice will depend on the base coating (gel, gel polish, varnish, shellac, biogel, acrylic) and the selected type of slider. So, gluing the slider necessarily includes the following steps:
- Selection of the most suitable image, the basis for it. These main components must be organically combined with each other.
- Preparation of all necessary materials and tools for processing and painting nails. These most often include:
Working with the slider
- base and top coat;
- colored gel polish; file for natural nails;
- buff;
- orange or apricot stick;
- primer;
- clinser;
- sticky layer remover;
- sliders;
- scissors or tweezers (whichever is more convenient);
- cotton buds;
- pusher;
- glass of water.
- Performing high-quality manicure.
- Cutting out the necessary sliders for the design according to the size of the marigolds. The film should not extend beyond its boundaries.
- Prepare liquid in a small convenient container.
- Degrease treated nails and apply primer (application of primer is not necessary, but recommended).
- Apply and dry the base, remove the sticky layer from its surface.
- Cover your nails with colored gel polish and dry them.
- Separate the drawing from the base. To do this, place the cut out element in water for half a minute. If the paper is thick, then you should keep it in water for one minute.
- Separate the film with the picture from the paper and place it on the nail. Immediately it is necessary to thoroughly level the surface.
- Cover the nails with top coat and dry in a lamp.
Advice! For better adhesion of the coating and the nail, it is recommended to carefully buff the glossy layer of the nail plate with a buff. The surface may become a little rough - this is even better for the stability of the manicure.
Cutting out the slider
Thus, applying sliders to gel polish is completely easy. To visually study the procedure, it is recommended to watch the corresponding video.
When building up
In this situation, there is also no problem in applying this design to your nails:
- Before gluing, the extended surface is wiped with a pusher.
- The sticker soaked in water is applied to the surface of the nail with tweezers. Here it is very important to immediately accurately apply the sticker to the nail, since in this coating option it can no longer be moved.
- After application, the slider is secured with a fixing varnish.
When applying gel extensions, be sure to dry your nails with a lamp and only then start gluing the sticker.
How to make a continuous coating
Nail sliders, the design of which is that they are applied to the entire surface of the nails, have some features:
- the film covers the entire surface of the nail;
- it fits tightly to the nail, and the ornament extends to the entire nail plate.
A continuous film stays on the nail longer than one that occupies only part of it, made using the applique technique. After the film has dried, a fixing layer is applied.
What are nail sliders and how to glue them?
Not all nail technicians are able to create a unique design with their own hands. To do this, you need to master the technique of painting with acrylic or gel, as well as have a rich imagination and imagination. When the master does not master one of these skills, then you can resort to the help of nail sliders. Not only a professional can use them, but also any girl at home when doing a manicure. It’s not difficult to make every nail spectacular; you just need to learn how to apply sliders to the nail plate correctly.
How to cut a slider evenly on a nail
Sliders are made of a standard type; their size may not fit the nail plates, so it becomes necessary to cut them; this is not difficult to do in two ways:
- a stencil is cut out of thin paper, which is applied to the nail, and then a slider is cut out in accordance with this stencil;
- It is initially cut from the eye sticker to the size of the nail, then, after gluing it to the nail, the excess film is cut off.
The problem of trimming excess is not as difficult as it seems. The main thing is to pre-select the sticker to the size of the nail, so that you don’t have to cut off too much.
How is slider nail design made?
Probably, everyone who loves nail stickers has more than once encountered the following situation: they saw a beautiful design, ordered it, received the package, open it and……. Oh God!!! The slider design is of terrible quality... The image is dim or completely black, small design elements are generally difficult to distinguish, and instead of a smooth color transition there are some dots. Although on the resource where these unfortunate sliders were ordered, there were such beautiful images of the products, and they wrote so sweetly about the quality. And how do you put such horror on your nails? Throw it away? Change? Get your money back? Wasting your precious time.....
Which nail sliders are better?
In order not to make a mistake in choosing nail stickers, let's look at how they are produced. There are several main technologies for printing labels: screen printing, printing on digital printing machines (the so-called digital) and inkjet printing. Without going into subtleties and technical details, let's look at their advantages and disadvantages.
Silk-screen printing (screen printing).
The main advantage of this method is the ability to print with anything and on anything. Screen printing allows you to use any paint, including those that are not soluble with acetone.
A serious disadvantage of this technology is the limited range, since each design requires the production of several stencils, which is quite expensive and is only justified in large quantities. There are also limitations on print quality, specifically the inability to print thin lines, small fragments and smooth color transitions.
Digital printing.
The simplest example is printing on a laser printer. In this case, you can use almost any laser printer - from household to professional printing machines (which, of course, affects the image quality).
Pros: ease of operation and setup, the ability to produce single copies without additional costs, printing occurs quite quickly.
Cons - after all, laser printers are not designed for printing small images the size of a fingernail. On such prints there is clearly a raster grid (the image consists of microdots), smooth color transitions are not entirely smooth, small details are sometimes difficult to distinguish or merge into a solid dark spot (solid patch). If you see a “mesh” on the finished slider when transitioning from light to dark color, it was printed on a digital machine.
Using this technology, we print economy series sliders on professional printing equipment, which eliminates most of the shortcomings.
Due to these shortcomings, the manufacturer has to carefully select the initial design for the slider, taking into account whether its equipment can print - this is in the best case, but, as practice shows, this is often not taken into account; what is printed is what is sold. And sadly enough, it’s the buyer who suffers!
Also, there are currently a lot of so-called “floats”. We have not found a single toner (except ceramic, which is very expensive and not suitable for sliders) that is not soluble in acetone. It's like roulette - either it works or it doesn't.
What is all this information for?
First, please answer the question:
What equipment do you think will print better, for 15 thousand. or for 2 million? Of course, for 2 million, you will answer - and you will be right! Why is the question posed this way, in terms of money? Because a person not involved in printing simply will not understand the difference in names and technical characteristics. But I'll try to explain anyway.
Our premium series sliders are produced using Mimaki equipment using UV printing technology.
What it is? This is a completely new, cutting-edge inkjet technology that produces exceptional image quality without the disadvantages of other technologies. It's very simple, we don't have any defective slider designs. You get a slider design with the image quality presented on the site (and often better). We can print sliders with a white backing, white, textures for a white background - all in the exceptional, photographic quality that only inkjet can achieve. In addition, our equipment is “tailored” specifically for nail stickers - from engineering settings to color scheme and ink type.
The disadvantages of this technology include the rather high cost of production, which does not prevent us from maintaining minimum prices comparable to the prices of other printing methods.
I would like to draw your attention to the reasonable price and wide range of our stickers. We offer wholesale buyers absolutely free access to samples of our products. To do this, you need to send a request to our email
ArtMix company respects its customers. We offer you guaranteed quality.
How to use metallic sliders
This type of sticker differs from ordinary ones in that it has a metallic sheen, i.e. the film is made in such a way as to create just such an effect. They are glued both to a gel polish base and to a regular base, just like other water-type sliders.
They look very beautiful, last a long time on the nail and can be easily removed if necessary.
The algorithm for placing such stickers is as follows:
- We take a suitable plate with tweezers and lower it into water;
- gently apply to the surface of the nail;
- smooth it out with a cotton swab so that there are no wrinkles or bubbles left.
There are other ways to add a metallic shine to the surface of the nail, but the one offered with the help of a slider is the most successful and convenient.
How to glue sliders on nails: detailed instructions
How to stick sliders evenly and neatly? Catch life hacks from the pros and get inspired.
The founder of the Lakodom store, Polina Koroleva, believes that sliders are a simple and quick way to give yourself a fun manicure #right now, without wasting time on going to the salon. (And at the same time, by the way, to correct flaws in applying varnish, which can be useful:)
Sliders H2Oh! - her idea. The drawings are created by designers Polina Tukmakova @freiliiegend, Nastya Smerdeva @nailtard and Sasha Razueva @sasshhaaaa. Now at H2Oh! The collection includes 50 types of sliders. If you want, you will get psychedelic and frivolous flamingos, or if you want, strict marbled patterns and graphics.
The shape of the stickers was tested by the whole team so that it would fit any nails.
But many people still have questions: how to glue them? In theory, everything is clear: wet it, stick it on. But in practice, sometimes questions arise. We asked Mila Krendeleva, model and photographer for Lakodoma, to give step-by-step instructions for slider neophytes.
You will need:
- varnish base;
- nail polish;
- top (In principle, any will do, but there are some that corrode the sliders. Of the tested ones - Picture Polish Looking Glass.)
- orange stick;
- scissors;
- medium abrasive file;
- nail polish remover;
- tweezers (optional, many people don’t use them);
- cotton pads;
- an artificial bristle brush – flat, not too soft, optionally with a beveled edge.
- bowl with water.
Step 1: Paint your nails with base and polish
Mila advises choosing a white polish (hers is NCLA, shade Donut Glaze): on it the design looks as bright as possible, just like in the packaging. You can use other colors, then the pattern will look different.
It is not necessary to achieve a perfectly smooth, bald spot-free coating. The sticker will still cover up minor imperfections.
Wait 5-10 minutes for the top coat of varnish to dry. To speed up the process, you can coat your nails with a quick dry.
Step 2: Cut out the sliders
Roughly estimate which slider will suit which nail. To do this, alternately place your fingers on the stickers - the slider should be 1-2 mm wider than your nail. Don't be alarmed if the sliders seem too wide - most likely it's an optical illusion because the sticker is flat but the nail is not.
To choose the size, cut out the slider along the contour and apply it to the nail. It's okay if the sticker protrudes a couple of millimeters beyond the edges of the nail plate - the excess can be easily removed.
Just in case, Lakodom provides the exact dimensions of all stickers.
Each set has 14 sliders (not 10, like the fingers on two hands). This gives you the right to make mistakes: you can choose the size more precisely or replace the sticker if you ruin it.
Step 3: Wet the sliders
The slider is made on the same principle as transfer tattoos: the design is attached to a paper backing base. To separate the film with the pattern, you need to wet it.
There are two ways to do this: dip the entire sticker in water for a few seconds or, as Mila advises, place it on a wet cotton pad with the paper base facing down.
The paper should be completely wet, and the film should be easily separated from the backing. But there is no need to separate it yet :)
Step 4: Glue the Slider
Hold the slider with two fingers. Bring it to the nail you are going to glue on. To make the drawing lie evenly, use your thumb to move the film towards the hole, and with your index finger pull the paper base up.
While the film is wet, it glides easily over the nail and can be easily smoothed out. Make sure there are no creases, folds or bubbles.
Step 5. Remove excess
The edge of the sticker should remain at the end of the nail. Bend it with your fingers, and then saw it off with a nail file using gentle, gentle movements. Try to seal the end - bend the edge inward, under the nail.
Step 6. Cover the slider with topcoat - topcoat
Apply top coat. Work especially carefully on the end of the nail: the better it is sealed, the less chance the slider will come off.
Ready!
By the way, Mila prefers to first completely paint and decorate the fingers of one hand, and then the other - this way there is less chance of smearing the varnish or damaging the wet design.
Work on mistakes. What to do, if…
...the sticker turned out to be too big
Sliders are easily dissolved with acetone. If you have applied the film and there is excess sticking out at the edges of the nail, remove it with nail polish remover. Dip a flat brush and work along the outline. The movements should be short and jerky, otherwise the slider may come off entirely.
...if the slider is too narrow
Drop a little water on it and effortlessly pull the film with two fingers in different directions.
So it will become wider by the desired couple of millimeters.
If you have any questions, watch the Lakodoma video instruction.
Price: 250 rub. for a set with two design options on the Lakodom website
Do you design your nails yourself or do you trust it exclusively to manicurists?)
How to work with 3d sliders
Nail sliders, the designs of which can be very diverse, also include the latest development - 3D stickers. The volume effect is created due to the fact that the lines and image patterns of the drawing are formed in such a way that they form a visual phenomenon of the volume of the image. It looks especially unusual on nails.
This aqua sticker covers the entire nail. Among the many sets of sliders that are sold in cosmetic stores, you need to choose those that guarantee a 3D effect. The slidet is applied in the same way as all other aqua stickers of this type.
After the sticker has dried, a dotted pattern is applied with gel polish over the entire surface of the nail, which, in combination with the existing pattern on the slider, will create the necessary shape in 3D style.
Types of nail sliders
On the market of materials for nail design, there is a huge variety of various elements with which you can create a manicure with 3D sliders:
- This decorative option greatly simplifies the work of the master, reduces time expenditure, plus these advantages, it is easy to work with sliders independently, and they are available in a large assortment of different types.
- The most common are films that completely cover the nail plate and create the effect of a pattern on the nail.
- Another type that is loved by many girls is 3D, they create the effect of a three-dimensional image on the nails.
- In addition to these common options, there are crystal slides, text, geometric and with a variety of patterns.
Types of nail sliders
video4
3D nail sliders
Transfer stickers that have convex or three-dimensional elements are 3D sliders for nails:
- The design is usually applied to a thin film, which is separated from the paper base by soaking in water and sliding.
- The 3D slider imitates a mosaic covering or modeling, be it geometric or floral patterns. This design looks interesting and new.
- There are many different types on sale, the most popular of which are floral images. Such stickers do not require a white background; they are applied over a slightly dried colored coating, dried and covered with a top coat.
- After drying the top, you can apply the transparent top again around the volumetric elements of the application and carry out final drying.
Crystal sliders for nails
Recently, beige nails with sliders or nail plates of a different color with these elements have become extremely popular:
- Often, crystal nail sliders are produced in the form of 3D images on a base sheet.
- Crystal film slides are much less common; they only create an imitation and flicker pattern.
- Crystal sliders appeared after the popular 3D stickers with plant and floral motifs.
- Crystal decals are three-dimensional images with a beautiful shimmering component; they are often made in the form of monograms, imitating crystal rhinestones and their inlay.
- Many manufacturers are experimenting with crystal motifs and making beautiful stickers in the form of shimmering mosaics or voluminous flowers.
Sliders for nails “space”
Nail slider stickers with space motifs are extremely popular:
- They come in two types: 3D and film. Both types look interesting and original.
- Common film stickers with metallic details are applied to the entire nail.
- Cosmic motifs are discernible in the images of planets, star clusters, flickering comets, shavings and satellites.
- Many of the images of space motifs on the sliders are fractal digital drawings; they fascinate and attract attention.
- Stickers with images of space are combined with a large palette of nail colors; they create a special mood.
- 3D space sliders can be made in the form of crystal or interspersed with metallized elements.
Nail sliders with inscriptions
One of the most popular types of nail decals is a manicure with inscription sliders:
- Different manufacturers offer stickers with different types and themes of inscriptions. They can be dedicated to your favorite holidays, carry some kind of message, or even be slogans or calls.
- An inscription is the best way to express your view of the world and yourself. There are inscriptions in popular languages. They go perfectly with picture sliders, complement them and emphasize the main mood of the nail decor.
- With the popularity of lettering, stickers with intricate calligraphy are also becoming popular. They can be either black or metallic.
Sliders for nails “flowers”
Nail designs with “flower” sliders are incredibly popular:
- The first stickers that came into the assortment of nail art masters had floral motifs, depicting beautiful roses, blossoming poppies and seasonal bouquets with fir cones, rowan tassels and maple leaves. Stickers depicting delicate flowers were designed to make the work of nail designers easier, trying to draw all the floral riots by hand.
- Flowers on decals can be found in a variety of colors: monochrome, bright, delicate spring, 3D. This pattern can be used to decorate one or several nails on one hand, and it will look appropriate with any nail color.
Sliders for nails “flowers”
Geometry nail slider
Geometric patterns are popular in most manicures. They are also used to create fashionable sliders for nails:
- Many craftsmen master the technique of applying geometry by hand, although this is difficult to do. This is where a variety of sliders with geometric patterns come to the rescue.
- The most popular are a combination of many shapes, interweaving geometric shapes, playing with symmetry and asymmetry.
- Geometric stickers can be 3D or simple film with an image printed on them.
- The geometry on the nails goes well with the matte finish.
- You can supplement such stickers with various metallized elements: foil, sparkles, bouillons.
- Geometric sliders are as easy to use as other types; these are one of the stylish and fashionable options for decorating nails.
Monogram sliders for nails
Monograms on nail plates can be easily drawn by hand with minimal skill. But fashionable nail sliders with twisted patterns are very popular among girls of different ages:
- This simplifies the process and reduces the time spent on design. At the same time, the variety of intertwined patterns in the form of decals is so great that you want to decorate the nail plates in different ways.
- 3D stickers in the form of monograms are popular both on their own and in combination with crystal slides or rhinestones.
- 3D monograms for nails are available in several of the most popular types: metallic colors, black and white. They go well with any color tone, and applying these slides to the nail is very simple.
Professional recommendations
Manicurists always, when you have a question about a specific nail treatment technique, I advise you to first contact them, show your nails and help you determine a nail care strategy.
Once this necessary step has been completed by professionals, they offer some tips for caring for your nails with this manicure:
- prepare the nail surface for gluing in advance;
- prepare all the necessary tools;
- stick the slider only on a clean surface;
- It is better to select a sticker for the nail in advance, cut it according to a stencil so that it fits perfectly on the nail plate;
- We must remember that this type of manicure takes a lot of time;
- if the sticker lays unevenly, then you cannot move it, it is better to leave everything as is, and cover the shortcomings with the help of some other decorative elements or do all the work again;
- After all the stickers are placed on the nails, do not wet your hands for 30 minutes.
Keeping these tips in mind, you can create beautiful nail decorations on your own, without the help of specialists.
How long does the slider design last?
This question worries any girl who has decided to resort to such a manicure. As in any other option, you always want to know the deadlines after which you need to take some decisive steps in order to correct the situation and extend their validity.
The sliders stay on the surface of the nails for the following period of time:
- on regular varnish for a week;
- on gel polish for three weeks.
In both cases, in order to extend the life of the sliders, you must strictly adhere to the technology of gluing them, as well as follow the rules of nail care for such a manicure.
Types of sliders
Sliders are usually called small pictures printed on a special film that is easily and quickly attached to nails as a decoration. This bright film is stored on a paper base, which is removed with water.
There are three main types of sliders:
- completely covering the nail plate;
- having a transparent base;
- with a dense patterned base.
Each type will be discussed in detail below.
Sliders for nails
Sliders covering the entire nail plate
This type is considered the easiest to apply to nails. The picture covers the nail completely and is then fixed with a fixative. This can be clear nail polish or a top coat of gel polish.
Original design
Transparent base
This slider nail design on gel polish is attached just as easily as the above option. At the same time, it looks much more impressive in light or transparent colors. A manicure covered with a matte, velvet or velvet top will look stylish. Such drawings are distinguished by the presence of well-drawn small details.
Floral drawing
Dense slider pattern
This type of design will significantly transform any girl’s manicure. The base can be absolutely any color. The choice depends only on the wishes and imagination of the owner of the marigolds. The top design can be decorated with sparkles, rhinestones, and ribbons.
Materials for work
Why do sliders peel off?
There are situations in which glued sliders do not last the period they are supposed to stay on the nails.
The plates begin to peel off, and this happens earlier than planned, the reasons for this phenomenon may be as follows:
- the base coat was applied incorrectly and not dried as required;
- poor quality stickers;
- the sliders were glued in violation of technology;
- no topcoat applied.
And another option, in which the sticker begins to peel off too quickly, is that the sticker itself is not dried enough and a fixing layer is applied to the wet sticker, which leads to peeling of the slider within 1 - 2 days.
Features of manicure with sliders: technique, advantages, disadvantages and photo samples
Working with sliders divided the masters into two camps. Some believe that the quality of manicure from the use of sliders suffers greatly due to the fact that the film on which the design is applied, in places of contact with the gel coating, prevents good adhesion of the varnish to the top, which is why the finishing layer may subsequently come off, which in turn affects the service life of the manicure. Others advocate the use of sliders, because they allow you to achieve a thin, clear design that is simply impossible to achieve using traditional means for painting nails - gel polishes and acrylic paints.
Photo from the site: Krasotkapro.ru
Photo from the site: krasotkapro.ru
It doesn’t matter that they are venerable masters, the important thing is that for those who are just starting to master the field of gel manicure and for amateurs, such “stickers” are simply a salvation, because they have a lot of advantages:
- Sliders allow you to create a clear, symmetrical nail design. Achieving the same contour, thickness of lines, symmetry and size of paintings on all nails is a difficult task, especially for beginners. One sheet of sliders contains designs for any nail size with clear symmetry and proportion for each finger.
- Sliders speed up decorating work. Even the simplest drawing using gel polishes requires a lot of time to work it out and re-trace it for clear color rendering. Naturally, all this results in certain time costs, both for the execution of the decor and for drying all the layers of the lamp. Sliders only require fixation and subsequent securing with a top layer. That's all!
- Sliders solve the problem of a scarce supply of gel polishes. Agree, a novice master has a very small assortment of varnishes, and amateurs have even less - 2 - 3 colors. Still, gel polishes are not cheap, and buying, say, black just for the sake of decoration is quite an expensive undertaking. But the sliders are full of all sorts of colors.
On a note
It is not at all necessary to purchase a large palette of colored gel polishes. Bored colors can be updated by simply mixing two or more varnishes of different shades. Use a regular palette for this and create new colors. The main thing is to use varnishes of the same brand. Coatings from different brands may conflict with each other.
- Sliders help hide mistakes made when covering nails. When you just start your first steps in creating a manicure, rough edges cannot be avoided. Bubbles from varnish, wrinkled coating, random speck that has polymerized with the next layer of gel polish, etc. - all these are annoying troubles that can ruin labor-intensive work. A slider carefully glued to the resulting defect will help save the manicure.
- Sliders distract from uneven nail shapes. It is not always possible to create the ideal shape of the free edge. The same sliders will help to distract from slight asymmetry.
Photo from the site: nailconcept.ru
Photo from the site: nailconcept.ru
As you can see, sliders are a real salvation for novice craftsmen and amateurs. It is not surprising that reviews of nail sliders on numerous forums dedicated to manicure have received many positive ratings. But still, it is worth mentioning the disadvantages of this design option. There are only three of them, they significantly affect the result:
- The main drawback, as noted above, is the instability of such a manicure. Indeed, there is a risk that the base coat, due to insufficient adhesion, will quite quickly move away from the nail along with the slider. The thing is that for reliable fixation, the dispersion formed when drying the gel polish in a lamp is important. In the case of sliders, the dispersion is covered with film. To prevent this from happening, when fixing the slider, craftsmen advise stepping back a few 1 - 2 mm from the colored varnish. around the edges. But this value is sometimes not enough. It can be especially difficult when fixing sliders to the free tip of the nail. This is a rather vulnerable area, and even reliable fixation of the end does not always prevent the varnish from coming off. Well, the slider contributes to this even more.
- Slider deformation at bend points. The nails have a natural relief, resembling an arch on the cut and a small hill in the center. Accordingly, there are tension zones and narrowing zones on the nails. As a result, small creases and bends always form in places of narrowing. Even if they are small and not visible to the naked eye, they ultimately form small roughnesses and voids, which are not always covered by the top layer. As a result, over time, chips and detachments of the top layer form in these places, and with it the entire coating comes off.
- Sliders that are poorly dried from water. When working with sliders, contact with water is inevitable (without it, they simply do not transfer to the nails). As you know, gel manicure “conflicts” with water. Of course, before applying the topcoat, you should remove beads of moisture from your nails. But in any case, a small amount of water may remain on the skin near the nail, and even under the slider itself, especially if it occupies a large area. All this affects poor adhesion of manicure layers.
On a note
To minimize the contact of gel manicure with moisture, use a little trick. To detach the pattern from the backing, do not put it in the water, just blot it with the back of it on a cotton pad soaked in water. The drawing will move away from the substrate in a matter of seconds, while remaining almost dry.
To avoid such troubles, strictly follow the manicure technique. Especially to help beginners, we suggest you watch a video of applying a slider design to gel polish.
Manufacturers of sliders - which ones to choose
Currently, many companies produce sliders, but among them there are those that make the most attractive, trendy and high-quality stickers.
The following options can be offered:
- Nataliya Korsa , the company has been producing stickers since 2013, since that time the company has developed its own design line of sliders, which allows you to choose the most optimal option from the offered range;
- Sally Hansen , these decals create a true salon-quality effect, although they are self-applied without the need for a professional, and they have recently launched varnish decals that allow you to create a smooth surface without a prior base coat;
- Amy's silicone-based stickers, which create a fairly reliable coating that is not subject to rapid deterioration, which, with the presence of quite a variety of designs, creates a stable popular reputation for these sliders;
- Faberlic stickers are famous for the fact that they actively use a thin lace ornament in translucent films; when glued to a nail, such an ornament on a white or transparent background looks simply great;
- stickers from the company Accessory offer a large selection of art prints of various subjects, in addition, the films themselves are so stable that without removing them you can safely wash dishes with detergent without worrying about their safety;
- nail foils are metallic foil-based stickers, they are very easy to apply and look extremely impressive on any nails, both short and long.
In any case, when choosing which stickers to apply on your nails, you need to decide for yourself what functionality they will carry, the options for images on the surface of the nails will depend on this, and they can be the following:
- an everyday option when you need to go to work or school, but at the same time feel completely in trend, in such cases a jacket in the form of a stripe at the end of a red nail with decoration in the form of a Chinese character is suitable, such stickers can be found;
- In autumn, warm colors are relevant: burgundy, brown, beige, the stickers themselves are in the form of openwork leaves, which can be used to decorate 1 - 2 nails, others can be made just one color, a good solution is a sticker with a maple leaf design;
- bright colors such as blue, green, pink are chosen in the summer; from the drawings, priority is given to the marine theme: fish, shells, boats;
- for a party, it is best to choose stickers with a black design, for example, a pattern of a panther, or use a mirror film;
- lace, openwork ornament and white base color - all this is part of a wedding manicure using sliders
The design of sliders for nails can be very diverse. And from the many options it is always easy to choose what suits different situations, seasons and life occasions.
