Acrylic nail paints are increasingly gaining popularity. This is a very simple safe material. Their main advantage is that they have a large palette, and for just 1000 rubles you can become the owner of a whole set with many colors of excellent quality. As for gel polishes, for this amount you will buy at most 2-3 bottles.
Acrylic paints work well; they can be used to create color mixtures, subtle elegant patterns, as well as bright details and even entire paintings. However, painting with acrylic requires skill because it dries quickly: if you hesitate a little, the drawing will dry out and it will be difficult to correct it.
If you are interested in learning more about the use of acrylic paints in nail design, then you will find a lot of useful information, namely: their types, how to choose acrylic paints for painting on nails, how to use acrylic, what ideas can be implemented in manicure with their help.
What is watercolor painting
Watercolor painting is one of the types of nail painting. Thanks to the use of special tools and techniques, the patterns on the nails resemble artistic watercolor drawings with their blurriness, halftones and fuzziness.
Watercolor painting, unlike many nail art techniques, requires artistic skills from the master, since each element of the design is created manually with a brush, but at the same time it provides almost unlimited possibilities for an original design.
You can create a drawing using watercolor technique using:
- special gel polish for watercolor design;
- nail paints “Watercolor drops”;
- acrylic paints;
- artificially liquefied gel polish.
Some tips for creating watercolor nail art:
- use a light base - white, beige, nude or pastel shades. Against a dark background, watercolor is lost;
- any dye, be it paint or diluted gel, must be sufficiently liquid. When applied to the nail, the color should be washed out. To check the degree of blur, do tests on a tip or other plastic surface;
- At first, when creating a design, use the examples of other masters. This will allow you not to be distracted by fiction and practice your technique.
Popular types of nail designs with acrylic paints
If a manicure is done by a novice master, this does not mean that the result will be boring and ugly. There are many style trends out there, and many ideas that even a beginner can do. The main thing in this matter is to get good at it.
Flowers
Even a novice master can master the simplest flowers, and the manicure will be stylish and beautiful.
French manicure with acrylic paints
The French jacket will look more original if it is decorated with some kind of pattern. Most often they decorate the ring fingers.
Abstractions and geometry
Clear lines and shapes always look stylish. For such patterns, in addition to brushes, you can use dots.
Romantic motives
The manicure will be more delicate if you decorate it with hearts and lace. Recently, various patterns and monograms have been especially appreciated.
Advice from professionals
When painting your nails with acrylics yourself, you should consider some recommendations from professional nail artists:
- To perform the procedure, you need to choose a comfortable place where your hand will lie without tension.
- When covering the surface, do not press hard on the brush.
- You shouldn’t choose a complex pattern for the first time.
- When depicting a drawing, first of all, draw an outline, which is then shaded.
- It is better to perform a complex design on one nail plate; on the remaining nails, depict simplified fragments that echo the main theme of the design in color.
- Any image made with acrylics must be fixed with a special fixative.
Lifehack for watercolor painting
To save time or if you lack artistic skills, use ready-made watercolor-style stickers. You can find them in online stores of nail products and, of course, on Chinese sites.
Stickers can be:
- water - to separate them, you need to place the fragment in water for 10-15 seconds;
- on an adhesive basis.
Before transferring the image to the nail, do a standard manicure, apply a top coat and a colored background.
Product price
You can purchase manicure paints at any specialized or chain store. You should avoid retail places of sale with mountains of vials or tubes piled into boxes - their cost and quality will be extremely low.
To check the suitability of the purchased paint, you need to lightly dip the brush into acrylic liquid. If the dipping area immediately begins to “tighten”, the paint is fresh; if the damage to the surface remains for a long time, the paint is expired or counterfeit.
Tip: If you buy a set of acrylic paints, check all the containers, not just one to choose from. You should not trust the information about the expiration date indicated by the manufacturer on the packaging, since its storage conditions are unknown.
The price of a bottle (20 ml) of acrylic paint for painting on nails from a well-known brand is 200 rubles. and more.
Formulations of the same volume from less popular companies cost 70-90 rubles. Standard forms of release of acrylate compositions are soft tubes, glass or plastic jars, as well as pencils for creating thin and clear inscriptions.
It's time to learn how to use acrylic nail paints.
Watercolor gel polish
Gel polish for watercolor techniques, or watercolor gel polish, is a special medium-density gel product that is devoid of ductility.
With its help, you can create abstract patterns or apply it pointwise, creating a flowing watercolor effect. Using this method, patterns are obtained, for example, as in the photo below.
Examples of gel varnishes for watercolor techniques:
For watercolor gel polish, you need to use a special base - without it, the dye will not spread. A large selection of watercolor gel polishes is presented by the Irisk brand in the “Watercolor” collection. The manufacturer also offers a special base - Wet Gel Polish.
To create a design, prepare:
- watercolor gel polish and a special base for it;
- colored gel polish for the background;
- base and top.
Step-by-step instruction:
- Apply a thin layer of your usual base – Kodi, TNL – to the nail plate and dry it in a lamp;
- Now prepare the background - with any gel polish, preferably a light shade and dry it again in the lamp;
- Apply a special base and, without waiting for it to dry, start creating your abstract pattern. The drops will spread, mix and form streaks;
- After finishing decorating, dry the coating in a lamp. Watercolor patterns need to be dried in LED from 30 to 60 seconds, in UV - 120 seconds;
- Secure the design with topcoat, seal the ends and dry again.
With gel polishes, you can try to create a meaningful pattern with a brush, but the process will be quite labor-intensive. It is recommended for experienced nail artists with well-practiced nail painting skills to use this method. At the initial stage, try using special or acrylic paint for these purposes.
Step-by-step instructions for use
Now let's look at detailed instructions on how to use gel nail paints. In this example, we described working with gel paint for coating with gel polish.
- Apply a base coat to the prepared nail and dry for 2 minutes in a UV lamp.
- Then we cover the nail with colored gel polish and dry it for 2 minutes in a UV lamp.
- If necessary, apply another layer of colored gel polish.
- We cover the nail with top coat and also polymerize it. Remove the sticky layer from the top, if there is any.
- Open a jar or tube of gel paint of the desired color and put the required amount on the brush. For painting you need to use special brushes for nail design. We looked at which brush is intended for what here.
- Let's start drawing. If the design is complex, we recommend drying each element separately in a UV lamp. Gel paint should be dried in a UV lamp for 2 minutes, in an LED lamp for 30 seconds - 1 minute.
- Depending on the need, cover the nail with topcoat and dry it as well.
How to remove gel paint from a nail coated with gel polish? To do this, you must first file off the top coat and pattern, then remove the gel polish with your usual special product.
Removal: how to remove gel paint from nails
The issue of removing gel paint from nails often becomes an element of controversy.
It would seem that the gel composition should be removed traditionally - in one of three options:
- sawing;
- remover with foil or clothespin;
- hardware.
In fact, gel paints are not affected by solvents. And all successful removals can be explained by the presence of lower and upper layers of gel polish on the nails. The remover dissolves gel polishes, and with them the intermediate layer with paint is additionally removed.
Those who choose this path should remember:
- mechanical cutting of the top reduces the time of foil wrapping - 5 minutes of waiting instead of 15;
- It is best to use a special Remover for gel compositions of paints and varnishes;
- At the end, you need to treat your nails with a degreaser and a buff to remove any remaining coating.
But still, gel paint is often removed from nails mechanically:
- A file with an abrasiveness mark of 100/180 grit;
- The cutters of the manicure machine are carbide or ceramic, corn or cylinder shaped.
The choice of method remains with the master and depends on the technical equipment of the manicure room.
VIDEO INSTRUCTIONS Gel paints today are the undisputed leaders among coatings in the nail industry. The cost of the material is comparable or even cheaper than gel polishes, the color palette will satisfy any artist, and the quality of the manicure directly depends on the skills and talents of the artist.
How to find your soulmate: tips for women and men
What happens if you stop washing your hair frequently?
15 shocking plastic surgeries that ended badly
Not all girls can boast of healthy and strong nails. The reasons for this are different - poor ecology, heredity, poor lifestyle, lack of microelements and vitamins in the diet and other factors. With the help of nail design and extensions, girls can hide most nail problems and attract attention to them with a beautiful design. Nowadays, various means are used to make designs on nails - polishes, gels, varnishes, but acrylic paints are the most popular. Their advantage is long-lasting paint durability, high quality and low cost of the material. Women can paint with these paints at home, even without professional skills.
Acrylic paints are often used on extended nails because the design lasts longer on them, but they can also be used on regular nails.
What is the best position to sleep in?
Is a man in love with you: 10 signs
What happens if you look into a person's eyes for too long?
Paint for painting “Watercolor drops”
Using watercolor paint, you can create both abstract and detailed designs, such as flowers. The paint is water-based and does not require polymerization - it dries in the open air within 30-120 seconds.
Watercolor paints offered by brands:
- Irisk
- Patrisa Nail;
- In Garden;
- Dona Jerdona.
To create a drawing, no special basic tools or other additional materials are required - the drawing is drawn on a dried background and secured with a topcoat after drying.
Step-by-step instruction:
- Prepare the background - apply a thin layer of base and color, drying each layer separately;
- Drop a little paint onto foil or a palette and use a thin brush to create the desired pattern on your nails. If it is necessary to blur the pigment, wet the brush in degreaser and then pick up dye on it;
- Wait for the pattern to dry and secure the design with topcoat.
For work, use any brushes that are convenient for the master and suitable for a specific pattern. If you haven’t acquired such a tool yet, take a look at sets from TNL or Roubloff. Roubloff has a small line of Watercolor brush sets specifically for painting.
Rules for using brushes for manicure. Basic techniques
Manicure brushes - types, purpose, how to choose and care
Manicure with acrylic paints at home
To make your nail design stylish and neat, you need to familiarize yourself with some rules:
- The most important rule is that the paint should not dry on the brush, otherwise you can say goodbye to the lint. Of course, you can try to soak the brush in a solvent, but it is unlikely that you will be able to paint anything with it after that.
- You should always use specialized paints.
- To get the perfect manicure, it is better to use water-based paints. Such pigments can be diluted, changing their density and structure.
- You should not skimp on brushes; cheap instruments with unnatural bristles are hard, quickly become brittle and go bald.
Following the above rules, making a manicure with acrylic paints at home will not be so difficult.
Popular manufacturers
We have already talked about such materials, now we will talk about the manufacturers. Common and well-known brands of acrylic nail paints include:
- “Polycolor” is one of the most popular series, famous not only for its durability, but also for its wide color palette. It is worth understanding that you will have to buy Polycolor acrylic paints for nails at a higher price than other brands;
- “Wealth” is produced mainly in the form of small volume tubes (up to 12 ml), which have a low price;
- "Oumaxi" belongs to the relatively inexpensive segment of acrylic paints and has a small selection of shades used to obtain a rich palette;
- Starlet Professional is usually sold in the form of kits, which allow you not only to use the original mixtures, but also to combine them with each other.
Paint selection
When choosing paint, the master must proceed from his preferences. The price category of the most famous brands is approximately the same, while the cost of acrylic paints is not very high, but the features of each are different.
Some pigments are ideal for watercolor painting because they mix well with each other and are diluted with water. The color palettes of different manufacturers differ in the presence of more or less saturated and bright shades.
Manicure with acrylic paints is not an easy task for beginners. To work with drawings, you need a certain palette of pigments; initially, six colors will be enough; they can be mixed with each other, obtaining new shades. But you need to purchase a set of a certain brand so that the acrylic does not change its properties when mixed.
Acrylic paint
The main advantage of working with acrylic paints is their drying time. If paint for watercolor painting sets within 1 minute, then acrylic paint gives the master 3-7 minutes to maneuver, refine and correct flaws in the drawing.
Prepare for work:
- acrylic paints in the desired tones. You can buy them individually or as a whole set, like TNL or Runail;
- brushes for painting. Choose brushes based on the complexity and composition of the drawing. To draw small details, use the thinnest brush, and to fill a large area, use a flat one;
- base and top;
- water;
- gel polish for the background.
Step-by-step instruction:
- Before painting, cover your nails with base and color, drying each layer in a lamp;
- Drop a little water and 1-2 drops of acrylic paint of the desired shade onto the foil or palette. Try not to add too much water at once, test the dye on a tip and dilute gradually until you get the desired shade;
- With light movements, outline the design on the nail and gradually draw out all the details;
- To add volume, shade large elements of the pattern with highly diluted paint with a light color tint;
- After finishing the painting, wait for 3-7 minutes to dry and cover the pattern with the finish.
Painting on nails: materials, step-by-step instructions, design ideas
How to work with acrylic nail paints?
Acrylic paints are easy to work with and do not require special tools.
Most artists use nylon brushes with elastic bristles, especially for drawing thin contour lines. And for filling large surfaces, flat proteins or a column are suitable. Brushes do not require special cleaning when working; the main thing is not to forget to rinse them in water in a timely manner, since dried paint no longer dissolves and can deform the pile. Accordingly, you can say goodbye to the unique tool of the “nail creator”. How long does acrylic nail paint take to dry?
The specific drying time depends solely on the manufacturer. However, if you apply a pattern to your nails in a thin, narrow layer, the acrylic paint usually dries within a few seconds. Much more paint “hangs” on the brush, which increases the drying time to several minutes.
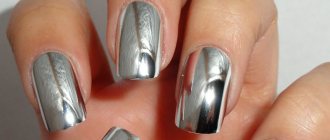
According to their covering properties, acrylic paints can be divided into several types: transparent, dense and translucent. Separately, we can also distinguish pastel paints, formed by mixing color with white. However, experienced craftsmen, as a rule, independently combine colors on the palette, achieving the required shade. Of the paints with additional decorative effects, nail technologists are especially fond of “metallics” and shades of pearls, which, even with a small addition to the design, give it a special and even chic look.
But whether the paint is glossy or matte does not matter at all, because according to design technology, any decorative coating is still additionally secured with a fixative, which gives the necessary shine and evens out the surface of the nail.
The basic colors, without which a true professional cannot exist, are red, blue, yellow, black and white. All the rest, as we know from a school drawing course, can be obtained through mixing. But since one of the most common motives for nail design is floristry, masters prefer to have green on hand as well. At the same time, it is not at all necessary to buy a large set; 6 colors are enough for full-fledged work. The only thing worth considering is that white color tends to run out faster than others, so you will have to purchase it in larger quantities and preferably from the same brand as the existing palette. This will eliminate the appearance of marble effect and unexpected extraneous shades when mixing.
What is gel nail paint?
Modern nail art uses a wide variety of materials, using which you can create an almost imperceptible delicate and light pattern, as well as bright, eye-catching designs, make the coating translucent with light lace, or decorate your nails with paintings worthy of the title of masterpiece. One of these materials is gel nail paints.
Gel paint or gel nail paint is a thick, plastic substance with high pigmentation. This substance does not bubble or spread. Just like acrylic used for nail extensions, it polymerizes under the influence of ultraviolet lamp radiation for a maximum of two minutes.
How to properly paint wooden products with acrylic paints? The properties of this substance allow you to create super nail designs. When working with gel paints, the master can take his time, fearing that the material will harden, and carefully draw every detail of the design or element of the pattern.
Gel nail paint is a universal material. You can paint with gel paints on both natural and extended nails of any shape and length. You can make both Chinese and elegant French manicures with gel paints, and also use them for aquarium design.
In 2022, French nail design is a combination of poorly compatible design elements, colors and patterns. The classic white tips of the nails are giving way to dark, black, foil, silver colors, various intricate ornaments and patterns that highlight the free edge of the nail. Today, making a French gel paint does not mean drawing simple white or colored stripes on the free edge of the nail, but also skillfully choosing patterns, rhinestones, sparkles, foil for them, in a word, it is interesting to play with the classic version of this type of nail design, beloved by many girls.
How to remove acrylic paint from nails, clothes and hand skin?
There are a few things to consider when working with acrylic paints.
Paints that are easily diluted with water before drying are no longer afraid of water after drying. Therefore, if they come into contact with clothing during work, Gel paints have been used for nail designs for many years, but questions about the material do not lose their relevance. What is the difference between gel paint and gel polish?
How to apply and remove designs from nails? Is it possible to paint nails with gel paint, or is the material only suitable for drawings?
Paint and shellac are often called interchangeable products, but this does not indicate their identity.
The following properties are considered characteristic of gel paints:
- Brightness - in manicure, paint is usually applied in one layer;
- Thickness - you can safely draw designs without worrying that the composition will flow or dry out;
- Uniformity - the pigment is evenly distributed in the composition and does not settle to the bottom.
At the same time, there is a similarity with gel polishes.
Both materials:
- polymerize under the influence of UV or LED lamps;
- stays on nails for a long time;
- allow you to create the most current nail designs.
Another advantage of gel paints is easy mixing of colors. The master, like a real artist, can create his own palette of shades, delighting clients with exclusive paintings and unusual combinations.
What you need for a manicure
Before you start designing your nails with acrylic paints, place the following items close to each other: acrylic art paints of different colors (a few pieces will be enough to start), dots, a thin paint brush, a clear topcoat, colored varnish, a container with water for cleaning brushes, a palette for mixing paints, a napkin for blotting the brush, nail polish remover, a cotton swab for correcting the design and cleaning up mistakes.
For more complex designs, you can also prepare pebbles, beads, rhinestones, and seed beads.
Tip: for acrylic manicure, it is better to use synthetic fiber brushes.
Pre-workout
Before you start doing a step-by-step manicure with acrylic paints, you need to learn how to use a brush correctly - understand how it is more convenient to hold it, how hard to press, how much paint to take. Therefore, for girls just starting to learn the basics of performing manicures with acrylic, it is better to start by practicing not on nails, but on any other surface, for example, on a piece of cardboard or plastic.
Cover the selected surface with colored varnish and wait until it dries completely. Apply a little paint to the palette and mix several shades. Try to draw simple lines on the surface first with different brush angles and different pressures, taking different amounts of paint.
Then complicate the task: draw a nail plate on the surface, apply varnish to it, let it dry and try to complete the chosen pattern.
Once you feel that you have become more confident in using the brush, and the drawings have become clearer and brighter, you can begin to perform a manicure with acrylic art paints on real nails.
Step-by-step manicure
Painting nails with acrylic paints for those just starting to try this type of manicure consists of the following steps, performed step by step:
- Get your nails done. Remove the cuticle, give your nails the desired shape, and degrease the nail plate with nail polish remover.
- Cover the nail plate with a base coat. Wait for the base to dry completely.
- Apply a thin, translucent layer of colored varnish. Wait until completely dry. If you want the color of the surface of the plate to be more dense and non-transparent, apply a second layer of varnish. Wait until it dries completely again.
- Take a container of water and dip a brush into it until it becomes soft. Blot the brush with a napkin.
- Apply acrylic art paints of the selected colors to the palette in large drops. If necessary, mix colors to obtain the desired shades. It is advisable not to mix too much, otherwise the drawings will turn out complex and multi-colored.
- Start designing. Apply painting elements of the same color using gentle movements. Apply painting elements of a different color only after the previous one has completely dried. When applying small dots or droplets, use dots. Let the manicure dry.
- Apply topcoat sealer. Let it dry. Manicure is ready (video)!
Read also: All about strengthening nails with shellac at home
Advice: for beginners who are just starting to try to draw patterns on nails, we advise you to first use a design in which complex painting is applied only to 1-2 nails, without applying to the rest or with simple, simple patterns applied to them in the form of stripes, droplets, dots . Gradually complicate the design by adding new colors and elements.
Benefits of acrylic
Acrylic art paints have appeared on the market recently, but are already loved by professional and novice manicure lovers due to their positive properties:
- long-term preservation on nails due to weather resistance and flexibility (do not chip or crack);
- a wide variety of colors, while the brightness and shine are maintained throughout the entire time they are on the nails, and the possibility of mixing provides additional shades and scope for design ideas;
- acceptable, quite affordable cost;
- long shelf life;
- economical material - one tube is enough for several applications;
- quick drying, allowing quick application of the next layer and preventing smearing of the previous layer;
- harmlessness – during operation there is no evaporation of substances harmful to the human body;
- resistance to UV rays, which is why the painting is not susceptible to fading from exposure to sunlight;
- easy solubility in water allows you to adjust patterns during application;
- Acrylic nail paints are very convenient for beginners because of the ease of application.
Information: the only disadvantage of acrylic art paints is the poor tolerance of very low temperatures, at which the coating loses some of its properties.
Application technique
Acrylic paints are diluted with ordinary water. You can work with them in any manner and technique. For example, miniatures can resemble works in oil, watercolor or gouache.
The composition can be diluted to a transparent or translucent state - it all depends on the final task. Each nail design artist has his own style, and original designs emerge from under their brushes. But there are several basic application techniques that can be easily combined.
Oil painting
Oil painting with acrylic paints on nails is one of the most popular techniques and is used most often. The point is that nail art masters do not dilute paints and work with a very thin brush. Strokes come in different shapes, sizes and textures.
The end result has the effect of an oil painting. Most often, work is done with several colors along the edges of the nail or the image is stretched over the entire surface. The manicure looks very bright.
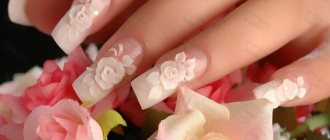
It is the oil technique that is used for painting three-dimensional objects attached to the nail plates. This is a favorite sculpting technique with modeling acrylic powder or a special gel composition, with the help of which entire bouquets are created on the fingers. Finished three-dimensional objects are brightly painted.
Gouache painting
Gouache is a bit like oil painting. The difference is that paints require dilution.
In a drawing, layers of color often overlap each other. It turns out to be effective, although somewhat rough. There is no charming airiness that attracts other techniques. However, errors in work are less noticeable, and flaws in painting can be easily covered up with a new layer.
These patterns are very reminiscent of those used in the production of communist propaganda posters in the twenties of the last century. They are bright, clear and concise.
In gouache painting, paints that give a matte surface are often used.
Watercolor painting
The paints are diluted with water until translucent and applied layer by layer. As with watercolor painting, transparency is key. This technique makes excellent transitions within a picture or background.
However, the difficulty is that even when painting using a dry technique on paper, watercolors take some time to dry. Acrylic “sets” almost instantly. Water slightly slows down the hardening process, but the master needs to work very quickly.
Sliding
The slide technique requires mixing structural gels and acrylic paints. At first, this mix looks whitish. But there is no need to worry - after drying, the paint will take on its real color. The manicure turns out juicy and bright. Experienced artists manage to create deep shades and complex gradations of color.
This technique requires experience as you need to know how to mix acrylic and gel to get the desired shade. An interesting “aquarium” design is performed using the sliding technique.
Glaze
Glazing is a very ancient technique. The famous Mona Lisa by the Italian master Leonardo da Vinci was painted in a similar manner. In fact, it was he who developed this complex technology.
Its peculiarity is that almost transparent layers of paint are applied to each other. After drying, the effect is amazing. Skilled artists create smooth, delicate patterns with almost imperceptible transitions. The designs on the nails come out very elegant and voluminous. They are transparent almost to the very base.
Acrylic is diluted in water and applied to the nail plate with tiny strokes. The goal is to achieve color shifts by working with many shades. And this must be done as quietly as possible. Be sure to wait until the previous layer dries.
But there is a big drawback - such a manicure takes longer than usual and requires good practical experience and mastery of drawing techniques.