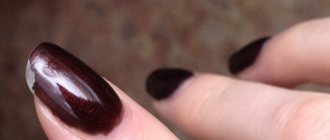
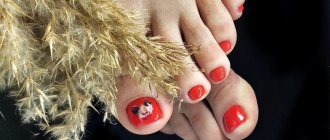
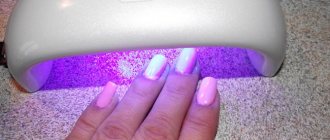
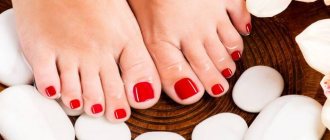
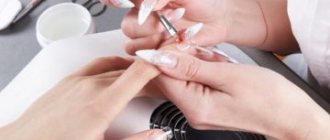
Gel polish on the legs is performed using a primer, liquid base, flower bed and top. But first, the nails are prepared for the procedure - excess length is removed and shaped, the cuticle is pushed back and adhered skin particles are removed from the base of the plates.
Unlike manicure, leveling with a base is not performed; other products are also applied as thinly as possible. But any design can be made, including with rhinestones, sparkles, kamifubuki, drawings, and foil. In the salon, a pedicure costs from 700 rubles. up to 5000 rub.
Features of gel polish on legs
Gel polish on the legs is done and worn a little differently than a manicure:
- nails cannot be long, they are cut and filed, if not to “zero”, then still quite short;
- decor is used more modestly than for hands, since there is a higher chance that it will get in the way and come off faster;
- leveling with a base is not done during pedicure;
- over-wearing the coating is even more dangerous than with a manicure, especially during the season of closed shoes;
- design can be varied;
- Finger separators should be used when applying the coating, otherwise it may smear.
Material advantages
A pedicure with a polymerizing coating has several advantages:
- the design can be made much more interesting than with regular varnish;
- it lasts longer, maintaining pristine freshness;
- it is not hampered by exposure to sea water or chlorine in the pool;
- feet look well-groomed for 2-3 weeks without additional effort.
How to do a pedicure with gel polish
Pedicure with gel polish is performed in a certain sequence:
- Treat feet with antiseptic.
- Nails are prepared for coating.
- Put on finger separators.
- Wipe the nail plates and the skin around them with a degreaser.
- Apply primer and let it air dry for a minute.
- Use a thin layer of liquid base for each nail.
- Dry it in a lamp, placing your foot there so that your toes are exposed to the radiation.
- Remove the sticky layer, if any.
- Apply gel polish of the selected shade, including coating the end parts with it.
- Dry the layer of the flower bed in a lamp, remove the stickiness.
- The finish is applied and polymerized.
Preparation for coating
The coating will lie flat and will look aesthetically pleasing only on prepared nails:
- The cuticle is pushed back with a pusher.
- The pterygium is thoroughly cleaned.
- If the cuticle is wide, it is cut with special scissors or nippers or tweeters.
- The nails need to be shaped, but so that the corners are not too cut and then grow ingrown.
- The ends are processed with a file so that they become smooth, without burrs.
- The plates are wiped with a degreaser to remove dust and excess moisture.
Watch the video on how to properly do a pedicure and treat your feet:
At the preparation stage, attention should also be paid to the feet, since neatly painted nails look discordant with rough, unkempt heels. They can be steamed in water or treated with a keratolytic agent. The softened skin is polished with a hardware attachment to remove excess stratum corneum.
How do the characteristics of feet and nails affect the frequency of pedicures?
The frequency of the procedure depends on many features, for example, the intensity of growth of the nail plate, skin type and the degree of its sensitivity. There are cases when the issue of the frequency of professional care and hardware treatment needs to be addressed especially carefully and with caution:
- curved or ingrown nails;
The pathological shape and characteristics of nail growth is a problem that cannot be solved at home. In this situation, even a hardware pedicure and the services of an insufficiently experienced specialist can cause harm. With a similar problem, you need to visit beauty salons at least once every 10-12 days.
Deformation of the nail plate
- presence of cracks or corns;
Rough, problematic skin on the feet definitely needs a hardware pedicure and proper care. If you don't take care of your feet, more serious problems may arise. In this situation, it is enough to carry out the procedure at least once every two to three weeks. After the procedure, lubricate the feet with a special cream that has a moisturizing effect.
- slow-growing coating;
This is not a very serious problem, however, it also requires attention and a special approach. You need to renew the coating at least once every three weeks, since your natural nail will crack if it cannot withstand numerous layers of coating.
Professional pedicure for cracked nails
- foot condition
There are many diseases that also affect how often you need to get a pedicure. These are flat feet, congenital joint deformities, dermatological diseases with localized lesions on the legs.
The frequency of the procedure and compliance with all its stages guarantees not only an aesthetic appearance, but also healthy legs and nails.
How long does a pedicure with gel polish last, and how often is correction needed?
A pedicure coated with gel polish should be worn for no more than 2-3 weeks, although toenails grow more slowly than fingernails.
But a longer absence of correction in this case is more dangerous. The slightly grown edge rests on the shoe. And this leads to increased stress on the nails. They may begin to peel, and your fingers may hurt. There is a danger of nails detaching from the bed, deformation, and onycholysis. Therefore, correction should be carried out every 2-3 weeks. It depends on the growth rate of the plates, everything is individual.
What not to do during a pedicure?
What not to do before a pedicure?
- Don't cut your nails very short. ...
- Do not apply foot cream or oil before the procedure - this will make the specialist’s work more difficult. ...
- You should not remove the overgrown coating yourself - this will make your nails very thin, they will peel, break and hurt!
Interesting materials:
What is the difference between 585 and 750? What is the difference without VAT and without VAT? What is the difference between a civil marriage and an official one? What is the difference between REM and NREM sleep? What is the difference between Neanderthal and Homo sapiens? What is the difference between plaster and putty? What's the point of staying alive? What are the features of interpersonal relationships? What is the purpose of programming systems? What is Bubnov's truth?
How safe is it for nails?
A nail pedicure is as safe as a manicure if certain conditions are met:
- coat only healthy plates;
- when preparing them, work carefully, do not press too hard with a cutter or hand tools, and do not go deep under the cuticle;
- use high-quality products - varnishes, bases, tops, etc.;
- sterilize instruments or buy disposable ones;
- Do not wear tight shoes, and if you have problem feet and nails, leave the design with gel polish until summer.
There is another important nuance - when performing a pedicure, they do not use a base for leveling. Otherwise, there will be too much material on the nail plates, which will lead to damage. Masters often use single-phase gel polishes for pedicures so that the layer on the nails is thinner. You should also not overload them with an abundance of other components - powder, gels, tops.
It is better to attach voluminous decor (rhinestones, modeling) closer to the base rather than to the ends. Otherwise it will quickly fall off. In the meantime, it will be worn and may cause discomfort.
Pedicure frequency by season
The season, climatic conditions and the type of shoes that are selected for each season have a direct impact on the frequency of the procedure.
Spring.
Spring is the period when warmth comes and winter shoes are replaced by elegant boots, boots, and, possibly, shoes. A beautiful manicure and pedicure plays an important role at this time of year. On average, at this time of year, representatives of the fair sex visit salons at least once every three weeks. However, the exact frequency of the procedure depends not only on the time of year, but also on other features of the lady’s legs.
Summer.
Summer is the warmest and most awaited time of the year. It is at this time that girls and women wear the most open shoes and the appearance of healthy, well-groomed legs is especially important. During this period, the services of a specialist are required at least once every three weeks, and possibly even every two weeks. At the same time, it is still worth taking into account individual characteristics, the presence of chronic diseases, skin type, the degree of its sensitivity, and many other factors.
Autumn.
In autumn, women's legs hide in closed shoes, and the skin often suffers from a lack of vitamins. Therefore, comprehensive care, massage, specialist services, as well as the use of moisturizing, nourishing creams, soothing foot baths and taking a complex of vitamins are very important. At this time of year, you can visit a specialist or do a pedicure at home a little less often, once every three weeks.
Winter.
In winter, you don’t have to wear open shoes, but this doesn’t mean you should forget about getting a pedicure. At this time of year, at home you need to use moisturizing and nourishing creams more often, as well as do massages and relaxing baths. At this time of year, it is enough to do a pedicure once every three to four weeks, unless there is a need to perform the procedure more often.
Foot baths
Interesting designs with gel polish on legs
Fashionable design options for gel polish on legs are:
- French. The classic one with a white free edge is popular. But the main color is opaque pink. Basic blue gel polish and white for a “smile” are also in fashion when doing French.
- Bright monochromatic. They use a matte or glossy finish, both of which look very beautiful. The rich color is complemented with rhinestones. But they are not glued to the most noticeable thumbnail, but to the one nearby, and along the cuticle.
- With drawings. Hand painting is done on the largest nail. If it is a slider, it is glued there. The latest trend for summer is whole fruit or slices. Funny silhouettes are also in fashion - black foot prints or cat paw prints. You can make different designs on the right and left legs.
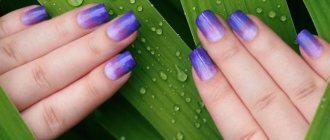
- Gradient. The classic vertical one is done on the thumb. And the rest of the nails are painted in the same colors, but entirely. For example, if lilac and yellow are used for the thumb, then on the next finger the plate is covered only with the first, then with the second, etc.
- With sparkles. They decorate the entire nail of the second finger. For the rest, use a bright color and a matte top. You can highlight the holes with sparkles.
- A combination of three shades of gel polish, one of them is light. They cover the nail on the thumb. And the second and third colors are used to make the design - leaves, twigs, flowers, etc.
- Stripes. They are made of different lengths, vertical or horizontal and drawn on the thumb in three or four similar shades (pink, lemon, beige or red, fuchsia, burgundy). For the remaining nails, use one of the same colors, covering the plates completely.
- In white. They make a monochromatic manicure or an ornament from small details. In the second case, you can draw it not only on the thumb. Or they make drawings of insects (ladybugs, flies, multi-colored butterflies) on a snow-white background.
- With kamifubuki. For the thumb, you can take different sizes and shapes. For the rest - small stars and circles. The background can be made pastel or bright - as desired.
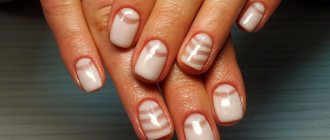
- With negative space. It can be played up in different ways - with silver sparkles and a cool shade of the base color, with foil stripes, with bright colors of gel polish.
Nail design
If you wish, you can turn your toenails into a whole work of art; all you need is a little imagination and a few colors of gel polish. There is also a pedicure, for which additional elements are used, for example, rhinestones. Pedicure, like manicure, can be performed in both classic and modern styles.
Abstraction
This type of design definitely cannot be called classic. But it is very variable and does not require special artistic skills. When performing abstraction, the design on the nails is applied in a chaotic manner or repeated on each nail, but without maintaining accuracy. If you have the appropriate skills, you can draw something.
Abstract pedicure does not require precision in drawings and lines
Gradient
This type of pedicure involves color extraction. The direction does not matter; the gradient can be horizontal or vertical. Sometimes the color stretches from one nail to another. There are many options, and they are all popular. This type of coating may contain several colors or only two colors.
There are several technologies for performing gradients. This design can be done with a brush or sponge. In the first case, stripes of shades are applied to the nail, and the border between them is shaded with a brush. Using a sponge is much easier. You just need to apply the colors on it and stamp it on your nails.
Performing a gradient requires certain skills and dexterity. The design is good for summer.
Pedicure with rhinestones
Rhinestones make your nails look elegant, and designs using them are very easy to implement. It is enough just to place them on the nails along with the last layer of gel polish. The top coating is already applied to the rhinestones and allows them to last longer.
Using rhinestones you can create various designs
Pedicure in monochrome
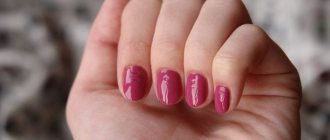
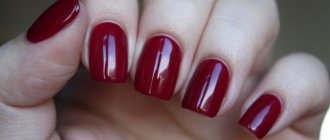
Monochrome is the most conservative type of pedicure. It involves using only one shade of gel polish. But this does not mean that the pedicure will be boring, because the shade palette includes many bright and unusual colors.
Monochrome pedicure can be made glossy or matte
Broken glass design
The nail pattern resembles fragments. This trend is relatively new and looks unusual, creating a 3-D effect. To perform such a pedicure, you will need holographic film or cellophane; you can also use foil. The material is cut into pieces, which then need to be applied to the last layer of gel polish before drying it in the lamp, so that they stick to the nails. The pedicure, as usual, ends with the application of a top coat.
Holographic film for “broken glass” is cut in random order
Video: pedicure design ideas
Which gel polish lasts best on toenails?
For toenails, nail technicians prefer CND gel polish. It applies thinly but does not smear. There are different colors, quite dense, the pigment in which is distributed evenly. Vogue, PNB, UNO, TNL products are also suitable for pedicure.
The pigmentation of gel polishes is a particularly important property when performing a pedicure. If the color is dense, you can apply it in one layer, which is a big plus for toenails. It’s good when the product is of medium thickness.
A texture that is too steep can cause the gel polish to apply thickly or unevenly. And it is physically difficult to apply it to small toenails. And too liquid gel polish spreads, and in one layer it can become bald.
Peculiarities
Shellac appeared in the nail industry a long time ago (more than 10 years ago) and has firmly gained a leading position. This is a modern and very durable nail coating.
Shellac contains:
- Polymers;
- Gel polish;
- Pigment.
Unlike regular varnishes, shellac does not dry on its own in the open air. It requires short drying in a special UV lamp so that the application result is thoroughly fixed. A few years ago, such lamps were only available in beauty salons and private manicurists/pedicurists, as they were expensive.
@isadoranailsstudio
@manicure_sets_shellac
But now you can find more budget-friendly options for UV lamps, which are usually easy to use and require battery power.
@vse_dly_krasoti__ussur
Shellac pedicure with a colored or plain coating has a noble appearance and is easy to apply. Depending on the amount of pigment in the composition, apply 1-2 layers to consolidate the effect. Between layers of varnish, the nails are dried under a UV lamp.
@manikur_odintsovo
@pedicure_journal
@look.nails178
What to consider when deciding to do it at home
It is better to do a pedicure at home without a device if you do not have clear knowledge and skills in working with it. In addition, using the device on yourself is physically difficult and inconvenient, so there is a high risk of injury. The cuticle should not be removed either. On the toes it is thin, barely visible, there is a danger of cutting off excess skin and getting hurt. It is enough to move it aside and remove the pterygium with an orange stick.
Gel polish will lie smoothly and beautifully if you remove streaks before polymerization. For this, toothpicks, orange sticks, degreaser or cleanser are useful. In addition to them, you should prepare the necessary tools and accessories in advance.
The coating is also removed without a device by soaking. Use gel polish remover, foil or silicone caps.
What material is needed
To perform a pedicure yourself, you should prepare the following tools and accessories:
- nail clippers or scissors, because on the legs they are denser and thicker than on the hands;
- metal pusher or tool with a silicone tip;
- several orange sticks;
- cuticle scissors;
- a nail file, maybe an inexpensive and simple metal one;
- lint-free wipes;
- degreaser;
- primer;
- liquid consistency base;
- gel polish;
- finishing agent;
- ultraviolet or LED lamp for polymerization of the coating.
This is a mandatory set of items, without which a quality pedicure is impossible. Lovers of intricate designs will also need decor.
Procedure
Pedicures at home are done almost the same way as in a salon, but they do without a device, and you don’t have to cut the cuticle. It’s not worth working with cutters without having learned how to do this with your toenails. Without knowledge and experience, it’s easy to get hurt, and instead of a pedicure, you end up with lameness until the wound heals. And physically performing a hardware pedicure on yourself is very inconvenient.
The same can be said about working with cuticles. It is enough to push it away with a pusher and clean the pterygium to make the coating smooth and aesthetic. In general, the procedure consists of the following steps:
- Nail preparation, which includes cutting off excess length, smoothing the edges with a file, pushing back the cuticles with a pusher and dry cleaning the pterygium with an orange stick.
- Treating the plates and skin with a lint-free cloth soaked in a degreaser to remove dust and moisture.
- Using a primer to improve the adhesion of the material to surfaces.
- Application of the base product and its polymerization in the lamp.
- Coating with gel polish, performing a complex design (this stage may consist of several intermediate steps, interspersed with drying in a lamp).
- Polymerize the flower bed and remove the sticky layer after a couple of minutes.
- Using the top, drying it in a lamp.
For the convenience of applying the base, flower bed and top, finger separators are put on, and in the absence of a device, cotton pads rolled into a tube are used. You can steam your heels in hot water or soften rough skin with a keratolytic. Then it is cleaned off with a foot grater. When the pedicure is completely ready, apply oil to the skin around the nails and cream to the heels.
How to remove
It is better to remove the coating at home by soaking:
- File off the top with a hard file.
- Apply gel polish remover to pieces of cotton pad.
- Attach them to each nail and put foil or silicone caps on top.
- Leave for 15-20 minutes.
- Remove the foil and cotton wool, and use an orange stick to clean off the sodden coating.
- Wipe your nails with gel polish remover again.
- Make a foot bath to wash away any remaining solvent.
Advantages and disadvantages of shellac coating on legs
Like any product, shellac has its advantages and disadvantages. First, about the advantages:
- This is truly a very durable coating. Having done such a pedicure, you can forget about your nails for at least three weeks.
- You can model your nail and give the tip any shape.
- It is very convenient to use.
- If your nails are prone to brittleness, then shellac will make them stronger; the word Shell means “shell.”
- Hypoallergenic, does not contain any harmful substances.
- A rich palette of shades and unlimited design possibilities.
Is everything so wonderful? Alas, not quite. Here are the disadvantages that are important to be aware of:
- Shellac dehydrates the nail plate. The nail becomes dry and brittle, so experts recommend taking a break from applying it and giving your nails nourishing baths at this time.
- Shellac must be dried under a UV lamp, and this is not always beneficial for the skin around the nails.
- If nails with shellac grow long, they look untidy. However, this is true not only for shellac.
- On flexible and thin nails, shellac may peel off. In addition, there is a risk of damaging the nail plate.
- High price - it is more expensive than gel polish.
And, of course, this is true for any coating; shellac should not be applied to sore nails.
Price for services in the salon
The cost of a pedicure in a salon ranges from 800-1000 rubles. up to 5000 rub. This depends on many factors:
- establishment level;
- the chosen design, the more complex it is, the higher the price;
- Is it necessary to remove the old coating from another master;
- Is there a need to correct the shape of the nails by extending the corners?
In any case, this is usually a more expensive procedure than a manicure, unless the latter is accompanied by complex actions (increasing length, strengthening with gel, etc.).
A pedicure adds completeness and well-groomedness to your look. And you don’t have to do it to match your manicure. On the contrary, on the legs the gel polish can be brighter and the design more explosive.
What are the contraindications when using Shellac for pedicure?
The components in the gel polish certainly protect the nail plate from damage, strengthen it and improve its external condition. The only reason to stop using Shellac is fungus. The disease must be treated, and not masked with a beautiful and spectacular coating. If there is the slightest manifestation of fungus, this is the right way to go to the doctor and buy medications, otherwise you can lose your nail and there will be no way to do a pedicure.
By contacting a professional master and eliminating negative factors that affect the coating, the pedicure will retain its original appearance for at least 3-4 weeks. And during this time you won’t have to be afraid to wear open shoes and sandals.
