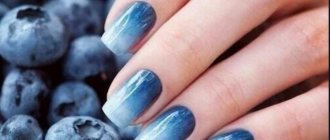
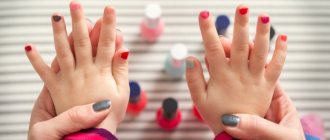
A gradient on nails with gel polish is the use of several colors on a plate and blurred boundaries between them, which looks very natural even with contrasting tones. It can be vertical, horizontal (classic), chaotic, there are “baby boomer” techniques, French, with sparkles, mirror rubbing, velvet sand, geometry.
The design is made with a comb brush, which blurs the boundaries of shades, or with a sponge, air puffing, or sponge. You can do it with an airbrush, but it requires special paint.
What does gradient mean on nails with gel polish?
A gradient on gel polish nails, also called ombre or stretch, is a smooth flow of one tone into another - from light to dark or vice versa. This technique has something in common with French manicure, but the most significant difference is the absence of a clear boundary between shades.
Transitions should be blurry, that's the beauty of design. And the shades of varnish are very different. But they look better when they belong to the same color scheme, for example, burgundy, red, pink.
We recommend reading the article on how to do a French manicure with gel polish. From it you will learn what you need to do a French manicure with gel polish, which gel polish is better and the types of French manicure with gel polish. And here is more information about how gel polish differs from shellac.
Gradient manicure techniques
A gradient style manicure can be done in several different ways. The gradient on the nails with a sponge is done in the first two methods, and in the third using a brush.
1. The first method is one of the easiest. It requires several shades of nail polish (2 or more) and a small piece of sponge. Strips of varnish are applied to it in the required sequence. Then the sponge is gently pressed onto the surface of the nail - the colors are transferred to the nail plate. To achieve maximum brightness of colors, you can first apply a thick white varnish to your nails. Excess color is removed from the skin with nail polish remover, and the nails are covered with a topcoat - a finishing coat that fixes the color and gives a glossy (or, if desired, matte) finish to the manicure.
Gradient manicure (photo) is performed step by step on each nail:
2. The second method allows you to achieve the smoothest color transitions. This gradient is performed step by step: varnishes of different shades are first mixed on a flat surface, and then the colors are transferred to a sponge, and only then to the surface of the nail. This is the most common way to make a gradient manicure with varnish (step-by-step photo):
3. The third gradient technique allows you to do without a sponge. This is the easiest way to make a transition from one color to another, but achieving smoothness in this case is very difficult. The surface of the nail is covered in one or two layers with a base shade of varnish, after which has dried, another varnish is applied to part of the nail plate in the usual way. Gradient manicure with a brush is simple and quick to perform, but often it does not look neat enough.
How to make a gradient on nails with gel polish, what is needed for this
To make a gradient on your nails with gel polish, you need to:
- perform a hygienic manicure
- use a base, preferably transparent, and if camouflage, then choose the most neutral shade;
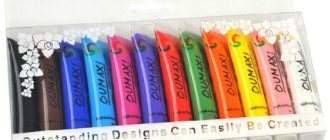
- have 2 or more tones of varnish, topcoat, cleanser, lint-free napkins, orange sticks;
- prepare a comb brush or foam sponge, air puffing, sponge, airbrush, paint for the latter;
- the presence of a UV or LED lamp for drying the coating.
Depending on the type of ombre, you may need glitter, stencils, foil, film, and velvet sand.
There are several types of this manicure, but the main ones are:
| Type of manicure | Description | Photo example |
| Vertical | With it, the shades change from the area near the cuticle to the free edge and vice versa. | |
| Horizontal | The shades transform into each other from the right to the left sinus. | |
| Original | The flow of tones is carried out from one nail to another, that is, each of them is painted in its own color. | |
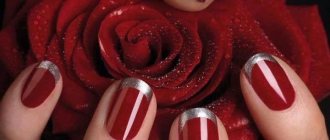
| French | Here, the free edge of the nail must be lighter or darker than the rest of the nail, usually it is white. |
What helps to achieve a smooth transition
A smooth transition of shades is achieved by shading one varnish over another. Both products should not be allowed to dry.
The flow of colors is ensured by using:
- Sponge or sponge made of foam rubber . You can take a dishwasher one, but only a new, unused one, be sure to cut it to reduce its size.
- Special brush - comb . It is quite wide, almost flat, and the hairs at the end are spread out, like the teeth of a comb.
- Aeropuffing . This is something like a brush, but its working part is not lint, but a foam ball.
- Airbrush . This is a compressor manicure device that sprays gel polish using air pressure.
Foam sponge to create a gradient Special brush - comb Aeropuffing Airbrush
After completing the gradient, before drying, you need to let the gel polish “sit” a little on the nail, the bubbles disappear. That is, you should wait a few seconds before sending it to the lamp.
What kind of brush should it be?
The brush called “comb” should be:
- with a fairly long pile;
- soft;
- with equally diverging hairs at the tip.
Similar ones are produced by TNL, Pole, RuNail, Rubloff, Patrisa Nail and others.
In addition to the “comb”, you will need a brush to apply the base shade; you can use the one in the bottle with the product itself. A “hair” is also needed for painting areas near the cuticle and sinuses. Skilled craftsmen use a fan brush instead of a comb. But not everyone will be able to work with it; the fleecy part of this tool is too wide.
Watch the video on how to prepare a gradient brush:
How to choose a sponge
The width and length of the sponge should be larger than the nail plate, quite thick so that it can be comfortably fixed with your fingers. The one designed for washing dishes is suitable. But you should use its soft side, and the hard side can be cut off, at the same time reducing the overall size. The sponge must be porous to hold the gel polish inside. Therefore, sponges that are too smooth are not suitable for applying cosmetics. They will make an even impression, as if with a brush, but shading is needed.
What is needed to perform a gradient manicure?
To make a gradient varnish, you will need:
1. Several varnishes of suitable shades. There can be two or more of them - it all depends on your desire.
2. Sponge for gradient manicure. The smaller the pores of the sponge, the more accurate and smooth the shade transitions will be. An ordinary sponge for washing dishes will do, but it is best to use a cosmetic sponge to apply foundation, cutting it to the required size.
3. A working surface for mixing varnishes - this can be a piece of plastic or film.
4. Toothpick or needle for mixing shades.
5. Nail polish remover - with its help, excess color is removed from the skin around the nail.
6. Finishing coat - a topcoat to fix the color.
Gradient on nails with gel polish step by step with a comb brush
A gradient on nails with gel polish using a “comb” is done step by step as follows:
- After degreasing the nail plate, a rubber base is applied and must be dried.
- At the base, the nail should be painted with a dark color, in the center with a neon shade, and the free edge should be made completely light.
- Using a comb brush, pull the dark shade through the middle to the tip of the plate.
- The “hair” is painted at the cuticle and dried.
- Next, steps 2-4 are repeated in the same order so that the varnish layer is denser and the stretching is smoother.
- Where there is a clear border of colors, you need to go over the comb brush again to better shade it.
- After drying the second layer of gradient coating, apply topcoat and place your finger in the lamp.
For a more uniform shading of colors, the brush can be dipped into the clinser and slightly squeezed, and then worked along the boundaries of the transition of shades. You should move the instrument with short strokes in the direction of the stretch and at the same time make movements from the right sinus to the left and vice versa. You need to walk along the sides of the nails with a “hair”.
Features of manicure
Gradient design is a popular subtype of French nail art, which represents a beautiful smooth transition of very close and similar colors or, on the contrary, contrasting opposite colors. In a gradient nail design, there are necessarily boundaries between the colors used, only they are not clear, but blurred.
The main distinguishing feature of a nail gradient is the fact that there is not just one color on the nail, but a whole inflorescence of colors and tones. And the colors themselves, which dramatically change from a more saturated and dark tone to a lighter one, and, conversely, at the request of the owner of the nails, create either light and smooth, or sharp and sometimes even rough transitions of the color spectrum.
The gradient is applied to the nails both vertically - which is more common - and horizontally - the main thing is to do this according to a clear pattern, and then with cross-border mixing the much-needed transition from a faded color to a more saturated tone will be obtained. Few masters can tell you the maximum possible number of colors or tones: some choose no more than four colors, others work with a good dozen - here a lot depends on the creativity of the master, as well as on the shapes and parameters of the nails themselves.
There are several types of gradient nail decor.
- The tip of the nail is painted over with varnish of a lighter shade, after which this color will gradually flow into a much darker tone. For this kind of idea, you can choose colors from the same shade range or varnishes that are completely opposite in saturation and color.
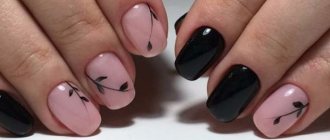
- The color of nails can change with a visually inconspicuous transition from one nail to the second. Here, they usually choose several shades at once in a single color scheme.
A gradient on a manicure always looks attractive, it will be more than appropriate under various circumstances, the main thing is to choose the right colors. Gradient coverage can be created using both bold and catchy and rather dull pastel undertones.
This kind of coverage is perfect for both respectable ladies and very young girls - after all, it is suitable for all ages. Many people believe that creating a gradient is a very complicated technique, but in fact it is much easier to “smear” the polish on your nails than to draw flowers, designs or letters on it. If you set out to learn how to decorate your nails using this method, you will soon be able to select the most interesting ideas for yourself.
Pros of gradient:
- simple methods of execution;
- magnificent combinations of any shades;
- catchy look;
- inexpensive tools and decorative materials;
- the opportunity to come up with a unique design yourself.
Manicure with color transition using baby boomer gel polish
A gel polish manicure with a color transition called “baby boomer” is done like this:
- After drying, a light beige flower garden is applied to oil-free nails coated with primer and base, covering each plate entirely. You will need 2 layers, both need to be dried.
- Apply white varnish to the tip of the foam sponge and blot this layer on the foil. You just need to touch the glossy surface with the product several times.
- Then tap the sponge along the free edges of the nails, almost to the center of the plates. The first layer must be dried and the second must be applied in the same way, and after the next drying, the third. The finger is again sent into the lamp, and the fourth layer is applied with a sponge. After drying, cover the nails with a non-sticky top, leveling them out. This is followed by final polymerization.
How to transition nails with airpuffing
The transition on nails with a gradient manicure using air puffing should be done as follows:
- A darker shade of varnish is applied to the prepared and base coated plate, covering it completely.
- This layer must be dried.
- Place a little dense gel polish or gel paint of a lighter tone on a clean palette.
- It must be collected by air puffing, tapping the product with the soft tip of the tool.
- Then the same is done at the base of the nail so that the border with the darker color is blurred.
- The finger should be placed in the lamp.
- Then a new, smaller portion of light gel polish is placed on the palette, collected by air puffing and applied with a tapping motion as a second layer to the same area of the plate.
- Border shading is done with the clean side of the device.
- The finished design is dried.
- All that remains is to coat the nail with topcoat and place it under the lamp again.
After use, wipe the instrument with a cloth moistened with a cleaner.
French gradient gel polish
French gradient gel polish is done so that the tips of the nails are highlighted in a lighter or darker tone or several:
- The prepared plates are treated with a dehydrator.
- Then an acid-free primer and a thin layer of base are applied to the nail and dried.
- From the base to a third it is painted over with dark varnish.
- The remaining clean part up to the free edge is covered with a lighter tone.
- Using a comb brush, making small movements across the nail, pull the dark color towards the end, periodically wiping the pile on a napkin.
- This layer needs to be polymerized.
- Then steps 3-5 are repeated, only the border should be shaded more carefully, and the nail should be painted with a thin brush near the cuticle.
- After drying, a top coat is applied and polymerized again.
Watch the video on how to make a French gradient:
Gradient brush with glitter
A gradient with a brush can be made not only with different colors of gel polish, but also by highlighting areas of the nails with decor, for example, sparkles:
- A flower bed is applied to the dried base, covering the entire nail.
- After polymerization, a portion of glitter with a transparent base is placed on the tip.
- Using a brush, they are stretched towards the center of the nail so that the transition is smooth.
- The coating must be dried again.
- Finally, a top coat is applied, which is also polymerized in a lamp.
Gradient on nails with gel polish sponge and rubbing
A gradient on nails with gel polish using a sponge using rubbing is no more difficult than just using different colors:
- The nails are covered with a base and placed in a lamp.
- The next step is the flower bed, it is applied to the entire plate with a regular brush, in one layer.
- After drying, cover with a top coat without a sticky layer and polymerize.
- Using a sponge, scoop up a rub of one color and drive it in at the base of the nails to about a quarter of the length.
- Take turns using the same product in two more shades, apply to the middle of the plates and in the penultimate quarter.
- Excess rubbing is brushed off with a flat brush.
- All nails are decorated in the same way, and part of the free edge is covered with the brightest gold powder.
- All that remains is to shake off the excess, cover your nails with 2 layers of topcoat, and dry both.
You can use one color rub or a transparent silver one. But then the gradient is made with several shades of gel polishes, dried, covered with topcoat, polymerized, and mirror powder is rubbed onto all nails. The final layer is applied with a finish, which is also dried in a lamp.
You should always use a very small amount of rub, as the excess will come off the nails. If the product gets on the skin, remove it with a cloth moistened with a degreaser.
Watch the video on how to make a gradient using a sponge and rubbing:
Gradient on short nails with gel polish: which one should not be done
Gradient gel polish on short nails will look natural if:
- use no more than 2 colors;
- give preference to shades of the same range (white with pink, beige, latte or blue-blue, red-burgundy);
- make the base of the nail darker and lighten it towards the free edge;
- abandon the abundance of geometric lines and large ornaments.
All other ombre options, except the last one, are not only acceptable, but also ideal, helping to visually stretch out the plates and make them more graceful.
Interesting manicure ideas with ombre effect
There are a lot of manicure design ideas using a gradient. You can dilute the gradient with patterns, stickers, and rhinestones. You can also use different gradient techniques (vertical, horizontal, diagonal, geometric) in one design. Improvise, show your imagination, but do not forget about a sense of proportion, then you will have no equal.
Rice. 1. Combination of ombre using an airbrush with French manicure and patterns. A very gentle winter option. Rice. 2. Ombre using colored acrylic powder. It looks interesting due to its “rough” texture. Rice. 3. A combination of vertical ombre with a rose pattern. Feminine and delicate design option. Rice. 4. Manicure for a romantic look using rhinestones. Perfect for a bride's wedding manicure. Rice. 5. A stylish and bright combination of a vertical gradient with a lunar manicure. A wonderful summer design.
A beautiful manicure is not difficult. A little patience, training, and every day you will be able to open new “horizons” of gradient manicure. Your beauty is in your hands!
https://youtube.com/watch?v=vBwZUVU0_Ps
Shading on nails with gel polish and sand
Shading on nails with gel polish and sand is called a sugar gradient and is done like this:
- A classic ombre is applied to the dried base. It can be a vertical or horizontal gradient, of two or three shades.
- The gel polish is dried in a lamp. Then the same tones are applied in a second layer, shaded and polymerized again.
- Now you need to cover your nails with topcoat and do not dry it. Sprinkle transparent powder or tint powder on top with a spatula, or you can use sand of several colors on different parts of the nail.
- You need to lower your finger down and tap so that the excess product falls off. Drying is needed again.
- Then they go over the nail with a trusty brush to remove the remaining unnecessary sand. The final stage is applying the top and polymerization.
Velvet sand cannot be used on the entire nail. Sometimes it is enough to highlight one or several stripes for them, near the sinus, in the center, along the cuticle, in a word, as your imagination dictates.
Watch the video for step-by-step instructions on how to apply a horizontal gradient with a sponge:
How to do it step by step?
Performing a manicure using the gradient technique is quite simple at home, using a step-by-step guide and using little tricks for the perfect effect. Smooth transitions are made using a special brush; novice artists use sponges or ordinary household sponges with small pores. You can draw clear transitions using a stencil or tape.
Before creating a unique design, your nails should be carefully prepared. The old coating is carefully removed, the nails are lowered into a nourishing bath with oil and salt. After this, the hands are treated with a nutrient and the nails are degreased. The nail plate needs to be leveled, given the desired shape and length. After this, a base coat is applied to protect the nail. If the selected shades of gel polish are quite light and transparent, a milky white base will give them brightness instead of the usual transparent one. The detailed technology for applying manicure in the gradient style is described below.
Classic horizontal sponge gradient.
- After drying the base layer, take the selected two or three tones of gel polish and drop a drop of each color onto a piece of foil next to each other. Using a needle or toothpick, mix the boundaries of the coating.
- Take a sponge with a fine porous structure and dip it in the resulting colors. First, we make two or three prints here on the foil to get rid of excess paint. Then, using light tapping movements, apply a three-layer gradient to the nail.
- To smooth out any resulting bubbles, immediately apply a clear top coat on top and then dry under a UV lamp for 10 minutes.
Vertical ombre with a flat brush with a rounded tip.
- We take the two selected shades and apply them vertically on the dried and prepared base next to each other. You can do two layers at once.
- Using a damp brush in a clinser, with quick vertical movements from the lunula to the tip, lightly rub the boundary between the layers of gel polish.
- Dry the coating under the lamp. Then we repeat the procedure to obtain a more saturated tone one or two more times. We cover the top with a protective coating and finally carefully seal the manicure under the influence of a UV lamp.
Gradient on nails with gel polish with white geometry
Gradient gel polish on nails with white geometric lines requires more effort than traditional ombre, although many of the steps are repeated:
- First, apply the base and dry it in a lamp.
- Then paint the nails with the main shade in 2 layers and polymerize.
- You need to go over the surface of the plates with a buff to remove the glossiness.
- Protective strips are applied to the nails where the base color needs to be left.
- White paint is sprayed onto the remaining open areas using an airbrush, maybe not evenly, but more on the free edge, less at the base.
- The protective strips need to be removed, and the ends of the nails should be lightly processed with a file to remove excess light pigment.
- Then, with a thin brush, white lines are drawn with gel paint along or across the plate, possibly diagonally, and polymerized.
- All that remains is to apply the finishing coat and dry it too.
To complete this design, you can do without an airbrush and make transitions with a thin brush using white over a darker base tone.
Gradient gel polish using a sponge and stencil
A gradient of gel polish using a sponge and a stencil turns out to be very catchy, so you can design one or two nails on each hand like this:
- The plate is covered with base and dried. The surfaces of the nails on which the stencil needs to be glued are treated with a buff.
- Use a napkin to remove sawdust. The stencil is separated from the base with tweezers and attached to the nail. You need to smooth it out, fix it well and use scissors to cut off the parts that are outside the plate.
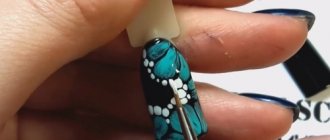
- Strips of gel polish are applied to the palette in the order in which they want to be seen on the nail, layering one color on top of another and blending the transitions. There can be 2-3 shades.
- A sponge is applied to this multi-colored print. And then it is leaned against the surface of the nail with a stencil so that the open areas are painted.
- Now you can peel off the protective film by carefully picking up the edges with tweezers and pulling in the direction of the design. The finger must be placed in the lamp.
- A top coat is applied over the dried gel polish. It is also polymerized.
A striped gradient is also made using stencils:
- The strips are glued onto a dried camouflage base across the plate.
- The remaining open space is painted with white gel paint on a third of the nail.
- Each mini-strip is shaded with a sponge closer to the middle of the plate.
- Dry and repeat steps 2 and 3 a couple more times.
- After the next polymerization, the strips are removed, the nail is covered with a top coat without a sticky layer, and dried.
- New stencil devices are glued again across the plate, but this time covering the gradient.
- Gel paint in 3 layers is applied to the open stripes, only on the other side of the nail and almost up to half of it.
- Each time it is shaded with a sponge and polymerized without removing the stencil.
- After drying the 3rd layer of white gel paint, the strips are peeled off.
- The last step is to apply topcoat and dry.
Watch the video on how to make a gradient with gel polish using a sponge and stencil:
Geometric gradient gel polish at home
The following geometric gradient using gel polish at home is quite simple to do, despite the apparent complexity of the design:
- A little white varnish and colored varnish are laid out on the palette.
- A drop of the latter is mixed into the light gel using a “hair” brush.
- Using this mixture, draw 3 triangles in a row, the vertices of which should be at the beginning of the free edge of the nail.
- The coating is dried, and a little more color is added to the gel polish mixture.
- Use it to draw the next row of triangles, placing them lower and in a checkerboard pattern.
- After drying, steps 4 and 5 are repeated until the entire nail to the base is painted.
- The bottom row of triangles is made with dark varnish without adding white.
- After its polymerization, everything is covered with a matte topcoat and dried.
This design is done on 1-2 plates or on all fingers.
Geometry in combination with ombre can be in the form of waves, straight or irregular lines, and shapes. The main thing you need to do when creating a design this way:
- mix gel polishes with white on a palette or foil;
- work with a thin brush;
- dry each drawn detail.
Gradient manicure: video
Tags: nails
Market Analytics
- 10 most revolutionary scientific developments in the beauty industry in 2021
- Top 10 Best Beauty Products in 2022
- Global cosmetics market 2022: an unprecedented test for the global cosmetics industry
Convenient search for beauty salons on our website
Beauty salons in Moscow Beauty salons in St. Petersburg Beauty salons in Ekaterinburg Beauty salons in Novosibirsk
Latest blog posts on our website
- Naturecream / Properties of the “Sunny” oil itself
- Naturecream / “Sugar” wrinkles - or what glycation can do
- Naturecream / Esterified oils
- Naturecream / Arnica - the magical plant of alchemists
- Naturecream / Tremella Extract - Snow Mushroom Detox for Skin
- Prostye-sovety / How to visually enlarge your lips with makeup
- Naturecream / Apricot kernel oil for face
- Naturecream / MATRIXYL3000 - the best skin elasticity stimulator
- Naturecream / SPF in Natural Oils
- Naturecream / Geranium (Pelargonium) oil for skin health and beauty
Latest forum topics on our website
- Natalya / How to properly make a gelatin mask?
- Mrs._Smith / Badly sunburned! What to do?((
- Ice / Is it necessary to combine fitness classes with a diet?
- Antonova / What can be used for hair loss?
- Radio operatorKat / Who was on a protein diet?
Other articles in this section
| How to choose and make the right nail shape The choice of nail shape directly depends on the shape of the cuticle edge and the length of the nail plate. A manicure can look completely different in each case. Choosing the shape of your nails is like choosing a silhouette in clothes: it will help hide imperfections, visually lengthen your nails, or vice versa, make your hands coarser and your fingers shorter. |
| Removing ingrown toenails with laser and radio waves: which method is more effective? Ingrown nails (onychocryptosis) are a common cosmetic defect that causes many problems. The process is accompanied by painful sensations, the skin on the finger becomes red and swollen. Complications in the form of purulent discharge may occur. Just 5-7 years ago, doctors resorted to a surgical method to eliminate the problem, using a scalpel and stitches. Medicine does not stand still. Currently, it is widely practiced to remove ingrown toenails using laser or radio waves. We will discuss what the procedures are in the article. |
| Manicure for September 1st with a jacket September 1st is coming soon. Children will go to school, some even for the first time. And on this day you want to have a corresponding manicure. We offer you an interesting nail design with a jacket pattern for girls and boys. Your marigolds will be dressed in school uniform just like your children. |
| Knitted manicure Knitted manicure on nails is a very interesting, relevant and fashionable solution. With the onset of cold weather, we so want to dress warmly and each of us remembers the sweaters carefully knitted by our mother or grandmother. Large, beautiful knitting makes the product incredibly beautiful, cozy and homely. And it is precisely this texture that modern fashionistas strive to depict on their claws today. |
| Beautiful manicure Exquisite ideas for creating a beautiful manicure will help you choose the best option for a laconic completion of your look. You can try to apply the polish yourself or have your nails done by a professional. We offer ideas for creating a beautiful manicure and reveal some secrets. |
| New Year's manicure On the eve of the New Year's holidays, fashionistas study magazines and horoscopes in order to find out what outfit to choose, what color to prefer, and what to refuse. A mandatory addition to a spectacular look will be a New Year's manicure, which can be performed using different techniques. |
| Manicure for Halloween In this article we will learn how to do a manicure for Halloween, since the holiday is just around the corner. We offer you a step-by-step simple Halloween manicure that you can easily do at home. Traditional colors of choice for Halloween manicures are black, orange and white, but we diversify it with other colors. |
| Review of gel polish removers A review of gel polish removers will help you decide on the best product. |
| Japanese manicure: what is it and how is it done If the French are usually called trendsetters, then the Japanese are leaders in the number of various spectacular and beautiful rituals associated with caring for their body, hair and nails. Few women have ever heard of Japanese manicure, but this technique deserves close attention. |
| Nail polish: composition, types and brands, application rules Nail polish is the basis of any modern manicure. By choosing a coating of different colors, women not only emphasize the beauty of the nail plate and protect it from harmful chemicals and mechanical influences, but also strive to change their image by adding bright colors and tones. |
"Ink" gradient
The shading does not have to be symmetrical; chaotic also looks interesting, and it can be done in any tones:
- A drop of gel polish in two colors (for example, black and blue), as well as a top coat, is applied to the palette.
- The nails are prepared and the base applied to them is dried.
- At the base of the plate a top coat is applied in a stripe, the middle part is coated with blue varnish, and the free edge is coated with black.
- On the undried top coat, make streaks with both colors using a flat brush.
- It is used to smear the border between shades, after which the nail is dried.
- Then additional black and blue stains are applied with a hair on the transparent part.
- The free edge is drawn more clearly in the darkest tone.
- All that remains is to dry it, cover it with top coat, and polymerize it again.
Liquid varnishes are perfect for this manicure. But they need to work quickly. And the areas near the cuticle and sinuses should be painted with a thin brush after the first drying.
Watch the video on how to make an ink gradient:
Fashionable gradient colors
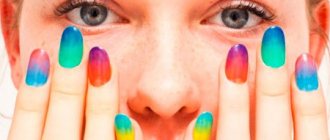
The modern fashion industry offers girls a huge selection of a wide variety of paint colors. Calm nude and pastel shades (milk, coffee, pink, mint, blue, sand, yellow) and their combinations do not lose their relevance. Bright colors play on contrast, and the most unusual combinations look interesting and elegant, for example, rich shades of green, black, blue and various shades of red. To comply with the latest fashion trends, do not be afraid to experiment and feel free to combine a wide variety of shades, getting an unusual and bright manicure that will definitely not go unnoticed.
Pastel
Bright
Dark
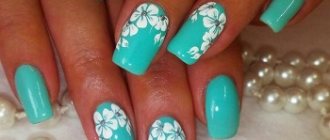
Original gradient
The original ombre design involves painting each nail a different color, but all shades must belong to the same range. For example, tones from soft pink to muted red or from light green to sea green are used. This design looks more organic on young girls. And it is better to use pastel shades.
We recommend reading the article on how to do a manicure with red gel polish. From it you will learn about manicure design options for short and long nails and application techniques. And here is more information about how to remove shellac at home.
Gradient is the richest design option, and many of them are easy to implement. And at the end you can get a unique manicure, calm or flashy - whatever you want. After all, the technique of applying varnishes gives you the chance to use colors that differ by a couple of tones, and contrasting ones.
Pros and cons of ombre manicure
Like any manicure design, the gradient has its advantages and disadvantages. Let's look at some of them:
Advantages:
- A huge number of options for creating an ombre effect. Great combination with other designs. You can use a large number of color shades in one manicure, thereby creating a bright and original manicure.
- Ombre manicure is universal. Using different shades, you can create both everyday and bright holiday manicures.
- Ombre can be used in symbiosis with other types of manicure, for example, French or moonlight. The result is always very unusual and impressive.
- You can do this manicure with a specialist or yourself, at home, if you have at least some skills in performing the degrade technique.
Flaws:
The technique of performing degrade will require patience and extreme accuracy; difficulties may often arise with the selection and combination of shades
If you have problems with this, then it is better to entrust the work to a professional at least for the first time. When combining the ombre effect with other designs, it is important not to overdo it. For example, using incompatible colors and even using rhinestones will look ugly and awkward
If you know that there are problems with a sense of proportion, then it is better to look for photos of finished works or consult with someone.