Reads: 5,563
Reading time: 7 min.
no comments
Paints, varnishes and gels used in nail art as one of the areas of body art should be as durable as possible and as bright as possible.
After all, when painting on the body, you cannot ignore the nails - their design should complement the overall composition or sharply contrast with it, depending on the concept conceived by the artist.
List of necessary things for home nail art
If you are not going to become a professional, you don’t have to buy everything; get a set of irreplaceable things that will be useful for drawing, and create as much as your imagination allows.
It’s easy to do an original manicure yourself if you want.
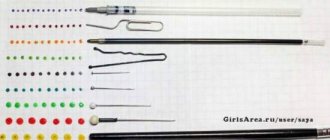
You will need:
- Dots - a small stick made of plastic, metal or wood with a ball at the end for dot drawings (it’s also convenient to draw with)
- Scotch tape - you can use it to create geometric shapes and make French tape
- A set of brushes of different diameters - choose ones with natural soft bristles
- Glitters, varnishes, gel polishes of different colors, rhinestones and sequins - everything you can imagine
- Nail polish remover and/or manicure corrector
- Cotton swabs, toothpicks
- Fixer - will extend the life of the coating and add additional shine
Advice: you don’t have to experiment with professional materials right away; at the initial stage, practice painting on your nails with simple watercolor paints - they wash off easily.
The main thing is not to overdo it with the design
Main types of varnishes for design
Surely, you know about the variety of textured varnishes, their huge range of colors and other “interesting things”.
All women who are interested in nail design are constantly watching the emergence of new textures and shades. So this time we will not focus on this, taking a more general look at the types of coatings. So, speaking in general terms, today two main types of varnishes are used to create nail art:
- well-known traditional coating - manicure varnish
- new product – gel polish
In both the first and second categories, there is a separate line of products - painting varnishes. Their difference from traditional forms is the presence of a thin brush, which allows you to draw thin and neat lines without the use of improvised means (needles, toothpicks, etc.).
Next we’ll talk in more detail about what and how you can draw using this or that means.
Nail patterns for beginners using tape
There is nothing easier than making French or colored blocks of different lengths and shapes. To do this, you can use either regular tape, which is found in every home, or buy special self-adhesive strips - they are sold in a cosmetic store.
Design using tape - what could be simpler?
The simplest lines are performed as follows:
- Apply a transparent base to the nails, then a layer of varnish of the same color
- After complete drying, glue the strips
- We cover the desired part of the plate with a layer of varnish of a different color/colors, depending on the idea
- When the coating is dry, remove the strips and secure with a transparent topcoat.
It is important to follow the sequence of actions.
Using the same technique, it is easy to create patterns with semicircles, rhombuses, triangles and other geometric shapes.
Let's look at several options for beginners in more detail:
Design with an accent: a yellow manicure with a couple of bright details looks fresh and bright in a summery way Self-adhesive strips will come to the rescue Three-color design using tape Bold and bright manicure Now you know how to make a moonlight manicure yourself
Single-color geometry step by step This decor can be achieved using semicircles rather than straight lines Any girl can handle triangles Another extremely simple and effective manicure in the 2017 season trend Matte finish is still in fashion A combination of classic black and white and metallic Lacquer-matte French with using adhesive tape
How to draw patterns on nails for beginners using dots - use the dot technique
Mastering the dotting technique
Dots are the most suitable tool for dotting techniques. If you don’t want to buy professional tools, replace it with a hairpin, a toothpick, or a wooden stick with a pointed end.
A few simple dots can make a manicure expressive and noticeable.
Using devices of different diameters, you will get completely different designs: images of animals, figures, flowers.
If drawing with your left hand is uncomfortable, limit yourself to selecting one finger
Apply a few drops of varnish with a brush to a palette - a piece of cardboard or foil. Dip the tip of the tool into the coating and gently apply to the nail in a drip motion. To create a curl or a straight line, start drawing with the tool as if you were writing with a ballpoint pen. Stretch a drop of varnish into a pre-conceived pattern with a smooth movement.
Yellow is one of the most popular shades of the season Floral dotting pattern step by step A variant of the laconic dot technique French oval manicure using tape and dots Colored dot coating Cute hearts made using the same technique This manicure is literally created to charm you For a contrasting design you will need polishes of several colors A perfectionist's dream
What tools may be needed during the work process?
It’s not enough to know how to draw flowers on your nails step by step; you also need to prepare the appropriate tools. It is advisable to choose a table that is not cluttered and is well lit by natural or artificial light. The rays should fall from the left side. The list of “equipment” consists of several items:
- Several brushes of different widths.
- Base and top coat.
- Dots, which can be easily replaced with a regular ballpoint pen.
- Acrylic paints of a suitable color.
- Varnish that will determine the color of the flower itself.
Additionally, you may need cotton swabs, which can be used to correct the design and remove excess drops of varnish. In addition to a set of paints and varnishes, you may need glitter, rhinestones or stones - it all depends on the design features of the flower and the overall composition.
Nail patterns for beginners step by step - photo of working with a brush
Painting with a brush is also not difficult.
For girls who are taking their first steps in home nail art, the technique of painting with a brush may seem the most difficult. But this is a misconception. Start experimenting with simple geometric patterns. To create a spectacular finish, you will need a base color, two more for the design and a varnish fixer. Next we proceed, looking at a simple step-by-step guide:
Start with the simplest
Tip: do not forget that each layer of varnish must dry thoroughly. Only after this can you apply the next one, so as not to spoil the entire drawing.
Choose classic light patterns
Of course, with the help of a brush, professionals create real miracles, and it is quite difficult to learn all the subtleties of the craft at home, but everyone can master a few basic techniques.
Add variety to classic red Tartan Check Pastel Check Accessible Geometry
Beautiful manicure with a pattern: ideas
Women have been decorating their nails since time immemorial. Mentions of nail art can be found in Ancient Egypt. Modern manicure is more than caring for nails and applying polish.
A bright manicure should not be associated with flashy colors, an abundance of stones, or long and impractical nails. Modern manicure is originality, a way of self-expression and creating a unique image.
To keep your hands always in order, it is enough to know how to take care of them, do a manicure regularly and correctly, and learn how to reproduce interesting nail art ideas on your nails.
For years in a row, drawings have remained trending. Each season brings new manicure ideas, where they use:
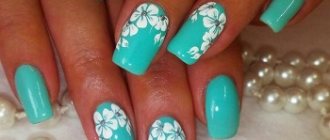
- floral ornament;
- oriental painting;
- cartoon elements;
- contrasting jacket with a pattern on individual nails;
- geometric patterns.
Photo: divartz.com: UGC
When choosing ideas for nail art, pay attention to the following methods of nail design:
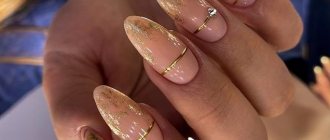
- Natural naturalness.
Natural manicure is at the peak of popularity. The designs can be bright and contrasting, but the basic colors are kept in pastel colors. Choose from peach, beige, vanilla, sand, lavender, mint or ivory.
The use of contrasting varnishes is encouraged. With a natural base background, use raspberry, burgundy, marsala, plum, black colors.
Photo: Plitkar: UGC
If the manicure is themed, then there are practically no restrictions on the use of colors, shades and decorative elements. The main thing is not to overdo it.
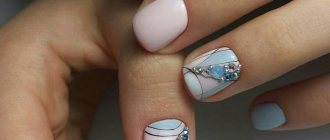
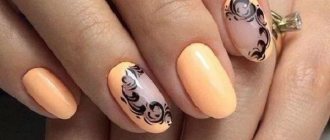
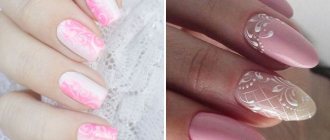
- The lightness of openwork lace.
The openwork lace manicure deserves special attention. This nail art is suitable for everyday and festive looks.
The main background can be any color; feel free to use matte or glossy varnish. Make the openwork pattern in a darker shade of the base background or choose a contrasting varnish. Apply the design to all your nails or to your ring finger.
Photo: paintshop: UGC
Feel free to decorate a discreet manicure with a pattern with stones and broths. Experiment with a variety of colors, making each nail unique in its own way.
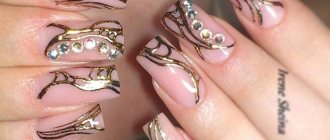
- Game of colors and lines.
A manicure with a geometric pattern does not lose its position. The pattern can be monochrome or multi-colored. Try a harmonious combination of shades or a combination of absolutely bright contrasting colors.
Photo: LiveShopping.me: UGC
Ombre on nails looks original. This manicure is complemented with designs of flowers, butterflies, and decorated with sparkles, broths and voluminous polymer elements.
Ombre is not necessarily present on all nails. The gradient stripes on the ring and little fingers look interesting.
The combination of matte and transparent varnish allows you to create the effect of droplets that have frozen on the nails.
Photo: YouTube: UGC
3D images and drawings in combination with openwork patterns are actively gaining popularity.
Simple nail designs for beginners using a sponge
Ombre
This manicure is called a gradient or ombre, and any representative of the fair sex can handle it. To work, you will need a sponge/fine-pored sponge, varnish of several colors, a transparent base for a colored coating, a fixative and liquid latex.
Two color gradient
It is important that the chosen sponge does not absorb the varnish too actively, and that it itself is not thickened, otherwise nothing will come of the idea. Before practicing on your own nails, try to achieve the desired effect on a piece of cardboard.
Three color gradient
Step-by-step ombre coating technique
First way
- Get a manicure and apply a protective base to your nails
- Cover the nail with one of the colors in a thick layer
- Apply the second color to the sponge - one part should be thicker
- Press the sponge against the plate with quick movements; start from the middle to the free edge, making the color denser
Shades of red
Second way
It is considered more complex, but the color transition is smoother.
- Cover the palette tightly with varnishes of three colors and carefully blend the borders with a needle
- Apply liquid latex to your finger around the nail.
- Dip a sponge into the polish and cover the nail plate with it.
- When dry, remove the latex layer
- Secure your manicure with a top coat
Ombre can be emphasized by highlighting a couple of fingers with stickers. Rich blueberry Ombre in combination with a moon manicure.
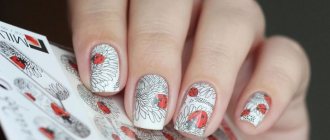
Technique for drawing poppies
To paint poppies on your nails, it is advisable to use gel paints, which are most convenient to work with. The drawings turn out very beautiful and airy.
- Apply red on one side and black on the other to the tip of a flat brush. The ratio of tones should be different. The black color that will frame the core should be only a fifth, otherwise the poppies will not work. Applying the brush to the nail, draw two broken petals.
- To make the design more natural, for the following elements, pick up a white tone with the tip, highlighting a little red. Apply a second layer of petals on top of the first.
- Next, you can draw the core of the poppy. Use a green tone to fill the center of the flower, then use white to create a kind of “chamomile” and small stamen dots inside.
- When the poppies are ready, you can start decorating the leaves. To paint them, apply approximately 4:1 ratio of green and red to the tip of the brush. These elements are also applied with intermittent movements and should turn out torn. To clearly see how poppies are drawn on nails, we suggest watching the following video tutorial.
How to make easy patterns on nails for beginners using stamping
Nail design using stamps
Stamping - also a way of transferring a design onto a nail using a stamp - is another simple technique for adding variety to a boring monochromatic manicure. To master it, you will need a little patience and a set of tools:
- Flat metal plate with engraved patterns
- A stamp with a silicone or rubber base for transferring the design from the plate to the nail
- Scraper to remove remaining varnish from the disc
Stamping saves time
Advice: the advantage of the stamping technique is the speed of execution. A pattern that would take a craftsman up to two hours to create can be drawn in 15 minutes using a stamp.
You will need a set of stencils and stamps.
Stamping scheme step by step:
- Degrease the nail surface and apply a base
- Paint your nails with your base color and let dry thoroughly.
- Apply the second varnish to the stencil
- Leave the varnish only in the recesses, remove excess with a scraper
- Transfer the image to the rubber surface of the stamp
- Select places on the nail for the stamp and press firmly onto the nail.
- If the design is imprinted on the skin, carefully remove the excess with acetone
- When the design is dry, cover your nails with top coat.
Stamps can be completely different Combination of tape and stamping Eternal classics Multi-colored stamping Fun black and white decor using stamps Stamping and gradient
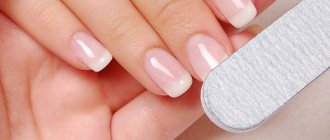
Nail preparation
Before applying gel polish, it is necessary to properly prepare the nail plates:
- Remove old nail polish using special products.
- Use a file to give your nails the desired shape.
- Use tongs to remove hangnails and push back the cuticle.
- Level the surface of the nail plate with a buffer until matte.
- Treat with anti-silicone to remove remaining nail dust, dirt and grease.
- Use a dehydrator to get rid of excess moisture in the nail.
- Apply an acid-free bonder for better adhesion of the gel polish to the nail.
- Apply a primer (base coat) to prevent the color pigment from penetrating into the nail and for better adhesion.
- Dry in a UV lamp for about 10 seconds. After drying, the base will acquire a sticky structure that must be smoothed out with a dry brush.
- Apply all coatings in as thin a layer as possible, spacing 0.3 cm from the cuticle.
How to make patterns on nails at home for beginners with a needle
This type of drawing technique is considered outdated today, but the photo clearly shows the principles of working with a needle.
Another relatively simple and popular technique is painting on nails with a needle - tools for such nail art can be found in every home.
Start practicing by applying the simplest elements and shapes Pastel Sea Wave
As in previous cases, the first thing we do is manicure, apply a base coat of polish and wait until it dries. Then we make dots with a needle and, smoothly moving from one to another, we form a pre-thought-out pattern. When you are done with painting, let the polish dry and cover your nails with top coat.
Flirty cats Summer sea breeze Black and white classics Predatory print Coping with a web pattern is not difficult even for a beginner
There are thousands of options for a simple and beautiful home manicure. If you happen to have a fan brush, it won’t be difficult for you to come up with a cute two-color manicure using varnishes that you can find in your home palette:
Fan brush design
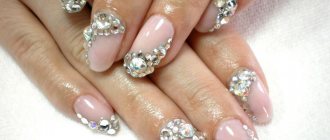
Don't forget about rhinestones and beads too. In this matter, the main thing is not to overdo it with accents:
To prevent your manicure from looking tasteless, decorate one finger with stones and beads
You can purchase special stencils:
Coating with a stencil
Or use foil:
Covering with foil
Features of creating flower arrangements
To make a manicure look neat and attractive, you need not only to prepare the nail plate well, but also to choose the right pattern, as well as place it correctly.
Before you create a flower on your nails step by step, you should decide what the finished composition will look like. Before choosing, you need to consider the shape and length of the nail:
- If the nail has a rectangular or square shape, then it is better to place the flower in the lower or upper corner. The size of the bud should be large. Additionally, you should take care of decorating with shiny elements.
- On round and oval nails of medium length, it is advisable to depict small flowers and branches with flowering elements. Do not overuse additional curls and leaves, shiny elements.
- Almond-shaped nails of medium length will look like flowers with large buds that can fill the space of the entire nail. In this case, the drawing is done only on a few nails of the hand.
It is worth considering the combination of colors. Varnishes of light tones and colors can visually lengthen the plate. Dark colors and bright buds can add more elegance to long nails.
Simple nail designs for beginners using gel polish
Gel polish coating extends the life of your manicure.
To make the coating last longer, use gel polishes instead of regular ones. Although they are more expensive, they last more than two weeks. True, in addition to varnishes, you will have to fork out for a UV lamp for drying. Drawings and patterns are performed in the following sequence:
- We treat the plates with a buff - a special rectangular file and degrease them using a primer
- Apply the base and dry in a lamp
- We make the pattern using the chosen technique
- Dry in a lamp
- Cover with topcoat and dry again
- Remove the top sticky layer with acetone
In addition to the varnishes themselves, you will also have to spend money on a lamp for drying.
You will also find a simple way to make beautiful patterns on your nails in this video tutorial for beginners:
Roses: painting a noble flower with paints and varnishes
You can draw a rose in several ways, using different tools. Let's look at step-by-step instructions for painting with varnishes.
- Prepare red and white varnish. In this case, it is better to choose thicker products.
- Place four dots so that they all touch each other, alternating red and white.
- Start mixing the polishes in random order using a toothpick.
- Make a few more flowers nearby.
- Draw two or three leaves near each rose.
In conclusion, we invite you to get acquainted with several more schemes for creating floral nail art.