A fashionable volumetric manicure provides endless possibilities for decoration, and it is quite possible to do it at home without resorting to the services of a master.
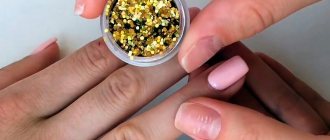
The main materials used for volumetric nail art are polymer clay and acrylic. Tips, sparkles, glitter, pebbles (for example, pearls) and so on are also often used. You can use ready-made motifs for applying to nails. These are the so-called “fimki”: sticks made of polymer clay with drawings inside. It is better to buy them ready for use: cut into the thinnest slices.
You can perform a variety of types of 3D manicure yourself, but the most relevant this and last season were:
- knitted and fur patterns,
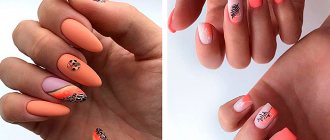
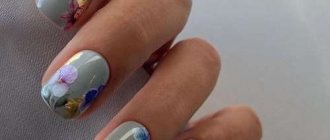
- voluminous floral motifs,
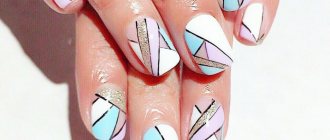
- monograms, lace, openwork frames,
- beads, caviar, abstractions, etc.
Are you planning to create a stunning voluminous nail design? First they need to be thoroughly prepared. Then the base, the main varnish, is applied. And then the fun begins: modeling from polymer clay, making applications from foil, flowers and bouillons.
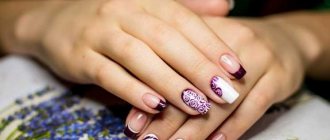
Openwork frame or monogram
- To draw such a pattern on a nail with 3D gel, take a dots and mark the outline of the design with dots, first with the same varnish that is already coated on the nail. The dots can be larger or smaller, depending on how thick the line is. Dry it.
- The next step is to draw lines with the same color. It is better to start from the free edge of the nail and move along the oval to the cuticle, where the line becomes thinner. Dry it.
- Next you need to work with gel polish: outline monograms, patterns and dots. You need to draw without pressure so that there is more volume. The gel polish should stick to the brush.
- After drying the base layer, you can add volume to the drawing. This is done with strokes of the base color, as if applying shadows. The next step is to add veins, gold sparkles and other decorations.
3D manicure using gel
Using the gel, you can create a pattern of any shape that will look voluminous on your nails, regardless of their shape and length. The main positive quality of the gel is that it perfectly holds its given shape and does not spread. Thanks to this, you can make a variety of pictures, patterns and inscriptions. Recently, the most popular are velvety patterns, which are made with gel and sprinkled with acrylic powder on top. After drying the marigolds in a lamp, you get a very stylish and beautiful marigold design.
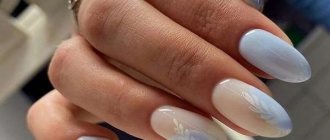
Wedding volume manicure
Fashionable versions of wedding nail art use delicate romantic colors, elegant patterns, and catchy stones. A voluminous manicure with gel polish on the bride’s nails is always appropriate and looks great.
3D manicure using foil
Using foil, you can create an incredible extravaganza of designs on nails of various lengths. With such an element it is worth trying a royal manicure that will complement any look. Foil can be holographic, embossed or engraved. When performing a manicure, you can completely cover one or two nails with foil. Girls who are used to surprising are encouraged to cover all their nails. Holes made with gold or silver foil look very unusual and feminine. To add elegance to your manicure, make an oblique strip of small pieces of foil of any color on the tips of your nails.
Options for everyday voluminous manicure
3D gel manicure is great for daily wear, if you don’t overuse it. Let the spectacular three-dimensional pattern flaunt on one or two fingers. This is enough to make an impression. Combine it with ombre and various types of French.
When is voluminous nail design appropriate?
Remember, at one time there was a craze for volumetric elements on nails? At the same time, the length of the extended nails was, to put it mildly, excessive. We are against such overkill and believe that any art (and three-dimensional modeling is a wonderful art!) should be harmonious. Therefore, we recommend, firstly, not to decorate all nails with volumes (1-2 on each hand is enough). This design will look organic and beautiful as a daily option. Secondly, if you nevertheless choose to decorate a larger number of nails, then try to time it to coincide with a specific celebration (wedding, anniversary, etc.), at which a somewhat flashy manicure will be very useful.
Molded flowers
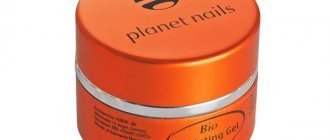
This type of volumetric nail design with gel polish requires skill development. There is gel plasticine for sculpting nail decorations. It is produced under the brands Arnelle, Lady Victory and others. Some artists use “liquid stones” to create nail bas-reliefs. To make a simple flower, apply petals with thin strokes onto a prepared, sanded nail. We add volume with each new layer, drying the previous one.
Photo selection: nail sculpting
This manicure is most often done after extending the nail plate or at least covering it with gel or shellac.
The shape for such a manicure is preferably oval, almond-shaped, pointed, but you can also use a square nail shape.
Knitted manicure
Spectacular voluminous manicure imitating braids and other knitted patterns is now in trend. They are performed only with gel polish, since other types of materials do not give a similar effect. How to make such nail art? The method of creating a pattern is similar to drawing monograms: first, outline the general appearance of the pattern with dots, and then, without pressing, apply gel polish with a dot, weaving the patterns. There must be at least three layers. Each subsequent stroke should be narrower than the previous one. And each one must be thoroughly dried. The top layer can be dipped into flock before drying, or given a rough texture. Knitted patterns are especially good in pastel colors.
Materials and techniques for performing volumetric nail designs
Now let’s turn directly to the modeling technique itself: how is it done and what materials are best to use?
Acrylic modeling
Acrylic powders remain the most popular material for sculpting. It is best to place acrylic shaped elements on an acrylic backing. The working technique is as follows:
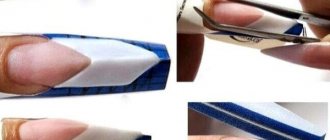
- We will carry out the traditional nail preparation: remove the natural gloss, degrease, apply a primer. After this, you will need to perform acrylic extensions on tips or forms. Let's give the desired shape to the nail plate, but for now we won't polish it with a buff.
- Now let's start modeling. We will need: monomer (liquid), acrylic powders of the required colors, a pointed synthetic bristle brush, preferably dots and, possibly, orange sticks.
- Pour the liquid into a small non-metallic container. Soak the brush in the liquid and scoop out some powder. Transfer to the nail or (you can use foil or paper if you are afraid to immediately make a pattern on the nail plate). Work quickly, since the drying time of acrylic is limited to tens of seconds, and use a brush, dots and sticks to form the desired elements (this is called perforation).
- If you worked on paper, apply a drop of glue to your nail and carefully place your figurine in the chosen place.
- After finishing the work, it is recommended to cover the nail with the pattern with a layer of gel or acrylic - this will protect the pattern from destruction and make the nail even stronger.
It is very important to choose the correct location of the figure! Thus, it is not recommended to place the pattern in the areas where it has been washed down, near the cuticle and at the very end of the nail, since in these areas it is most quickly destroyed. And, of course, acrylic elements can be transferred not only to an extended acrylic nail, but also to the surface of gel polish, polish, or gel. In this case, the selected area must be degreased and a small amount of special glue applied there.
Gel plasticine
Gel plasticine (4D gel) for modeling is an unsurpassedly convenient material for both amateurs and experienced craftsmen. This is because this relatively new sculpting tool has many positive qualities: there is no smell or residual stickiness, but it has a plastic texture. Plasticine does not “run away” or flow during operation; it can be modeled as much as necessary before polymerization.
The technique for working with plasticine is quite simple:
- Before applying gel plasticine, the surface of the nail must be degreased (wipe the nail already covered with gel polish or varnish with a lint-free sponge soaked in degreaser).
- Using a flat brush, dots and the same orange sticks, you need to transfer a small amount of 4D gel and model the elements of the figure. Then dry what you need in a UV or LED lamp.
- If you have constructed elements from multi-colored gels, then polymerize them one by one and remember that the drying time directly depends on the thickness of the layer.
- At the end of working with plasticine, do not forget to cover the resulting beauty with a top coat: this will not only extend the life of the volumetric elements, but will also give the shades greater expressiveness.
Tip: When working with plasticine, use a pointed brush with elastic bristles - it is ideal for giving shapes the desired shape. During the process, you need to clean it with a special degreaser that does not affect the condition of the villi.
Look at photo tutorials on volumetric and lace modeling with gel plasticine.
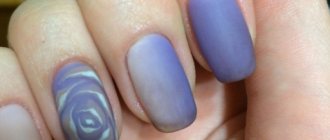
3D effects on a matte background
It’s worth “playing” with matte and glossy varnish of the same tone or with companion colors. This is enough to give a voluminous look to your manicure. If you don’t have a matte top coat that matches the color, then rub the buff over the dry glossy layer with gentle movements. Do not press hard, use even pressure. After this, draw a monogram or other pattern using the method described above. Rhinestones along the “moon” line, along the edge of the nail or along will complete the creation of a noble and stylish nail design.
3D manicure with bouillons
This type of manicure has recently become incredibly popular due to its texture and volume. You can cover your nails with broths in various ways: completely fill all or one nail, decorate the holes or complement the design. It is very fashionable to perform a French manicure with multi-colored broths. Using this decorative element, you can make various designs, for example, bows, flowers, hearts, and also lay out various patterns.
Fur manicure
If you combine three-dimensional designs with a coating of velvet powder (flock), you can get the effect of a fur surface. This powder consists of crushed viscose thread. It holds quite firmly: you can safely do your homework.
If the threads are very finely ground, you will get a velor surface. Draw a three-dimensional design: a monogram, a heart, a rose or anything else, and then dip the nail with undried varnish into the flock. Shake and remove excess particles with a dry brush. Dry your nails, and the fur voluminous design with gel polish is ready.
If you apply a layer of varnish on top of the flock, you get this super-textured effect.
Sweet Ariel
The most complex of the three-dimensional manicure designs presented, but extremely beautiful. The voluminous manicure follows the scales of the little mermaid's tail and has a unique blue-green hue. To perform this you will need acrylic powder with monomer or acrylic structural gel.
Technique:
- Before starting work, your fingers can be coated with iridescent gel polish with shimmer for a better effect, but this is not necessary.
- Attach a mold for laying out acrylic onto the prepared nail.
- Take a small ball of structuring gel and place it on the free edge of the nail.
- Using a manicure hatchet or an orange stick, flatten the ball, creating a scale shape.
- Place another small ball next to the previous one.
- Gently press it, giving it the shape of a scale.
- In this way, lay out all the scales on the entire nail plate.
- File the resulting frame with a file, cutting off excess volume.
- Cover the design with varnish of any color with shimmer (shimmering sparkles).
- Sprinkle with glitter or acrylic powder to make the coating look even more impressive.
- Place small rhinestones on the glue near the cuticle using an orange stick.
A chic manicure with a voluminous design in the style of the beautiful little mermaid Ariel is ready.
Caviar manicure, broths
This popular type of nail art by definition has volume and texture. It's very easy to do. In this case, multi-colored broths are used together with foil on a black surface, and this gives an exceptional decorative effect.