American manicure is ideal for those who love the classics and are not particularly predisposed to experiments. True, the latest trends in nail art have reached here too.
The trend towards simplicity is increasingly prevalent in manicure trends, so it is not surprising that neutral shades of coating, “naked” nails and the like are returning to fashion. Another new old trend is American manicure, which was at the peak of popularity in the last century, but is now confidently regaining its position again.
Stay up to date with events with the Quick Focus telegram channel.
Subscribe
American manicure, which involves a single-color coating in several layers, originated in the 50s of the last century in the USA, as is clear from its name. It was built on just two principles: practical and convenient. The woman had to forget about any problems with her nails and always remain on top. Therefore, it was selected strictly to match the color of the lipstick that was used on an ongoing basis.
It is because of this fad that the palette of American manicure is not particularly large and is limited to nude, red and, much less often, darker wine shades. However, the beauty of this cover is that it is equally suitable for everyday wear as it is for working in the office or going to a party, as it looks stylish, elegant and timeless.
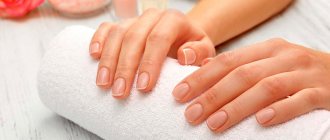
The ideal nail for an American manicure is medium length and oval in shape, as the focus is on femininity. This combination suits any hand shape and does not require long growing.
American manicure can be either glossy or matte . For a “wow” effect, it is better to choose a lipstick based on the shine of the varnish (matte to matte, shine to glossy).
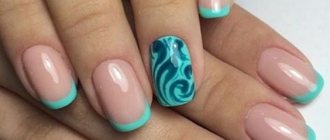
Another advantage is its laconic design .
The only disadvantage of this manicure is that a dark monochromatic nail coating requires more frequent correction than if it were a light and nude manicure.
Features of manicure
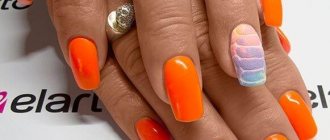
Designers are offering new types of manicure - from calm and elegant to catchy and bright. One of the species that has become extremely popular for its colorfulness and variability is the American one. It allows the use of different shades and patterns, is suitable for any occasion, for these qualities it is probably loved not only by American women, but also by women in other parts of the world.
What are the features:
- Brightness and saturation of color solutions.
- Round shape and length of the nail plate.
- Pair with lipstick of the same color. The permissible difference is no more than one tone.
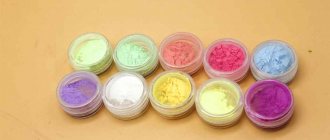
Therefore, blue, indigo and green colors are not used - it is difficult to imagine lips of similar shades. Recently, the rules are not so strict - beige varnishes are used, which are suitable for fashionable nude lipsticks. A fashion trend - it is allowed to combine varnish with shadows.
Step by Step Instructions for Drawing the US Flag
Drawing an American flag on your nails is not as difficult as it might seem at first glance. What will you need?
- Transparent, white and blue varnish.
- Red and white varnishes with a thin brush.
Step 1: Prepare your nails
American manicure will look beautiful only on well-groomed nails. Hangnails, cuticle rollers, and rough skin will stand out even more against the backdrop of a bright design. Therefore, first of all, pamper your hands with a classic or European manicure. Next, apply clear polish to your nails. The base coat will level the surface and protect the nail plate from colored pigment.
Step 2: Apply Base White Color
Use white nail polish with a regular brush. Paint your nails and wait for the coating to dry. If the varnish turns out to be runny and you couldn’t achieve a perfect surface the first time, apply a second coat. There should be no streaks on the nails, otherwise the American manicure will turn out dull and sloppy.
Step 3: Start Drawing
Take blue polish. Paint over part of the nail plate as shown in the photo. Apply the varnish in a thick layer so that there are no white gaps.
While the blue color is drying, open a jar of red nail polish. Using a thin brush, make several horizontal lines on the remaining surface of the nail.
All that remains is to decorate the American flag with white “stars” on a blue canvas. The most convenient way to do this is with a thin design brush. If you decide to limit yourself to only white dots, you can use a nail dot or a regular toothpick.
Step 4. Final touch
After complete drying, the American flag must be covered with clear varnish and, if desired, nail dryer. To clearly demonstrate the technique of performing a manicure in the “Stars and Stripes” style, we bring to your attention an interesting video lesson.
A little history
The concept itself, as well as the term “manicure,” originated in France. At first it meant ordinary hand care, then a tradition arose of covering the nail plate with colored paint. In the USA, it was first written about in a fashionable hairstyle magazine at the beginning of the last century. Since that time, new methods, types and techniques have appeared.
In 1900, a varnish was invented, which, unfortunately, lasted no more than a day. In 1917, a magical cuticle remover appeared; now there was no need to use scissors, which could easily damage the skin.
1925 - a new product went on sale - coating remover. A few years later, bleach was released, which was used to create a design similar to a modern French jacket.
In 1934, an innovative method for developing dyes was patented. Now it was possible to purchase non-harmful paint of different shades, which was easily washed off with a special liquid.
Gel nail extensions were invented in 1937, although it became widespread only in the 60s, when kits for a similar procedure went on sale.
Since 1980, manufacturers have been constantly offering new products for nail art, various accessories, techniques, and a variety of colors.
Everyone finds a suitable method for themselves - elegant and modest or bright and catchy.
From the history! It is known that women did manicures back in Ancient Egypt. In those days, it was not only a means of decoration, but also an indication of a person’s social status. The more noble the Egyptian woman, the brighter the covering she could afford.
To work or to a party
Treatment of the nail plate differs in purpose - depending on where the girl is going - to her own wedding, to work or a business meeting:
Everyday
Different techniques and color schemes are suitable, the main thing is simplicity and elegance, which makes it possible to wear different outfits - classic, office or evening. The covering should be neutral, then it will fit perfectly into the dress code of any event and will not cause a negative reaction. Preference should be given to light shades - beige, pink, or delicate nude.
Business
The length of nails for a business style should not exceed 4 mm, and you must also ensure that it is the same. Do not use bright colors; neutral, pastel - pale pink or beige, delicate apricot, milky - are suitable.
The use of glitter and various patterns is not recommended. The shape of the plate should be rounded; a sharp one is not suitable for a business style. Various techniques are used, the only condition is that they should not be provocative.
Evening
For an evening look, the main thing is harmony; extravagance and brightness are also welcome. There are no limitations to creating an elegant look: rich colors and numerous decorations - sparkles, rhinestones, powder, metallic adhesive tape look great in the evening.
Remember! An impeccable manicure should match not only the color scheme of the chosen image, but also its texture. If the festive outfit is satin, make the coating glossy, and matte goes well with velvet.
Wedding
A single-color manicure with an additional design in the form of several rhinestones or a coating with special acrylic powder looks very beautiful. Such decorative elements add completeness. Types of processing
Modern designers offer various processing techniques:
- Edged. With this technique, the softened cuticle is cut off with nail clippers. The disadvantage is the likelihood of injury, even if the nails are treated by a high-class master.
- Unedged. Before the procedure, oil with fruit acids is applied to the cuticle to soften it, which is then pushed back with a special orange stick.
- Hardware. Special devices are used for processing, grinding and other manipulations.
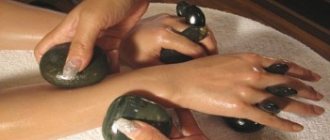
- Hot. If a woman has thin and brittle nails, the hot method is extremely useful - it has a strengthening effect. To carry it out, baths are made - water is heated to a certain temperature, adding nourishing lotion.
Each method has its clear advantages and disadvantages. You should try each one at least once to choose the one that suits you best.
Design options - nail art
There are many designs:
- Universal. It is suitable for any occasion, so it has discreet colors and simple patterns.
- Classical. Suitable for serious events, work or study. If you look at the intended purpose, then this is an analogue of a business one.
- Avant-garde - suitable for relaxation and parties. Suitable for young girls. However, this does not mean that it must be catchy or bright. This manicure can be very different, even delicate - it all depends on its design.
Application technique
Performing an unedged manicure
Before the manicure procedure, you should thoroughly treat your hands with an antiseptic composition to cleanse the skin of dirt and bacteria.
Procedure steps:
- use a file to give the desired shape. The length can be removed as desired during adjustment;
- soften the cuticle, remove it with tools or an orange stick;
- apply a nourishing cream (you need to wait until completely absorbed);
- cover with a layer of base transparent varnish, then two layers of colored;
- Apply a setting topcoat.
Interesting! Orange sticks are used because of the structure of the wood - it is soft and dense, and has antiseptic properties. Therefore, sticks made from it do not delaminate and do not injure the skin.
American way
Manicure for Halloween
Manicure received this name due to its exceptional popularity among the female population of the United States.
Currently, designers have invented several original methods:
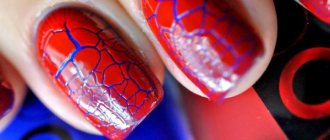
- avant-garde - implies rich colors and bright images. The most common design is the US flag. With such nails you can go to a party or sit in a cafe. Effective and easy to implement.
- “Beverly Hills” is a favorite view of Hollywood stars and businesswomen. Perfectly complements the image, always looks neat and bright.
- horror theme - in this case you need to show your imagination, use a photo and create a “horror story” design. This is not an everyday manicure - perfect for Halloween or a masquerade party.
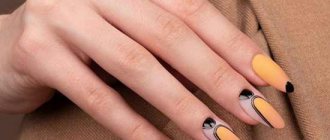
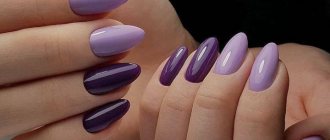
- two-color - the name itself says that the design uses two contrasting colors, often pastel and bright red tones. Dark is applied to the upper part, light - to the lower.
- striped - longitudinal stripes lengthen the nail. Carefully apply strips of any width (with a brush or with a stencil) onto a well-dried base. The direction of the drawing is at the girl’s choice - along, diagonally or across. Usually dark stripes are drawn on a light background.
"Beverly Hills"
The method is similar to the French one - it is made in calm colors, only flesh is used instead of white. How to do it correctly step by step:
- Remove the cuticle, use a nail file to give it an oval shape, treat with an antiseptic, and degrease.
- Cover the entire plate with light natural varnish.
- Using strips, create the edge of the nails.
- Then you need to draw a “smile” on the tip of the nail with a light varnish. If you don’t have enough experience, you should use a stencil. Apply sealer.
This method is neutral, has a natural shape, and is therefore universal.
What is the difference between technologies?
Classic and American manicures have much in common - in both cases, the cuticle is softened and trimmed with special tweezers. The difference is in the shape that the nails are given - in American it is round. In addition, it was originally assumed that the shade of lipstick and polish should be the same, but in recent years this tradition has lost its relevance.
In European style, the softened cuticle is not cut, but gently moved using an orange wood stick. This type eliminates injury, which means there is no risk of infection in the wound, and the procedure does not cause pain. Unfortunately, it is not suitable for treating very rough skin; in this case, you will have to resort to the help of scissors and nippers.
There are many ways to create a fashionable and original American nail design; choosing one to suit your taste is not difficult. Every year it becomes more and more popular - for its brightness, elegance and ease of execution.
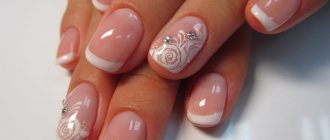
Beverly Hills manicure as a variation of American manicure
Manicure, which bears the name of one of the most elite areas of America, has some similarities with French manicure, primarily due to the fact that it involves working with varnish in neutral tones. Close to natural tones. In this manicure you can observe the harmony of French sophistication and American aggressiveness.
We should not forget that the main tone of the nail should be in harmony with the lipstick, but the tip of the nail, as with a traditional American manicure, can be absolutely anything. Art solutions are also possible, which we will certainly tell you about.